• Skip to primary navigation
  • Skip to main content
  • Skip to primary sidebar
  • Home
  • About Me
    • My Videos
    • Organ Meat Makeover
  • Recipes
  • Health Articles
  • Resources
    • Young Living Essential Oils

Beyond the Bite

Get Beyond the Tick Bite and Eat Right For Your Life.

  • E-books
    • Organ Meat Makeover
    • Practical Animal-Based Eating
  • About Me
    • Videos
    • Health Articles
  • Recipes
    • Email
    • Facebook
    • Instagram
    • Pinterest
    • YouTube

Recipe Index

Lyme & Pregnancy: Our Journey to Birth

June 3, 2019

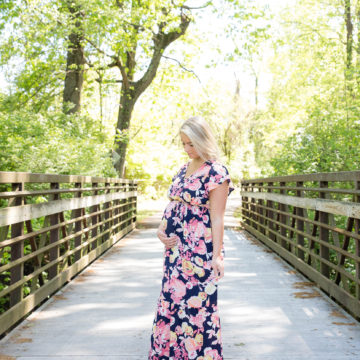
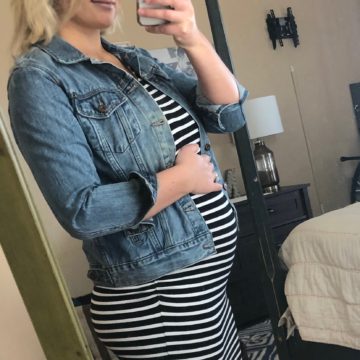
Its been two weeks since our little girl Alejandra Joy was born and I honestly don’t know where the time has gone. Can it stop already please? 

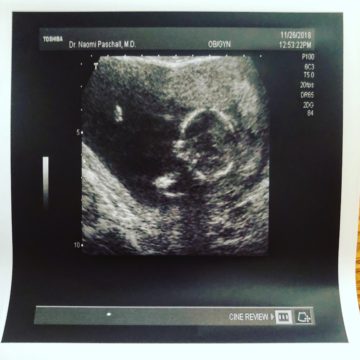
If you’ve been following my journey with pregnancy you know that I had originally planned to give birth naturally at a birthing center.  However, after an ultrasound at 36 weeks showed Allie to be in less than the 5th percentile in weight (about 4.5 lb), with a fluid sac by her heart, all of our plans went down the drain. On top of this, they discovered she was breech. Because of the uncertainty with her health, I was transferred from the care of midwives to the care of the birth centers referring physician. He offered the option of an external cephalic version to try and flip Allie, of which my husband and I initially declined due to not knowing how strong she was and if we wanted to add additional factors that could negatively effect her health. Yet after another extensive ultrasound, it was determined by my 38th week check up that Allie was no longer considered IUGR (intrauterine growth restriction), and the fluid sac had disappeared, all of which put birth at the birth center back on the table.  However, with no success at getting her to flip using natural methods (spinning babies, acupuncture, chiropractor, moxibustion, etc…), we decided it was time to make a plan.  

Our Birth Story

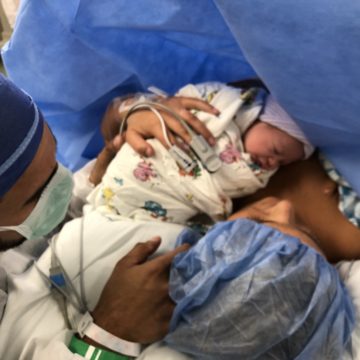
On May 20th at 1:30 PM my husband and I loaded up the car and set out to meet our baby girl.  The plan was to proceed with the ECV, and depending on its outcome, the nurses would either induce me or I would go in for a c-section.  After a few attempts at getting her to flip, and an incredibly amount of anesthesia, it was clear she wasn’t going to flip and I got wheeled into the OR for a c-section.  After another huge dose of anesthesia (at this point the nurses said I’d had 2-3 amount of a normal c-section, which was fun coming out of to say the least), our baby girl arrived screaming at 6PM on the dot.  She weighed 6 lb and 7 oz, measuring 19 inches long.  

The joy and relief I felt to finally have her safe in my arms was incredibly overwhelming.  I still get choked up with the gratefulness I feel to finally have her here with us despite all of the odds stacked against both of us.  When I look at her I’m reminded of all the times I sat and wondered if I’d ever be able to have kids of my own, all the times I was left feeling hopeless and defeated by my body, and all the moments my husband and I prayed that for our sweet little girl.  Between all the bittersweet memories and hormones, I’m not ashamed to say I’ve found myself breaking down in tears from sheer joy and thankfulness many times in the past 14 days.  Life truly is an amazing thing.  

Moving Forward

Though she passed all of her tests with flying colors, I did have the doctor take a piece of my placenta for further testing. The kit I ordered was through Igenex, which will test my placenta for any signs of a Lyme infection. This will give us a better understanding if anything tried to reach baby girl and if we should proceed with further testing to rule any possibilities out.  The test results are still undetermined, but will be interpreted by my functional medicine doctor when they come in.

As far as my recovery goes, I’m doing a lot better at the two week point then I thought I would be.  it definitely helps that I’ve had major abdominal surgery before (release of compressed celiac artery), as it’s helped a great deal in my approach to recovery.  At the hospital I welcomed all of the heavy IV pain killers, but once that was removed and I was switched to oral meds, I did my best to get off them as quick as possible.  By day 8 I was off all Motrin completely and haven’t taken anything since.  The hardest part of it all was trying to move around with such burning pain in my abdomen. But two weeks later Im happy to say my pain has decreased (thought not gone) and my stamina for being on my feet has slowly increased.  There is still quite a bit of swelling and tenderness around my incision, but overall I’m pleased with how my body is recovering and doing as a whole.

For more information on my journey with chronic Lyme and pregnancy, be sure to check out my videos and blogposts here.

Psalm 50:11 “”I know every bird of the mountains, And everything that moves in the field is Mine.”

Filed Under: chronic lyme, chronic lyme disease, Gabriella's Updates, Personal Experiences Tagged With: baby

AIP Blueberry Crumb Bars (Egg free, Low-carb)

May 23, 2019

(Note: I wrote this post prior to the birth of our beautiful daughter Alejandra, and am keeping it that way for sake of “flow.” However, rest assured I will have a birth update here soon! )

With my due date being 4 days away, I woke up knowing I needed to whip up an amazing summer recipe for all of my dedicated members before the baby arrives. While sometimes I like to use recipe development as an excuse to aimlessly roam the grocery store isles, looking for inspiration and new ingredients to feature, today’s recipe is one I created utilizing the bits and pieces of ingredients left in my cupboard and freezer. Lately, I’ve been on a major strawberry kick, however, with a couple bags of frozen blueberries in my freezer, I decided it was time to let them shine in a recipe. With a sweet, yet slightly tart filling and a topping with a subtle nutty sweetness from the tigernut flour, these bars are the perfect summer treat or mid-afternoon snack. Heck, they’d even be great as a breakfast treat! You may be surprised to see pureed green plantain in the crust. However, if you are a long time follower of Beyond the Bite, you know this is my secret weapon to creating autoimmune-friendly baked goods with superior taste and texture. What is even better is that plantains are incredibly cheap, at 50 cents per fruit, making them a great AIP ingredient to utilize. Overall, while the ingredient and recipe process may look lengthy, this recipe could not be easier. That being said, it is also quite versatile as you can make the filling with whatever berry or stone-fruit (such as peaches?) you have on hand. Enjoy!

AIP Blueberry Crumble Bars

Yields 9 square bars

Filling Ingredients

  • 3 cups frozen blueberries
  • 1 lemon, juiced
  • 1/4 cup maple sugar
  • 1 tbsp water
  • 1 tbsp arrowroot flour

Crust Ingredients

  • 1/2 cup coconut flour
  • 1/4 cup tigernut flour
  • 1/4 cup non-hydrogenated palm shortening (or) coconut oil
  • 1/4 cup maple sugar
  • 1 tsp vanilla extract
  • 1/4 cup pureed green plantain
  • 1/4 cup cold water
  • 1/4 tsp sea salt

Crumble Ingredients

  • 1/4 cup coconut flour
  • 1/4 cup tigernut flour
  • Pinch of sea salt
  • 1/2 tsp vanilla extract
  • 2 tbsp maple sugar
  • 1 tbsp cold water

Process

  • In a medium sauce pot, heat blueberries over medium heat until the juices have released and they are bubbling, then add in lemon juice and maple sugar, stirring until the sugar dissolves.
  • In a small ramekin, mix together water and arrowroot slurry until smooth, then add it to the bubbling berry mixture, stirring until combined and mixture has thickened slightly, then set the mixture aside to cool.
  • In a food processor fitted with the “S” blade, pulse together the coconut flour, tigernut flour, maple sugar, and sea salt.
  • Add in shortening, vanilla, and pureed plantain (see below for instructions), until combined, then slowly pour in the water until a smooth dough has formed.
  • Transfer dough to a parchment lined 8×8 inch square baking pan, gently pressing down into an even layer.
  • Place the pan in a 350 degree preheated oven and par-bake for 10 minutes.
  • While the crust is baking, pule together the topping ingredients until a crumble has formed.
  • Once the crust has par-baked for 10 minutes, remove it from the oven and spread the berry filling over the top in an even layer, then sprinkle the crumble topping over the filling.
  • Place the pan back in the oven and bake for an additional 25 minutes, until the topping has just started to golden.

Notes: Make the plantain puree ahead of time by peeling and cutting a green plantain into large chunks. Process the plantain in a food processor until smooth and store in a covered container in the fridge until ready to use. For a lower-in-carbs version, sub tigernut flour for almond flour and use monk fruit sweetener in place of the maple sugar.

Romans 15:2 “Each of us should please our neighbors for their good, to build them up.”

Filed Under: AIP, autoimmune friendly, autoimmune paleo, baked goods, breakfast, dairy free, egg free, grain free, low carb, nut free, paleo, Recipes, tigernut flour, tigernuts

Chronic Lyme & Pregnancy (Part 3)

May 15, 2019

I honestly cannot believe I am less than a week away from my due date, yet here we are! I still remember the morning I found out I was pregnant with our little girl like it was yesterday, and now we are less than a week away from meeting her. Pregnancy is definitely an interesting, yet exciting time. Some do not enjoy being pregnant, but I honestly would not have traded it for the world. Aside from the first half of the 9 months being filled with terrible morning sickness, my body has done great. In a way, it has seemed my body has almost actually benefited from being pregnant. Of course, not every day is spent on cloud-9, as I’ve definitely had my fair share of “very pregnant” days. That being said, if you’ve been following me over on my Instagram handle, you know that baby and I have experienced some major ups and downs lately. While everything seems to have panned out for now, we are still facing quite a bit of unknown in regards to her delivery. Overall, to learn more about this, and what’s been going on in this last trimester of pregnancy, be sure to watch my newest video on chronic Lyme and pregnancy below. And as always, thank you all for the continued support.

Ecclesiastes 11:5 “As you do not know the path of the wind, or how the body is formed in a mother’s womb, so you cannot understand the work of God, the Maker of all things.”

Filed Under: chronic illness, chronic lyme, chronic lyme disease, Gabriella's Updates, Personal Experiences Tagged With: pregnancy

AIP Yucca Breakfast Hash

May 11, 2019

With an unused yucca root sitting in my fridge, I decided it was time to make a hash that most everyone could enjoy. Originally, I wanted to create an AIP pork chorizo recipe, however, since I only had ground beef on hand I decided to just go with it and create a recipe with what I had. My favorite part of this dish is how crispy the yucca gets in the cast iron. Once the beef is added, it soaks up all of the yummy, meat juices, making it even tastier. Overall, I chose to do savory spices to stand up to the flavor of the red meat, however, I believe this recipe would be great using a sweeter (maple sage?) spice combination with poultry or pork instead of the beef. Honestly, there is not much more to say about this recipe except enjoy!

AIP Yucca Breakfast Hash

Ingredients

  • 1 large yucca root (3-4 cups cooked and diced)
  • 1 lb ground beef
  • 1.5 tsp dried thyme
  • 2 tsp sea salt
  • 1 tsp garlic powder
  • 1 tsp onion powder
  • 1/4 tsp ground cinnamon
  • Lard for frying
  • Cilantro for serving

Process

  • Peel and cut yucca into like-size chunks, then boil in a pot until for tender. Once tender, drain and medium dice.
  • In a large cast iron, heat 1/4 cup lard on medium-high heat, then add yucca and cook until golden, adding more lard as needed.
  • Once golden, add in beef, herbs, and spices, searing the beef and cooking until no longer pink.
  • Remove the cast iron from the heat and serve with fresh cilantro leaves.

Notes: If you are not following the autoimmune-protocol, feel free to add 1 tsp ground black pepper, 1 tbsp ancho chile powder, and 1 tsp or more of ground guajillo chile pepper.

Colossians 1:27 “To them God has chosen to make known among the Gentiles the glorious riches of this mystery, which is Christ in you, the hope of glory.”

Filed Under: AIP, autoimmune, autoimmune disease, autoimmune friendly, autoimmune paleo, beef, breakfast, cassava flour, egg free, Protein Dishes, Recipes

Fresas con Crema (Keto & AIP-friendly)

April 27, 2019

It may only be April here in Nashville, but in true TN fashion, we’ve jumped directly from winter to summer. While there are some exceptions to the sweltering heat (humid, at best), most days average in the high 70s-80s. Between the on and off morning sickness from being in my 3rd trimester, and the persistent Southern heat, cooking hot food in the kitchen is probably one of my least favorite things to do. On top of all of this, I’ve been in a major ice cream and fruit-craving mode. Cold+sweet+fruity=my current obsession, which is where the inspiration for today’s recipe came from. Much like my most recent Keto Avocado and Lime Agua Fresca, this recipe has some Mexican roots (as you can probably tell by the name). Based off of my research, there are quite a few different variations of fresas con crema. Some use exclusively Mexican crema, while others incorporate sweetened condensed milk and heavy cream. Because of all the variations, I decided to get some tips and tricks from my sister-in-law on how they traditionally make their recipe, which is what I based today’s recipe on. Overall, how sweet you make the crema mixture is up to you. If you prefer yours more tangy, go light on the sweetener, but if you prefer a true strawberries and cream flavor, feel free to add more to your liking. As noted below, the cream mixture may also seem a bit thick at first, however, allowing the mixture to sit in the fridge over night will let the natural strawberries juices release, making for the perfect texture and taste when mixing it all together before serving. Overall, whether you eat according to Keto or the Autoimmune Protocol, this recipe is a great to beat the summer heat without OD on the sugar (with an added bonus of healthy probiotics).

Fresas con Crema

AIP Ingredients

(Yields 4, 8 oz mason jar servings)

  • 1 qt fresh strawberries
  • 1/2 cup coconut yogurt 
  • 2 cups coconut cream
  • 1/4-1/2 cup maple sugar 
  • 1 tsp vanilla bean powder

Process

  • Put coconut cream in a bowl and beat with a hand mixture until fluffy.
  • Add in coconut yogurt, maple sugar, and vanilla, beating until a smooth, sweet cream has formed.
  • Cut strawberries into desired shapes and layer with cream in glass serving jars or bowls.
  • Let the jars to sit in the fridge overnight to allow the strawberries to release their natural juices, then mix each with a. Spoon before serving. 

Keto Ingredients

  • 1 qt fresh strawberries 
  • 1 cup heavy cream 
  • 3/4  cup Nancy’s plain yogurt
  • 1/2 cup powdered Swerve
  • 1 tsp vanilla extract 

Process

  • Put cream in a bowl and beat with a hand mixture until fluffy.
  • Add in yogurt, swerve, and vanilla, beating until a smooth, sweet cream has formed.
  • Cut strawberries into desired shapes and layer with cream in glass serving jars or bowls.
  • Let the jars to sit in the fridge overnight to allow the strawberries to release their natural juices, then mix each with a spoon before serving. 

Notes: don’t worry if the crema mixture seems thick. Letting the strawberries sit allows their natural juices to release, adding flavorful liquid that will then thin the mixture out and make the perfect fresas con crema texture.

Ephesians 4:6 “one God and Father of all, who is over all and through all and in all.”

Filed Under: autoimmune, autoimmune disease, autoimmune friendly, dairy free, Dessert, ketogenic, low carb, no bake, nut free, Recipes

Keto Avocado and Lime Agua Fresca (AIP-friendly)

April 11, 2019

It’s starting to get hot here in Nashville, like real hot. I’m realizing just how lucky I’ve been to be pregnant in the winter and spring months, because dang. I wake up and fall asleep craving ice cold drinks and ice cream. I simply can’t knock it. Therefore, after my husband got his new cookbook “Tu Casa Mi Casa” by Enrique Olvera, I decided there was only one thing to do…make a sugar-free version of one of his many agua fresca recipes! Now, if you haven’t heard of Enrique, first off, go to Netflix and watch his episode on Chef’s Table. Second, if you’re in the NY area, visit his USA based restaurant Cosme. My husband and I had the pleasure of visiting this gem a couple years back and definitely were NOT disappointed. And third, buy his new book, which pays true homage to my husband’s culture and food. I’m no expert in Mexican cuisine and cooking, but I’ve learned enough through my husband of what’s the real deal or not. And let me just tell you, Enrique is beyond the “real deal.” So, do yourself a favor and check him out (starting with that Chef’s Table episode I mentioned). So yeah, as you guessed, I truly can’t take credit for today’s recipe. Tu Casa Mi Casa include a lot of great cold, refreshing sweet treats, including a coconut smoothie, cocao water, and this avocado and citrus water. If you don’t have limes, simply use lemons, or if you are feeling fancy, opt for key limes. While similar to a typical lemonade, the addition of avocado adds a slight creaminess to an otherwise icy cold drink. Overall, the recipe couldn’t be easier and more refreshing on a hot summer (or Nashville spring) day.

Avocado and Lime Agua Fresca

Ingredients

  • 1 large ripe avocado
  • 1/2 cup fresh lime juice
  • 1/3 cup granulated Swerve (or) monk fruit
  • 4 cups cold water
  • Ice for serving

Process

  • In a blender, blend together the first 4 ingredients until smooth.
  • Pour over ice and serve.

Notes

Feel free to start with 1/4 cup of sweetener and adjust the sweetness according to your own personal preference.

Use honey in place of the sugar alcohol for an AIP-friendly variation

Romans 5:6-8 “You see, at just the right time, when we were still powerless, Christ died for the ungodly. Very rarely will anyone die for a righteous person, though for a good person someone might possibly dare to die. But God demonstrates his own love for us in this: While we were still sinners, Christ died for us.”

Filed Under: AIP, autoimmune friendly, dairy free, drinks, ketogenic, low carb, Recipes

Keto Lemon Sheet Cake with Cream Cheese Frosting (Dairy-free option)

March 25, 2019

I have been in a very tangy mood lately. I’m not sure if it is due to the return of morning (aka all-day and night sickness) from being 30 weeks pregnant or not, but I’m going with it. That being said, we’ve had a few warm days here in Nashville over the past few weeks, which had me in full on spring mode. However, if I’m going to be honest, it has been difficult to create new recipes for the blog, simply due to my own lack of motivation in the kitchen. I can come up with a great deal of new dishes in my head, but actually getting in the kitchen is a whole other deal. This is mainly due to excess stress in my personal life that, when I do get a moment to myself, the last thing I want to do is get in the kitchen. I’m sure many of you reading this can relate. However, I must say that after having the most calming and relaxing acupuncture sessions yesterday afternoon, I was left with a spark of inspiration to create today’s recipe. When dreaming of Spring, one of the first things that pops into my mind is lemons. Lemon curd, lemon buttermilk ice cream, lemon cookies, lemonade, you name it! So, after much thought, I decided to go with a simple lemon sheet cake. This cake recipe is based off of my Keto Vanilla Wedding Cake recipe and comes with dairy-free options. For myself, I used Nancy’s cream cheese, which is full in low-histamine probiotics and is something I’ve been able to slowly incorporate into my diet with no issues (happy dance). Overall, this recipe could not be easier and is great for a snack cake or dessert. Even my sugar-loving husband happily approved!

Keto Lemon Sheet Cake with Cream Cheese Frosting (Dairy-Free Option)

Lemon Sheet Cake

(Yields 8 slices)

  • 3/4 cup coconut flour
  • 1/2 cup granulated Swerve
  • 1/4 tsp sea salt
  • 1 tbsp lemon zest (from 2-3 lemons)
  • 1/2 tsp baking soda
  • 9 eggs
  • 1/2 cup avocado oil
  • 1/2 cup fresh lemon juice
  • 1 tsp vanilla extract

Cream Cheese Frosting

  • 6 oz Nancy’s cream cheese (or) Kite Hill’s dairy free cream cheese, room temperature
  • 6 oz unsalted butter, room temperature (or) non-hydrogenated palm shortening
  • 1 tbsp lemon zest
  • 1 tsp vanilla extract
  • Pinch of sea salt
  • 1 cup confectioner’s Swerve
  • Juice of 1 lemon
  • 2 tbsp heavy cream (or) coconut cream (optional)

Process

  • Preheat oven to 350 degrees and line a 8×8 square cake pan with parchment paper.
  • In a large bowl, whisk together eggs, vanilla, sea salt, granulated swerve, lemon juice, and avocado oil.
  • Once whisked smooth, add in coconut flour and baking soda until a smooth batter is formed.
  • Pour the batter into the prepared cake pan and allow to bake for 35 minutes until set in the middle and golden around the edges.
  • While the cake is baking, place cream cheese, confectioner’s swerve, and butter in a large bowl, beating with a mixer until smooth.
  • Add in lemon zest, sea salt, lemon juice, and optional cream, beating again until smooth and then set the mixture aside.
  • Once the cake is finished, allow to cool completely in the pan before removing, frosting, and slicing into 9 equal portions.

1 John 1:9 “If we confess our sins, he is faithful and just and will forgive us our sins and purify us from all unrighteousness.”

Filed Under: Cake, coconut flour, ketogenic, low carb, paleo, Primal, Recipes

Chronic Lyme and Pregnancy (Part 2)

March 7, 2019

Hey everyone! Now that I am in my third trimester of pregnancy I wanted to check in with ya’ll before our little girl is born to let you know how things have been going (and yes, it’s a girl!) For the most part through my 2nd trimester, not much changed.  Morning sickness is typically absent, and I have found that if I am struggling it is due to my detox pathways being backed up.  For this reason, I have to be diligent in keeping up with my colonics, coffee enemas, and activated charcoal, as all three of these help tremendously with clearing out any toxic buildup in my liver or gallbladder (two typical problem areas for me).  About halfway through the second trimester I also had an increase in stamina throughout the day, which was coupled with a rising desire to get back in the gym.  As many of you know, I have a strong love for working out and exercising. However, this passion diminished completely when I first got pregnant. I honestly wasn’t sure it’d ever come back, but decided to listen to my body and not push myself to do something I really didn’t care to do.  However, the further into my 2nd trimester I got, the more I desired to get my heart rate up and increase my strength (maybe it was my body intuitively knowing it needed to get stronger to take care of a baby?).  Either way, I prepared myself by doing bodyweight home workouts, and was really excited when my husband and I eventually got a membership at the YMCA.  For the past month now I have been going 3-4 times a week (amount varies on schedule, energy, and overall how I am feeling).  I’ve been making up my own little workouts, focusing on movements that feel best for me and my growing belly.  Some of these include squats (of any kind; hang squat cleans, thrusters, goblet squats, you name it), rowing (great for stamina and to get the heart rate up), as well as kettlebell swings.  My workouts vary, but always include some sort of dumbbell or kettlebell movement mixed in with some rowing.  I’ve found that these workouts have helped most with my digestion as baby girl continues to grow.  I’ve also noticed a considerable increase in my arm and leg strength, which is precisely what I was hoping for, as it truly does help with everyday life and work.  Some added energy, alertness, and happy endorphins are also a great bonus from working out.  Plus, going to the gym gives me somewhere else to go outside of home, work, school, appointments, or the grocery store, which is definitely an added bonus.

Overall, I plan on continuing my little workouts as far along into the third trimester as I safely can, though I suspect I may have to alter them as I get further along.  If you’re interested in my  pregnancy workouts be sure to check out my “fitness” stories on my Instagram account @beyondthebite4life. Besides working out and changes in morning sickness, my hunger has also changed a bit since moving into my 3rd trimester.  Lately I haven’t had much of an appetite, though I do see a significant increase after a good detox sweat or colonic (constipation, anyone?).  I definitely still have food aversions and still enjoy baking sweets MUCH more than cooking dinner.  It’s been a struggle to not burry my face in gluten-free cake or brownies.  Though I must admit, I have had locally made ice cream 3 times in the past 2 weeks (an all-time record).  If you know me, this is extremely rare and hasn’t happened probably since before being diagnosed with Lyme, but hey, what can I say.  It happens.  Overall, despite additional life stressors, things have been going pretty good for me and my girl.  I’m definitely in a major nesting-mode and want to clean and throw out pretty much everything I see.  Nothing is ever clean enough, ever. In regards to birth itself, I have decided to go through a local birthing center.  They’re directly tied to a large hospital that is right down the road, so if anything does not go the way we plan, I can simply be transported to the hospital.  I am very fortunate to have an option that focuses on both mom and baby wellness as a whole, along with more natural methods of labor.  Am I nervous? A bit.  But due to my experiences with western medicine and conventional medicine doctors, hospitals also make me extremely nervous, so I’m super glad for the alternative. They offer water birth, as well as delayed cord clamping, and all of the other good stuff. The one thing I still am searching on is how to test for Lyme in your placenta, so if you’re aware of any resources on this, I’d love if you reached out! That’s it for now folks, if you’re interested in following more a long with me in this journey be sure to follow me on Instagram @beyondthebite4life. I post as much (or remember too) as I can between work, school, taking care of 2 kids, and all the other duties of life. See you there!

Psalms 139:23-24 “Search me, God, and know my heart; test me and know my anxious thoughts. See if there is any offensive way in me, and lead me in the way everlasting.”

Filed Under: Baby, chronic illness, chronic lyme, chronic lyme disease, Personal Experiences Tagged With: baby, chronic illness, chronic lyme, exercise, lyme disease, pregnancy

AIP Paleo Sweet and Sour Baked Cauliflower

February 26, 2019

We all have a version of sweet and sour sauce in the back of our memory from our childhood years. More sweet? tangy? salty? citrusy? There are about a dozen versions out there; the infamous duck sauce, “orange sauce,” etc… For myself, I always liked the sweeter ones (who can blame me), though I can’t say I’ve had “real” sweet and sour sauce since I was little (pre-Lyme). Whatever your fancy, today’s recipe definitely will cater to you. If you like your sauce more sweet, cut down on the vinegar and coconut aminos. If you prefer it tangier, up the vinegar and lessen the sugar. And of course, if you prefer the saltiness of soy sauce (in this case, coconut aminos), reduce the amount vinegar and sugar all together. Another great addition would be the use of fresh orange juice. Overall, because this recipe is autoimmune-protocol paleo friendly, I use ginger to give the sauce a bit of “spiciness.” That being said, if you do not follow the AIP, feel free to add a dab of chili sauce or dried chili flakes to give the sauce some added heat. You can also make this sauce more of a garlic-based one with the addition of ground garlic on top of the use of minced, fresh garlic. Really, it’s your sauce, so it’s up to you! Make it how you like it and I can assure you won’t be disappointed in this recipe. If you’re not a big fat on cauliflower, follow a similar process with chicken or pork. Enjoy!

AIP Sweet and Sour Cauliflower

Ingredients

  • 1 head of cauliflower
  • 1 cup Otto’s cassava flour
  • 1 1/2 cups warm water (see notes below)
  • 1/2 cup coconut aminos
  • 1/4 cup honey
  • 1/4 cup coconut sugar
  • 3 tbsp apple cider vinegar
  • 1 tbsp ground ginger
  • 3 garlic cloves, finely minced
  • 1/4 cup warm water
  • 1 tbsp arrowroot flour
  • Fresh scallion, finely chopped

Process

  • Preheat oven to 450 degrees and line a baking sheet with parchment paper.
  • Make batter by mixing together cassava flour and slowly adding water until smooth. *You want the batter thick enough to coat the cauliflower but not too watery
  • Cut the cauliflower into small florets and dip in batter, placing battering florets on the prepared baking sheet.
  • Bake for 30 minutes until batter is lightly browned and crispy around the edges.
  • To make the sauce, whisk together the coconut aminos, coconut sugar, honey, apple cider vinegar, ginger, and garlic in a small sauce pot over medium heat until the coconut sugar and honey are dissolved.
  • In a small bowl, mix together arrowroot flour and water until smooth, then add to the sauce pot, whisking until the sauce has thickened enough to coat the back of a spoon.
  • Once the cauliflower is roasted and sauce is made, transfer cauliflower to a large bowl or platter, drizzle with sauce, top with chopped scallion, and serve!

Notes: As noted above in the recipe directions, there is a fine line between a batter thick enough to coat the cauliflower and a runny, watery batter that falls off the cauliflower as it cooks. The amount of water you will need will vary based on the climate you live in. For this reason, I recommend adding 1 cup of water and the remaining 1/2 cup 1 tbsp at a time to ensure your batter comes out the right consistency.

Matthew 27: 37-39 “Jesus replied: “‘Love the Lord your God with all your heart and with all your soul and with all your mind.’ This is the first and greatest commandment. And the second is like it: ‘Love your neighbor as yourself.”

Filed Under: AIP, autoimmune friendly, autoimmune paleo, cassava flour, dairy free, nut free, paleo, Recipes, Vegetables and Sides

Keto Flourless Chocolate Brownies with Ganache (Dairy-Free)

February 11, 2019

I’ve been craving chocolate cake and brownies before I even officially new I was pregnant. It’s a big love-hate relationship I must say, mainly because 1. chocolate is a bladder irritant and can flare my IC and 2. chocolate can be troublesome for those with mast-cell induced histamine issues (like myself). In fact, it was my growing craving for chocolate while being sick at the thought of all other food that made my husband first guess I was pregnant (funny how that works). Most days I tell myself what I really need is protein NOT chocolate cake. However, there are some days that I simply cannot knock the craving and have to have atleast the tiniest bit of chocolate to calm my desires. Yesterday was one of these days, which is why I decided to create a no-fuss, dense, dark chocolate flourless brownie recipe similar to that of a flourless chocolate cake. Seriously ya’ll, these brownies are so rich you could eat them cut up into small squares like fudge. But hey, who said that was a bad thing? They’re so fudgey that you can hardly tell where the ganache and brownie meet. Overall, if you’re craving chocolate, this recipe is the epitome of all-things-chocolate. The best part? They’re super easy to make sugar and dairy free!

Keto Flourless Chocolate Brownies with Ganache

Ingredients 

  • 1 cup Lily’s chocolate chips
  • 1/2 cup non-hydrogenated palm shortening
  • 1/2 tsp salt
  • 1 tsp vanilla
  • 3 eggs
  • 1/2 cup cocoa powder
  • 1/2 cup Swerve sweetener

Ganache 

  • 1/2 cup coconut milk, full fat
  • 1 cup Lily’s chocolate chips
  • 1/4 tsp sea salt

Process

  • Preheat oven to 375 degrees.
  • Line a 8×8 square baking pan with parchment and set aside.
  • Over a double broiler, melt chocolate chips, palm shortening, salt, and vanilla together until smooth.
  • In a separate mixing bowl, whisk together eggs and cocoa powder until combined.
  • Folding in melted chocolate mixture until fully combined and smooth.
  • Transfer mixture to prepared baking pan and bake for 25 minutes until just set.
  • Remove the pan from the oven and allow the brownies to cool completely before topping with ganache and cutting.
  • To make the ganache, melt chocolate chips and coconut milk together until whisked smooth.
  • Spread evenly over cooled brownies and enjoy.

Mark 9:35 “Sitting down, Jesus called the Twelve and said, “Anyone who wants to be first must be the very last, and the servant of all.”

Filed Under: coconut free, dairy free, gluten free, grain free, ketogenic, Recipes

Bartonella, IC, and UTI’s

January 29, 2019

In today’s video post I wanted to tackle three seemingly unrelated topics that are actually quite related to one another after all: Bartonella (a Lyme co-infection), Interstitial Cystitis (inflammation of the bladder), and UTI’s (the lovely, the unforgettable – urinary tract infections). You may be wondering what all of these things have to do with one another, and I too, for many years, wondered the same. However, after dealing with all three of these issues for far too long, I finally was able to put a finger on them, decipher which was which (UTI vs. IC flare), and how Bartonella was related to both of these both extremely painful bladder conditions. As a whole, Bartonella is one of the many Lyme co-infections that is not all too commonly talked about. Personally, the last time I did my own research on Bartonella, there wasn’t too much information out there. For these reasons, I didn’t take it into account as being a possible explanation for my return of pure fatigue, night sweats, foot pain, facial swelling, migraines, and later reoccurring UTIs and bladder pain. It got to the point where almost every month I would have what we believed to be a UTI. While some, in fact, were UTIs (detected via urine analysis), the symptoms began lingering long after my treatment regime had been finished. If you do not deal with IC, just imagine have a UTI 24/7. Terrible, right? Eventually, I was brought to my Whitts end, which is how I learned the connection between Bartonella and bladder inflammation. Overall, treating my Bartonella extensively with DesBio’s homeopathic series has helped the most with my symptoms and pain. On top of this, I still do my very best to avoid potential bladder irritants, such as coffee, citrus, chocolate, and vinegars. Most other irritants I wouldn’t normally eat and therefore don’t really worry about, however, here is an extensive list for those interested. While I recorded today’s video back in the fall of 2018, I am still on the 10M vial of DesBio’s homeopathic to this day. I go back and forth from taking 1-2 vials per week, with doses spread 3-4 days apart from each other. With a less inflamed bladder and more complete urination, I’ve only had 1 UTI in the past 7+ months, which is a big improvement for myself. That being said, this past UTI (which I acquired after having to hold my pee too long due to flying home from CT) really flared my IC, leaving me with UTI-like symptoms even after a round of antibiotics. Speaking of antibiotics, while not everyone is the same, I personally have had so many UTIs that I am resistant to pretty much all forms of oral antibiotics that target bladder infections. For this reason, this past UTI I ended up at the ER to get IV antibiotics, which, after a single dose and 6 hours later, left me completely symptom free (except for the IC pain that is). After having a flare, I make sure to double up on my Bartonella treatment, am extra vigilant to avoid triggers/bladder irritants, drink tons (and I mean TONS) of water, and pee as much as possible (which isn’t too hard being 23 weeks preggo and all). To learn more about how I’ve dealt with UTI’s, IC, and Bartonella, be sure to watch the video below!

Matthew 5:14 “Ye are the light of the world. A city that is set on a hill cannot be hidden.”

Filed Under: autoimmune disease, health article, Lyme 101, Personal Experiences

Keto Chocolate Chip Loaf Bread (Nut & Seed Free)

January 20, 2019

There are some recipes on my blog that I tend to make more than others.  One of these is my ketogenic-friendly wedding cake recipe, a recipe I created for the caterers to make on my special day.  It’s simple, straightforward, and is great to have on hand when I am craving something slightly sweet and decadent (a rather common occurrence now that I am pregnant).   While I have my ups and downs of sugar cravings, I don’t enjoy how sugar makes me feel, which makes this recipe PERFECT for those nights where I am still hungry after dinner (also pretty common now that I am 22 weeks in).  Overall, today’s recipe is inspired by the OG cake recipe, but instead is made in a loaf pan with the amazing addition of Lily’s chocolate.  While there is no cinnamon or zucchini involved, this recipe reminds me of the scrumptious chocolate chip zucchini bread my mom always made growing up (new recipe idea, yeah?).  It’s moist (sorry ya’ll, but believe me, it’s a good thing), not too sweet, with a spongey texture, and dark, decadent bits of chocolate spread throughout.  Seriously, what’s not to love?!  If you aren’t eating low-carb/keto, simply substitute the Swerve for coconut or maple sugar.  The results will be almost identical!  As for the dairy, simply substitute the melted butter for melted coconut oil, non-hydrogenated palm shortening, or a light avocado oil.  Overall, this recipe could not be easier and is sure to be a true crowd pleaser!

Keto Chocolate Chip Loaf Bread

Ingredients

  • 3/4 cup coconut flour
  • 1 tsp baking soda
  • 1/2 tsp sea salt
  • 6 eggs
  • 1 cup water, warm
  • 1/3 cup melted butter
  • 1/2 cup swerve, coconut, or maple sugar
  • 3/4 cup Lily’s Chocolate Chips

Process

  • Whisk together eggs, butter, water, sugar, and sea salt.
  • Next add in coconut flour and baking soda, whisking until smooth.
  • Fold in 1/2 cup of the chocolate chips and transfer the batter to a lined loaf pan.
  • Sprinkle remaining 1/4 cup chocolate chips on top and then bake at 350 in a parchment lined loaf pan for 50-55 minutes until a toothpick comes out clean.
  • Allow to cook slightly then remove from the loaf pan and allow to completely cool in the parchment before removing and slicing.

James 1:2-3 “Consider it pure joy, my brothers and sisters, whenever you face trials of many kinds, because you know that the testing of your faith produces perseverance.”

Filed Under: Cake, coconut flour, cookies, gluten free, ketogenic, low carb, paleo, Recipes

Pain Management and Chronic Lyme Disease

January 13, 2019

Today’s video is one that I made in the late summer of 2018, when I was a lot tanner and a lot more blonde (neither of which is relevant to today’s topic but I figured I’d point that out). Anyways! This video post is all about my journey with pain management since the beginning of my journey with chronic Lyme. Like anyone with a chronic illness knows, managing pain can be a difficult balance if you are also striving to heal your body from the inside out. While traditional medicine will typically suggest X, Y, & Z of pain medications (both over the counter and prescription), I have found there are many alternative ways to manage one’s pain outside of these drugs. An example of this is a friend of mine who uses vegan cbd oil and other CBD products to aid with her pain management. While I don’t think it is something for me, it has certainly helped her with her journey. However, don’t get me wrong, while I may not have wanted to try things like these CBD hemp tablets, pain meds most certainly have their place in my healing journey, and I’m certainly not ashamed of that. I haven’t done everything “perfectly” in my road to health and wellness, and that’s ok. What is most important is that you are knowledgable about what you are putting into your body and how it will effect you, along with what steps are necessary to continue healing your body. Now, I’m certainly not advocating you throw all caution to the wind if you are on a strict healing protocol like the AIP where you are to fully eliminate NSAIDs and other pain killers. There is a reason these drugs are eliminated during the AIP elimination phase (and hopefully from there on out as healing occurs). Overall, my point of this post is not to tell you when it is OK and not OK to take pain meds. That decision is ultimately up to you. Instead, the point of this video is to share some of the ways I have successfully managed mild-extreme bodily pain caused by the chronic Lyme and it’s complications in hopes that they too can help you. Some of the methods I discuss include acupuncture, myofascial massage, essential oils, epsom salt baths, and colonics. Another thing that I would like to mention in this post that has always helped significantly with pain is exercise and movement therapy. I seriously do not know where I would be without it, and while both of these methods have certainly changed a big deal since being pregnant, they still are very important. To learn more about why movement is so beneficial and to healing from a chronic illness, be sure to check out my girl Victoria from Lemons’N Lyme at her new health and wellness brand The Influence Health. And as always, for more information on my journey with Lyme and all the tools I’ve used to become healthier and stronger click here.

Romans 12:10 “Be devoted to one another in brotherly love. Honor one another above yourselves.”

Filed Under: autoimmune, autoimmune disease, chronic illness, chronic lyme, chronic lyme disease, Gabriella's Updates, health, health article

Chronic Lyme & Pregnancy (Part 1)

January 2, 2019

Guys! It’s felt like forever since I’ve gotten on here and posted anything very personal.  In short, the past four months have been full of ups and downs as my husband and I go through some pretty major changes (all pretty positive to say the least).  That being said, I am so incredibly excited thatI am able to finally share my pregnancy with ya’ll, as keeping it a secret made me feel very isolated and disconnected from the world.  But now I am back and am so ready to let you all in on my journey. Honestly, there is so much to cover, one video/post is not enough to catch you all up on the craziness of life (literally).  It’s definitely been a roller coaster.  Between the raging hunger, fatigue, and extreme morning sickness, a lot has changed not only in my body but my weekly routine.  Where to begin? Well, I guess I’ll start from the beginning.

~~~~~~~~~

On September 19th, 2018 at 4:30 AM, I officially found out the amazing news. I was pregnant! While I got the positive test about 3 days post-when-I-was-supposed-to-have-my-period,the symptoms started atleast two weeks prior to actually taking a test.  My hunger was the first to dramatically spike, which made me ditch the intermittent fasting as I simply could not make it past 8:30 AM without eating breakfast (something I haven’t experienced since day 1 of dealing with Lyme). Working out also become increasingly difficult as I felt my energy and strength was going elsewhere, somewhere I couldn’t quite put my finger on.  Therefore, as hard as it was  to pry myself away from the gym, I decided to listen to my body and stop working out.  On top of all this, following a keto diet also became extremely difficult for me, as the morning sickness made me crave carbs, carbs, and more carbs. Only white and tan colored foods were appealing (butter definitely not being one of them). For the first couple of months I struggled a lot with balancing the sickness with eating.  Even to this day I still struggle, however, after letting myself experiment with eating daily carbs (sweet potatoes, GF bread, plantain chips, rice, etc…), I now know that despite the thought of meat and vegetables making me want to puke, I do in fact feel better when I eat a low-carb version of Paleo.  Throughout the first couple of months I dabbled with exercising on the rower, the assault bike, and elliptical, however, now in days I focus more on movement as a whole, with rebounding and long walks when possible, plus maybe a few air squats and lunges sprinkled in throughout my day.

~~~~~~~~~ 

While a lot has changed in my body and routine, I know what most people are curious about is how I am balancing a chronic illness, specifically chronic Lyme Disease, with being pregnant.  I’ve had many inquiries about my concerns on the baby getting Lyme, if I am taking any preventative measures, if any of my symptoms have gotten worse, etc…For all of those wondering, I will definitely be answering all of these questions in my next video/post!  As I said earlier, there is so much to coverI cannot simply do it all in one blogpost. However, in the meantime, I did want to step back and take a moment to talk about the miracle that is my pregnancy. As many people that deal with chronic illnesses, the odds of conceiving are definitely stacked up against you. Between the extreme trauma my body has been through, persistent infections, damage to almost all of my organs, a shut-down, disrupted endocrine system, along with my bodies anatomical “abnormalities” (aka heart shaped uterus and extreme cervical stenosis) , the fact that there’s a little nougat inside of me happily growing is quite an amazing thing to think about.  As mentioned in today’s videos, I’ve always been one to want kids.  However, after getting diagnosed with Lyme and going through the hell that I went through, the likelihood of me being able to have any of my own was very slim, if not, impossible. While it didn’t bother me at first, I struggled a lot with this once I met my husband, and especially after we were engaged.  Doubt, anxiety, and depression would fill my mind, leaving me feeling completely desperate. Ultimately, I knew everything was out of my control, and if God wanted me to have children, He would allow it.  However, even after acknowledging and accepting this, the subject of having kids was a tough one.  I realized, much like all other aspects of dealing with a chronic illness, no one really truly “gets it.”  Though I felt like I was suffering all on my own, I knew many females out there struggle with infertility, which is why if God allowed me to conceive, I wanted to make a point of sharing my story. And somehow, through all the tears and anger that I struggled through in the months prior to writing this post, I am here, once again, attesting the seemingly impossible becoming possible.  Somedays, I still can’t believe it to be true, until I go to an ultrasound or feel a tiny kick or flutter and my heart is completely wrecked in awe and gratitude that is beyond expression. Overall, I feel so blessed to be able to share this part of my healing journey with ya’ll, so stay tuned because there is much more to come! Below are the two videos I have posted about my experiences thus far with pregnancy. If you have any questions please feel free to reach out.

John 15:5, 8 ““I am the vine; you are the branches. If you remain in me and I in you, you will bear much fruit; apart from me you can do nothing. This is to my Father’s glory, that you bear much fruit, showing yourselves to be my disciples.”

Filed Under: about me, autoimmune, autoimmune disease, Baby, beyond the bite, chronic illness, chronic lyme, chronic lyme disease, Gabriella's Updates, health, health article, Personal Experiences Tagged With: pregnancy

Keto Peppermint Patty Cookies (Nut-Free)

December 18, 2018

As some of you may know, I have a part time job at a restaurant in Downtown Nashville.  I started out as a host and soon realized front of the house work was not, in fact, “easier” than back of the house (even though it sounds like it would be).  While physically I’m not necessarily moving as much as I am while back in the kitchen, the stimulus that the kitchen provides helps keep my mind off of any aches or pains that may crop up.  On top of that, movement (and cooking!) has always been a form of pain therapy for me.  Because of this, standing at a host stand and greeting people isn’t exactly ideal.  On top of all that, ya’ll know I have a deep love for culinary arts, making anything in the back of the house my JAM.  Most days I work prep downstairs, while sometimes I work the line (if they need me).  Long story short, this recipe was inspired by spending the day helping my good friend plan her pastry menu for the restaurant.  After a day full of savory and dessert prep, what do I do when I walk in the house?  Make these cookies of course!  As always, my best recipes are always those that I do on a whim.  Overthinking cooking and baking never works in my favor.  Instead, my creative juices are at their best when I cook solely based off of inspiration. After making two autoimmune-friendly cookies earlier that week, I decided it was time to go with a keto cookie for all my low-carb-lovers.  The cookies themselves are a plain, vanilla shortbread-like cookie which are then dipped in a refreshing, deep chocolate minty coating. While they may seem a bit labor intensive at first glance, this recipe truly could not be easier.  Not a fan of peppermint? Simply omit and replace with your favorite extract or leave plain for a simple yet delicious chocolate dipped cookie.  The choice is yours!

Peppermint Patty Cookies 

(Yields 1 dozen)

  • 1 cup coconut flour, plus extra for rolling
  • 1/2 cup unsalted butter, room temperature
  • 1/2 tsp salt
  • 1/4 tsp baking soda
  • 1/2 cup Swerve
  • 1 tsp vanilla
  • 1 egg 
  • 1.5 cup Lily’s dark chocolate, melted
  • 24-30 drops peppermint essential oil
  • 1/4 cup unsalted butter

Process

  • Preheat oven to 350 degrees and line a baking sheet with parchment paper. 
  • In a mixing bowl, beat together butter, salt, swerve, egg, and vanilla until smooth, then add in baking soda and coconut flour until a dough has formed. 
  • Form the dough into a ball and roll out on a lightly floured surface until 1/4 inch thick. 
  • Use circle cutters to form uniform cookies, placing each on the parchment lined baking sheet and baking for 10 minutes until just golden. 
  • Allow the cookies to cool slightly then place on a wire rack and place the rack into the freezer to allow the cookies to cool completely before dipping in the chocolate. 
  • Melt Lily’s chocolate over a double broiler and whisk in butter and peppermint oil until smooth. 
  • Dip the cooled cookies in the chocolate and place back on the wire rack to allow the chocolate to solidify.  

Isaiah 7:14 “Therefore the Lord himself will give you a sign: The virgin will conceive and give birth to a son, and will call him Immanuel.”

Filed Under: cookies, grain free, ketogenic, low carb, nut free, paleo, Recipes

Paleo AIP GingerSnap Cookies (Nut-free, Egg-free, Coconut-free, Vegan)

December 13, 2018

I’ve been a fan of ginger ever since I can remember.  If I’m not mistaken my love for this spicy root began when I was little and my family and I would go out for sushi.  No one ever wanted to eat their pickled ginger slices, so of course, I gobbled it all up (along with my miso soup, California and cucumber rolls).  Ever since then, I’ve loved it, and it’s a good thing too, because I’ve sure needed my fair share of it’s medicinal properties for stomach issues, head colds, and nausea.  Now, while today’s recipe isn’t exactly “medicinal,” it sure is allergen friendly. With my Otto’s cassava flour sugar cookie recipe being such a hit, I decided to base the cookie off of it, but with a few minor tweaks.  The result?  A perfectly thick, chewy cookie with hits of winter spices and just the right amount of sweetness.  Because I still don’t handle dense carbs like cassava very well, my taste tester for this recipe was my older brother. And man, was he impressed! He said he isn’t sure how I manage to make such amazing recipes without all the “normal stuff,”  a comment leaving me pretty confident that you too will love these cookies just as much as he did.  

GingerSnap Cookies

Ingredients

  • 1 1/5 cups cassava flour
  • 2/3 cup non-hydrogenated palm shortening
  • 1/2 cup maple syrup
  • 1/4 cup mollasses
  • 1 tsp vanilla extract
  • 1 tbsp ground ginger
  • 1/2 tsp cinnamon
  • Pinch of nutmeg and cloves *OMIT FOR AIP
  • 1/2 tsp baking soda
  • 1/2 tsp sea salt

Process

  • Using a mixer, beat together shortening, maple syrup, molasses, vanilla extract, and spices.
  • Beat in baking soda, salt, and flour until a smooth dough has formed.
  • Preheat oven to 350 degrees.
  • Roll dough into balls, coat in additional sugar of choice (optional) and place on a parchment lined baking sheet, baking for 12 minutes until just golden on the bottom.
  • Allow cookies to cool completely on cookie sheet before serving.


Notes: roll in coconut sugar or maple sugar and a pinch of ginger for added taste.  For a keto-friendly, probiotic rich cream cheese icing, use 2 parts Nancys cream cheese, 1 part unsalted butter, powdered swerve to taste, dash of vanilla extract and lemon juice, and almond milk (or) heavy cream to thin the icing out.


Psalms 9:9-10 “The Lord is a refuge for the oppressed, a stronghold in times of trouble”

Filed Under: AIP, autoimmune, autoimmune disease, autoimmune friendly, autoimmune paleo, baked goods, cassava flour, coconut free, cookies, dairy free, egg free, nut free, Recipes

Keto Low-Carb Vanilla Glazed Doughnuts (Nut & Seed-Free)

November 18, 2018

 No, doughnuts sure aren’t your traditional Thanksgiving dessert, unless of course you roll these bad boys in a mixture of cinnamon and sugar (do.it.)  However, about once a week my husband craves a sweet treat. While my typical go-to recipes include Paleo chocolate chip cookies (or) a smaller version of our keto wedding cake recipe, this past weekend he wanted me to surprise him. With so many possibilities as to what I could make him, I was a bit undecided.  “Cookies? Cake? Brownies? What do you want? Just tell me and I’ll make it!”  But the problem was, he wouldn’t tell me. Instead, I was forced to get my creative juices flowing.  I truly didn’t know what I was going to make him until I spotted some neglected limes in our kitchen’s fruit bowl. While cakes and cookies typically have lemon in them, I decided to go out on a limb and use lime as the citrus-of-choice.  The result? A surprisingly decadent doughnut that satisfied both sweet and sour cravings. Topped with a citrus glaze, both my husband and the kids absolutely devoured the doughnuts.  Outside of the fantastic taste and texture, another great thing about this recipe is its versatility.  While I first made the doughnuts with lime added, I’ve also baked them as plain, vanilla doughnuts (as seen in today’s photos).  Why vanilla?  For the same reason I always choose vanilla…It’s so versatile and you can doctor it up any which way you want!  I also made an AIP-friendly variation (see recipe notes below).  For the lime-citrus doughnuts mentioned above, simply replace the water with lime juice you’re all set! You can also make them sans coconut milk by replacing all fluids with water as well.  Either way, you’ll still end up with the same, awesome baked doughnuts ready to be topped with whatever it is your heart desires (citrus glaze, chocolate frosting, chocolate chunks, vanilla glaze, CINNAMON & SUGAR for a holiday edition?! or simply creamy coconut butter? You name it!).

Keto Vanilla Glazed Doughnuts

Print Recipe

Yields 6-8 
 Ingredients 

  • 1/2 cup + 2 tbsp coconut flour
  • 1/2 cup Swerve
  • 1/3 cup butter, melted
  • 1/3 cup coconut milk, full fat
  • 1/2 tsp baking soda
  • 1/4 tsp sea salt
  • 1/3 cup water
  • 5 eggs

Process

  • In large bowl whisk together coconut flour, sweetner, baking soda, and sea salt.
  • Add in eggs, melted butter, coconut milk, vanilla, water, and zest, whisking until smooth.
  • Grease a doughnut pan and pour batter 3/4 up the way in each ring.
  • Bake doughnuts in a 350 degree oven for 25-30 minutes.

Notes
Baking time will vary on the size of your doughnuts.
To make icing, whisk together equal parts coconut cream and melted butter & Swerve, with additional flavors added to taste.
For a lime donut, use 1/3 cup lime juice in the batter, plus lime juice & zest in your desired icing.
AIP Variation: Use 1/2 cup pureed plantain in place of the eggs, use coconut oil in place of butter, and coconut or maple sugar in place of the Swerve – *Allow donuts to cool completely in molds before popping out (the AIP doughnuts are much more delicate, with less rise, but still very tasty)

Psalm 16:8 “I keep my eyes always on the Lord. With him at my right hand, I will not be shaken.”

Filed Under: autoimmune friendly, autoimmune paleo, baked goods, coconut flour, Dessert, gluten free, grain free, ketogenic, low carb, paleo

My Guide to Keto with a Chronic Illness

November 10, 2018

The idea to create this guide came to me one morning that I was supposed to “sleep in” (aka 8AM). Instead, I was woken up very early and could never fall back asleep. I’ve found that whenever I’m supposed to (or wish) I was sleeping, that is the time that I come up with my greatest (or so I think) ideas. So here it is, my guide to keto. I’ve been at keto for over 4 years and have experimented with a lot of things. A part of me wishes I had the ketogenic diet before and after photos to show you. That being said, the ketogenic diet for one individual is going to be different for another, especially for the individual that has a chronic illness.

There are many more factors involved outside of losing weight or performing better in the gym. Outside of activity levels, keto is also different from male to females. Overall, everything you will read below is based off of my own experiences (aka I’ve been there, done that). That doesn’t necessarily mean that you’ll have the same experience as me. In all honesty, the keto diet is not for everyone; for some, a more gradual and less restrictive weight loss program like Weight Watchers is a better option. The most important thing to do is weigh up the pros and cons, stated on the Weight Watchers vs Ketosis article on the Modern Fit website, and apply it to you as an individual.

I’ve hit those brick walls, I’ve been bored with my food, and dealt with GI and gallbladder issues. I’ve been dehydrated and not-motivated to continue. But above all else, I’ve pushed through, I’ve persevered, and I am here to share some of my main tips and tricks to balancing the keto diet with a chronic illness. Of course, there is the issue of the Keto Flu, but remember it affects different people in different ways. The best thing to do is read this guide to learn more about the Keto Flu if you want to discover more about how it can affect you.

Moreover, if you are just starting the keto diet, you might be interested to learn that cannabis can help. Regardless of whether you are consuming CBD, THC, or both, there are studies out there that suggest that cannabis could possibly enhance the benefits of keto and even help with some of the temporary negative effects of the keto diet, too. I was speaking to a friend of mine who lives in Missouri about this the other day. She has recently secured a medical marijuana card from her MO MMJ doctors and is now combining cannabis use with the keto diet as a way of managing her chronic illness.

So, how can cannabis and keto be combined? Well, during the initial stages of the keto diet, cravings can be intense, and your body might not have the same kind of physical stamina. This is all temporary, but it is possible to alleviate some of these symptoms by incorporating cannabis into your weight loss treatment. Cannabis-infused products can help with muscular aches and pains and can also potentially help with symptoms of keto flu. Above all, when combining cannabis with any type of diet be sure to do plenty of research and always consult with a medical professional before making any significant lifestyle changes.

My Guide to Keto with a Chronic Illness

If you’re dealing with indigestion/GI upset and bloating try:

  • Ox Bile supplement – helps your body break down the fat.
  • Diatomaceous earth – can be a great aid in digestion and detoxification.
  • Intermittent fasting – by eating in a 6-8 hr time frame and fasting the remaining time, your body is given a break from digestion.

If you need to add more dairy-free, low-inflammatory fat sources try:

  • Homemade mayo – I make mine low-histamine with egg yolks, avocado or MCT oil, and salt. Add citrus or vinegar if you like!
  • Avocados – if you’re ok with histamine and FODMAPs, avocados are the miracle child of keto.
  • Ghee – if full fat butter still gives you issue, try ghee! It contains zero milk proteins and is very friendly to those dealing with autoimmune disorders.
  • Fatty meats – don’t be afraid of them, the fat is chock full of nutrients, especially if the meat is organic and grass-fed. Skin- on chicken thighs, 80/20 ground beef, wings, ribeye steak, and duck breasts are great choices, to name a few!
  • Dressing – it doesn’t just have to go on salads! You can dress any cooked vegetable or protein with a sauce or homemade dressing. My favorites include pesto, Italian dressing, and chimichurri.

If you’re in need of some crunch try:

  • Pork rinds/chicharrones – order online through Bacons Heir, _____, or find them at your local grocery store. My favorites are those from the local Mexican market. They sure know how to make them!!!
  • Cucumbers – while not as “snappy” as chicharrones, cucumbers + salt can be a great fix for when you’re craving something salty and crunchy.
  • Fried chicken skin – yep, I said it. It may sound weird at first, but baking or frying chicken skin until crispy makes for an amazingly crunchy snack.
  • Roasted kale chips – or better yet, my roasted collard green chips.

If you’re feeling restrictive or bored with your meals try:

  • Adding in a new vegetable or protein to your rotation – Sometimes the answer to your boredom can be as simple as eating turkey instead of chicken, or roasting leeks instead of cauliflower. Afterall, variety is the spice of life!
  • Use a different cooking method – I get it, life is busy, and its super easy to get in a rut in the kitchen. If you’ve been faithfully roasting/baking your meals, try sauteeing, pan frying, or maybe even using the slow-cooker or Instapot!
  • Use a bowl and chopsticks – it sounds silly, but changing the vessel for your food and utensils used to eat it can completely change your dining experience. Don’t believe me? Try it!!!

If you’re in need of a carb up try:

  • Plantain chips – crunchy, salty, and perfectly satisfying for any carb-up without sending your body through the ringer. They can be eaten plain or incorporated into a full meal!
  • Fruit – if you tolerate sugars OK, try berries, melon, or other low-glycemic fruits.
  • Sweet potatoes – boiled, mashed, roasted, fried, or baked, who doesn’t love sweet potatoes?!
  • Coconut flour – bake up your favorite sweet treat using coconut flour and you may just get the carb-fix your body is needing without going overboard on the carbs.

When you feel like falling off the bandwagon try:

  • Re-create your favorite dish – sometimes all you need to keep you going is your favorite meal, dish, or cuisine. It can be just the moral booster you need to keep going’
  • Fall off the wagon – that’s right, I said it. Take a break! See how your body feels. If it feels worse, more than likely you’ll be happy to get back on the bandwagon. Overall, you’ll be reminded of why you started keto in the place.
  • Have a carb-up – sometimes a less daunting way to sway the scales can be by simply having a small to moderate carb-up. If you feel like giving up on keto, its usually because you’ve found yourself feeling restricted in eating. This is your cue to change things up!

When you’re feeling dehydrated try:

  • Himalayin pink salt – this stuff is chock full of minerals to help balance your electrolytes
  • E-lyte – a fancy version of Pedialyte without all the sugars. Many functional medical professionals sell it but you can get it on Amazon for cheaper.
  • Coconut water – while higher in sugars and carbs, sometimes sipping on coconut water can be just the thing you need.
  • Bone broth – add some salt and you’re set to go!

Want more tips and tricks on eating keto with a chronic illness? Follow me on Instagram at @beyondthebite4life (or) on Facebook at @beyondthebite – see ya around!

Job 37:5-6 “God’s voice thunders in marvelous ways; he does great things beyond our understanding. He says to the snow, ‘Fall on the earth,’ and to the rain shower, ‘Be a mighty downpour.'”

Filed Under: autoimmune disease, beyond the bite, chronic illness, chronic lyme, chronic lyme disease, coconut flour, Food and The Human Body, ketogenic, low carb, paleo

Tigernut Flour Cinnamon Oatmeal Raisin Cookies (AIP Paleo, Nut-free)

October 20, 2018

Today’s recipe is one that I have been dreaming for, well, years.  Many years ago when I was very, very sick, my mom made me a gluten-free version of my childhood favorite: Cinnamon Oatmeal Raisin Cookies.  I mean, who doesn’t love a chewy, cinnamon-infused cookie with bits of oatmeal and raisins mixed in?  I say this cookie is a childhood favorite because, growing up, my family and I would occasionally eat at Rein’s New York Style deli.  My brother and I’s meals typically consisted of scrambled eggs, sausage, and a NY style bagel, all of which was followed by an amazing cinnamon raisin oatmeal cookie that my mom split between the 5 of us.  While gluten-filled and certainly not healthy, the memories I have connected to those cookies are very sweet.  For that reason, I’ve always loved a good cinnamon oatmeal raisin cookie, even more-so than chocolate chip cookies (which believe me, is saying a lot).  Therefore, when I finally had the chance to purchase both tigernut flour AND tigernut flakes, I knew this was my chance to make the cookies I had always been dreaming of.  To my excitement they came out EXACTLY how I had hoped, with the perfect balance of flavors, and just the right texture that a good, cinnamon raisin oatmeal cookie should have.

Cinnamon Oatmeal Raisin Cookies

Yields 12-14 cookies

Ingredients

  • 3/4 cup arrowroot flour 
  • 1/2 cup tigernut flour
  • 1/2 cup tigernut flakes
  • 1/2 cup raisins
  • 1 tbsp coconut flour
  • 1/2 tsp baking soda
  • 1/4 tsp sea salt
  • 1 tbsp gelatin
  • 1/2 cup non-hydrogenated palm shortening
  • 1/4 cup maple syrup 
  • 1 tsp cinnamon
  • 1 tsp vanilla extract

Process

  • Preheat oven to 350 degrees.
  • In a large bowl sift together tigernut flour, arrowroot flour, coconut flour, baking soda, sea salt, cinnamon, and tigernut flakes.
  • Melt shortening and mix together with vanilla extract, then pour it over the dry ingredients, mixing until smooth, then fold in raisins.
  • Roll cookie dough into 12-14 like-size balls, placing them on a parchment lined baking sheet, pressing down slightly with the back of your palm, then baking for 12 minutes.
  • Once cooked remove the baking sheet from the oven and allow the cookies to cool 5-10 minutes before removing and allowing to fully cool on a wire rack.


Psalm 51:12 “Restore to me the joy of your salvation, and grant me a willing spirit to sustain me.”

Filed Under: AIP, baked goods, coconut flour, cookies, dairy free, Dessert, egg free, Recipes, Sweets and Snacks, tigernut flour, tigernuts

AIP Lamb Empanadas (Coconut, Egg, & Nut-free)

October 10, 2018

Today I decided to get back to my creative, AIP roots and share an autoimmune-friendly empanada recipe.  The inspiration from this recipe originally stemmed from doing the weekly grocery haul and seeing white sweet potatoes in the produce section.  Sweet potatoes are great, but WHITE sweet potatoes, those are what some of my most creative recipes have stemmed from (see here).  I wasn’t entirely sure what I was going to make with them, but I knew it was going to be something good.  I made a list, which include some sweet treats, including vanilla spice cookies and such.  However, I decided I wanted to go the savory route this time around.  As I sat on the couch brainstorming what I should put in the filling of the empanadas, my husband happened to ask me what I was working on.  Coming from a long line of amazing Mexican cooks, this recipe was right up his wheel house.   He made the genius suggestion of adding green olives and raisins to the filling, both of which bring a unique tangy, salty, yet sweet taste to the filling, one of which I would certainly never thought of on my own. Ginger is used as the “spice” factor, while the dried herbs add an overall earthiness to the meat.  Though the filling and dough were super tasty to me, I knew that the real test would be from my husband.  I was a bit hesitant to let him try them, but after just a couple bites the reviews were excellent.  SCORE! AIP friendly empanadas approved by a Mexican?  I knew I had hit the jack pot.  But hey, don’t take my word for it, give them a try yourself!

AIP Lamb Empanadas

Yields 6-8 

Dough Ingredients 

  • 2 cups pureed white sweet potato
  • 1.5 cups arrowroot flour
  • 2 tbsp lard

Filling Ingredients

  • 12 oz ground lamb
  • 1/2 cup diced carrots
  • 1/2 cup minced celery
  • 1/2 yellow onion, minced
  • 2 tbsp raisins, minced
  • 1/4 cup green olives, minced
  • 1 tsp ground ginger
  • 1/2 tsp dried oregano
  • 1/2 tsp dried thyme
  • 1/2 tsp dried rosemary
  • 2 tsp sea salt
  • 2 tbsp avocado oil

Process

  • Make sweet potato puree by peeling, dicing, and boiling sweet potato until fork tender, then place it in a food processor and puree until smooth.
  • To the food processor add arrowroot flour 1/2 cup at a time, pulsing until combined.
  • Pulse in lard until a smooth dough has formed.
  • Form 6-8 like-size balls out of the dough and place them on a parchment lined baking sheet.
  • Press each ball out to 1/8th inch thick, creating 6-8 inch circles, then place the baking sheet in the fridge to chill while preparing the filling.
  • In a medium size skillet, heat avocado oil on medium-high heat, then add onion, celery, and carrot, sauteing until soft.
  • Once soft, add in raisins and olives, then pour the mixture into a bowl and set aside.
  • Back in the skillet, cook beef with rosemary, salt, oregano, and thyme until browned and cooked through.
  • Add vegetable mixture to the skillet and stir until combined.
  • Allow the filling mixture to cool then place 2-3 tbsp in each circle of dough.
  • Fold each circle in half, creating a half moon shape, then pinch the edges together with a fork.
  • Place the baking sheet in a 350 degree preheated oven and allow the empanadas to bake for 45 minutes, until golden around the edges.


Notes:  A tortilla press lined with parchment paper is ideal for this recipe.  It allows you to form uniform tortillas without the hassle of rolling them out!


Proverbs 19:20-21 “Listen to advice and accept discipline, and at the end you will be counted among the wise. Many are the plans in a person’s heart, but it is the Lord’s purpose that prevails.”

Filed Under: AIP, autoimmune friendly, egg free, lamb, nut free, paleo, Protein Dishes, Recipes

How to Balance Chronic Lyme and Exercise

September 29, 2018

I’ve written quite a few posts on fitness during the different times of my illness.  Whether it be pilates, functional fitness, or my overall journey with fitness, I’ve talked about it. However, today I wanted to dive a little deeper into my experience with movement and exercise by making a video.  If you’re looking to learn more about my past and how I go to where I am today, be sure to go read those articles I linked above!  In the meantime, let’s dive a little deeper into how exactly, I am able to maintain weekly workouts without doing what everyone with a chronic illness is afraid of doing: sending my body in a downward spiral. Of course, like any worthwhile endeavor in life, learning what type of exercise suits my body best has come with its many setbacks and lessons.  You truly can’t know something until you try it, and this definitely applies to fitness as well.  So, how do you avoid the terrible downward spiral that we all do everything to avoid?  First and foremost, I talk about intuition. Secondly in this video I talk about recovery, including the supplements that I currently use to help support my body, it’s healing, as well as the important role of sleep, epsom salt baths, and mobilization/rolling out.  I also talk a lot about what happens when we start to workout outside of our homes and begin to fall into the comparison trap.  This is a trap that can be easy for anyone to fall into, especially if they are a fitness guru like myself.  However, as Theodore Roosevelt once said “comparison is the thief of joy.”  True that Roosevelt, true that….Of course, I couldn’t end the video without hitting on the topic of diet, how we all differ when it comes to macros, the importance of adequate calories, and overall what I have found suits my body best. It is important to note that not every day is a good day.  Sometimes I struggle to get through a workout, and sometimes I simply do not workout at all.  Again, exercising with a chronic illness is ALL about intuition.  I’ll say it again.  Intuition.  Don’t want to be in tune with your body?  Well, then, exercising with a chronic illness may just not work.  The choice is up to you! But I swear by it.  Not only will you benefit from being more in tune with your body, but so will your health and overall wellbeing.

Be sure to like & subscribe and thank you all for the continued support!!!

~~~~~~~~


John 3:20-21 “Everyone who does evil hates the light, and will not come into the light for fear that their deeds will be exposed. But whoever lives by the truth comes into the light, so that it may be seen plainly that what they have done has been done in the sight of God.”

Filed Under: autoimmune disease, chronic illness, chronic lyme, chronic lyme disease, Personal Experiences, Weekly workouts

« Previous Page
Next Page »

Primary Sidebar

Recent Posts

My Guide to Practical Animal-based Eating

Paleo Banana Collagen Bars with Coconut Flour (Nut-free)

Paleo AIP Cinnamon Raisin Collagen Bars (Fruit-sweetened, Coconut-free)

Coconut Flour Molasses Spice Cookie Bites (AIP-friendly, Nut-free)

Crustless Keto Cheesecake (Carnivore-friendly)

Paleo Fruit Sweetened Harvest Bread (Gluten-free)

Copyright © 2025 · LBD Pro V on Genesis Framework · WordPress · Log in