• Skip to primary navigation
  • Skip to main content
  • Skip to primary sidebar
  • Home
  • About Me
    • My Videos
    • Organ Meat Makeover
  • Recipes
  • Health Articles
  • Resources
    • Young Living Essential Oils

Beyond the Bite

Get Beyond the Tick Bite and Eat Right For Your Life.

  • E-books
    • Organ Meat Makeover
    • Practical Animal-Based Eating
  • About Me
    • Videos
    • Health Articles
  • Recipes
    • Email
    • Facebook
    • Instagram
    • Pinterest
    • YouTube

Recipe Index

Paleo Autoimmune Protocol Dry Rubbed Steak (Low-FODMAP)

June 8, 2015

AIPPaleoDryrubbed 2

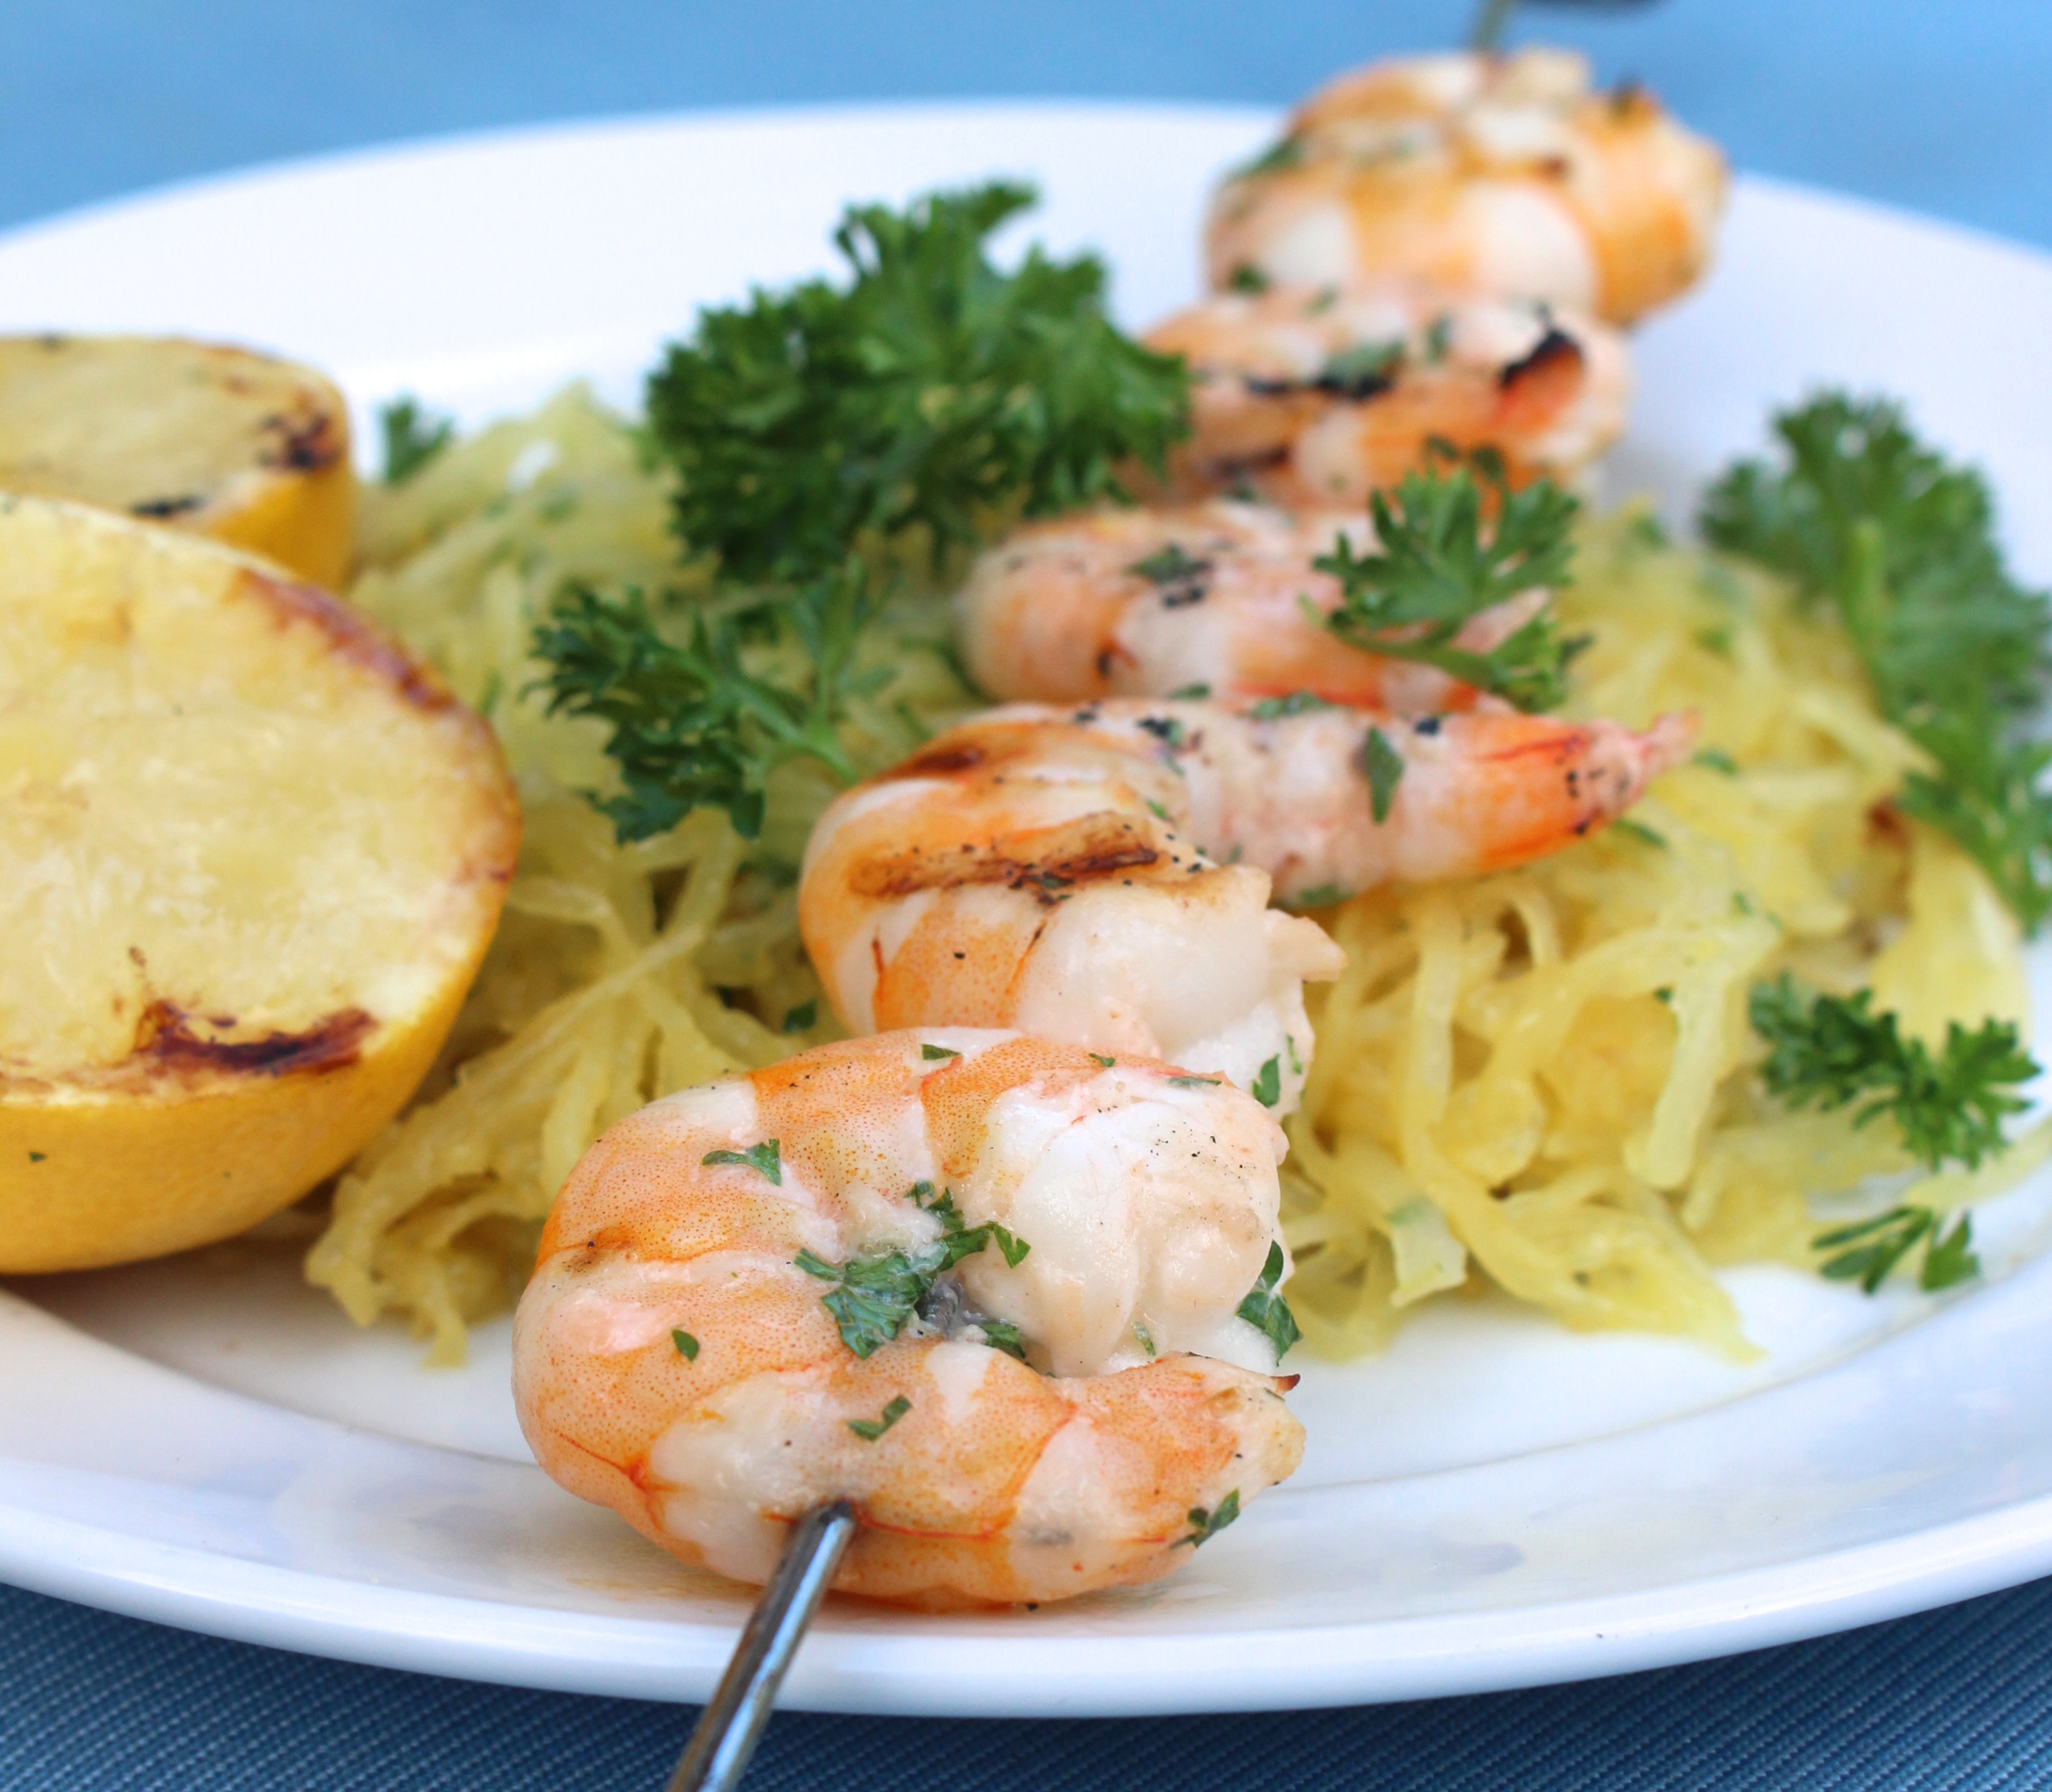
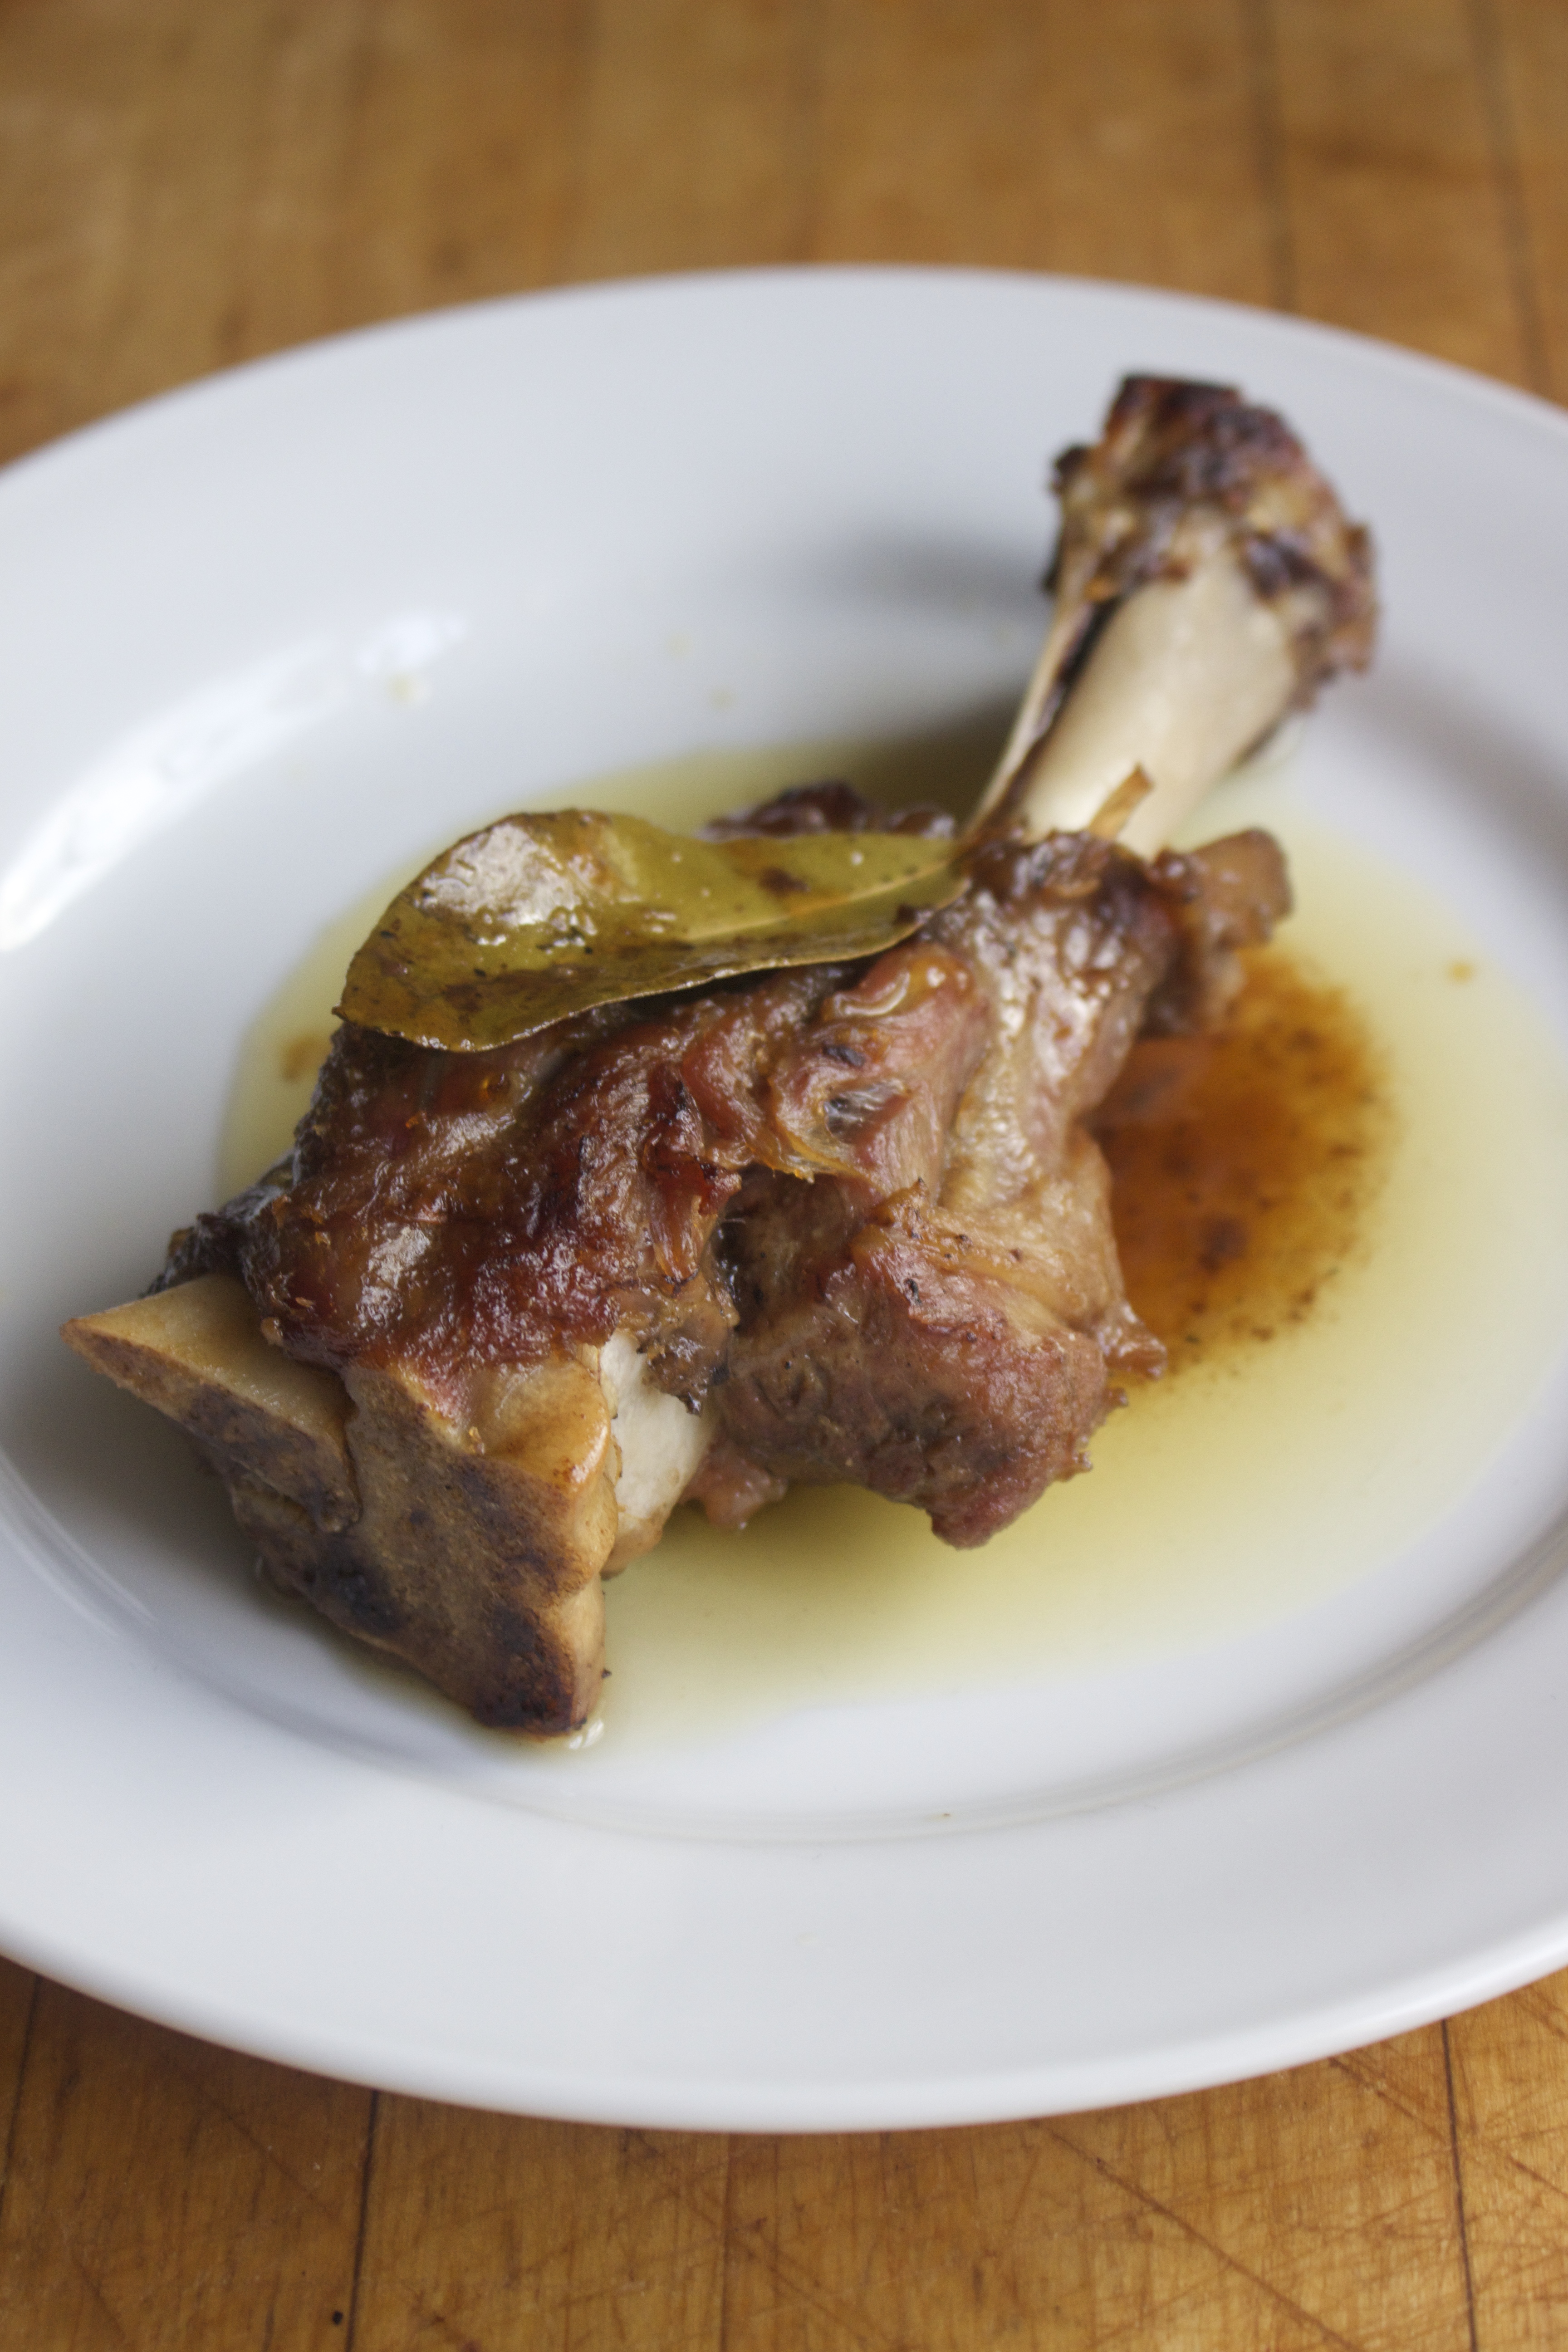
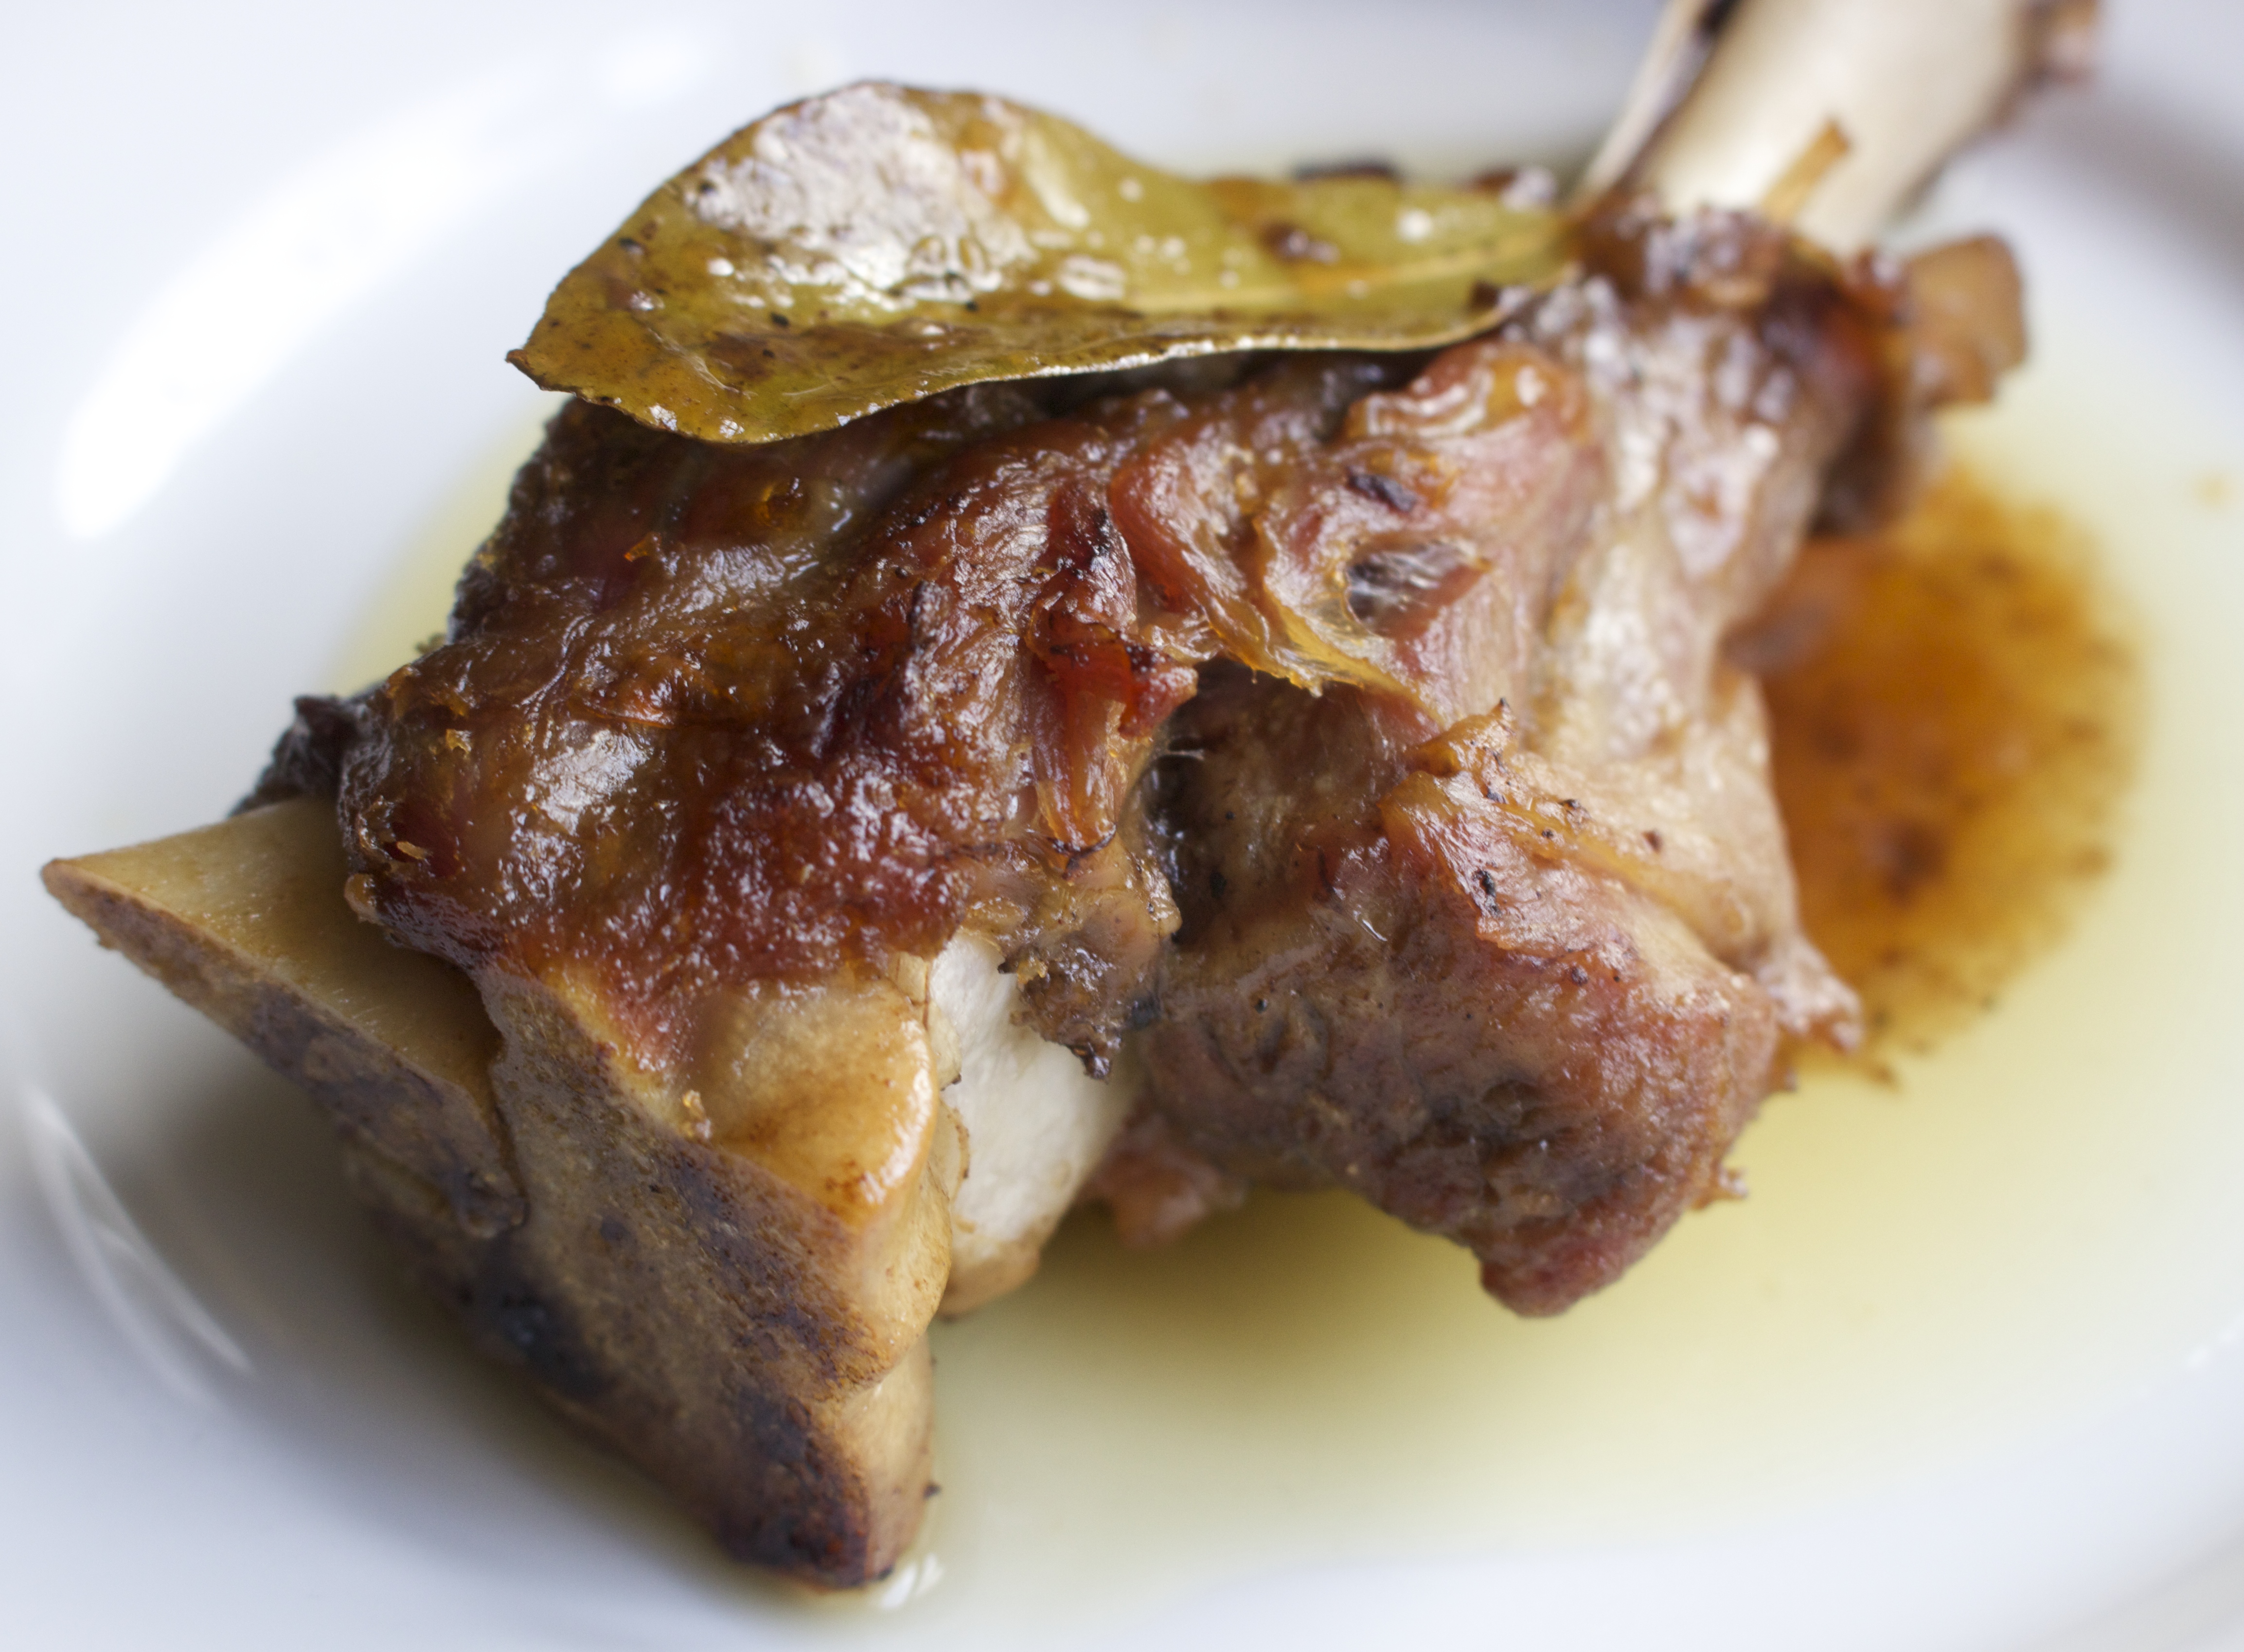
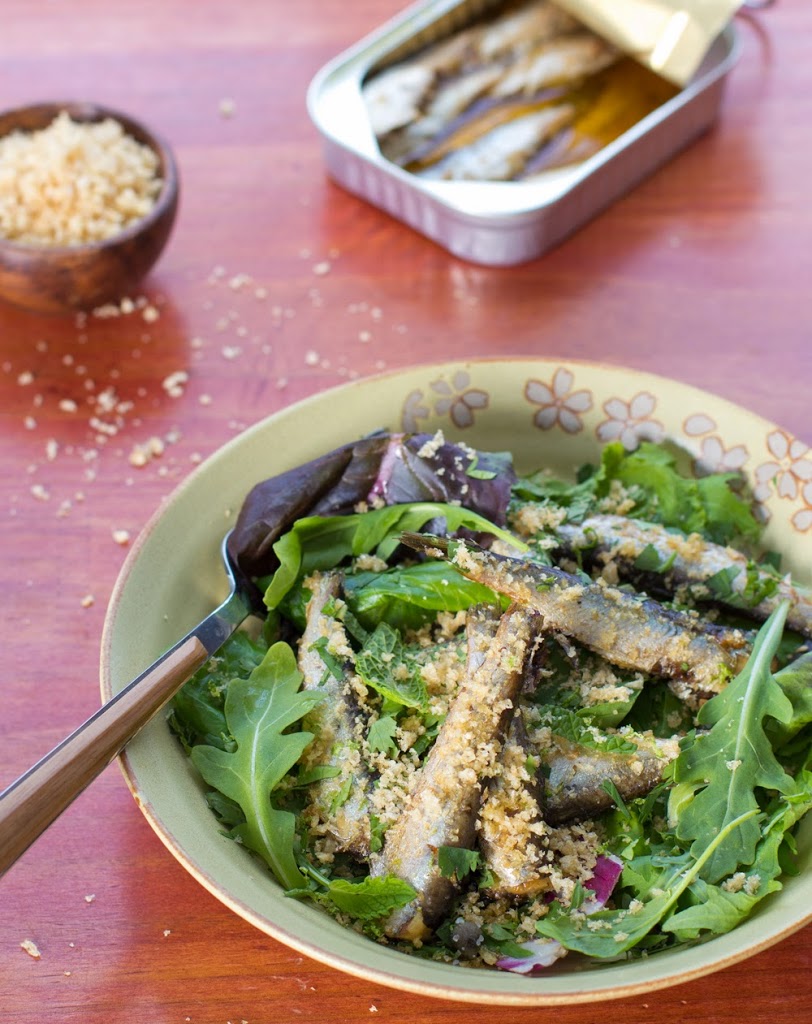
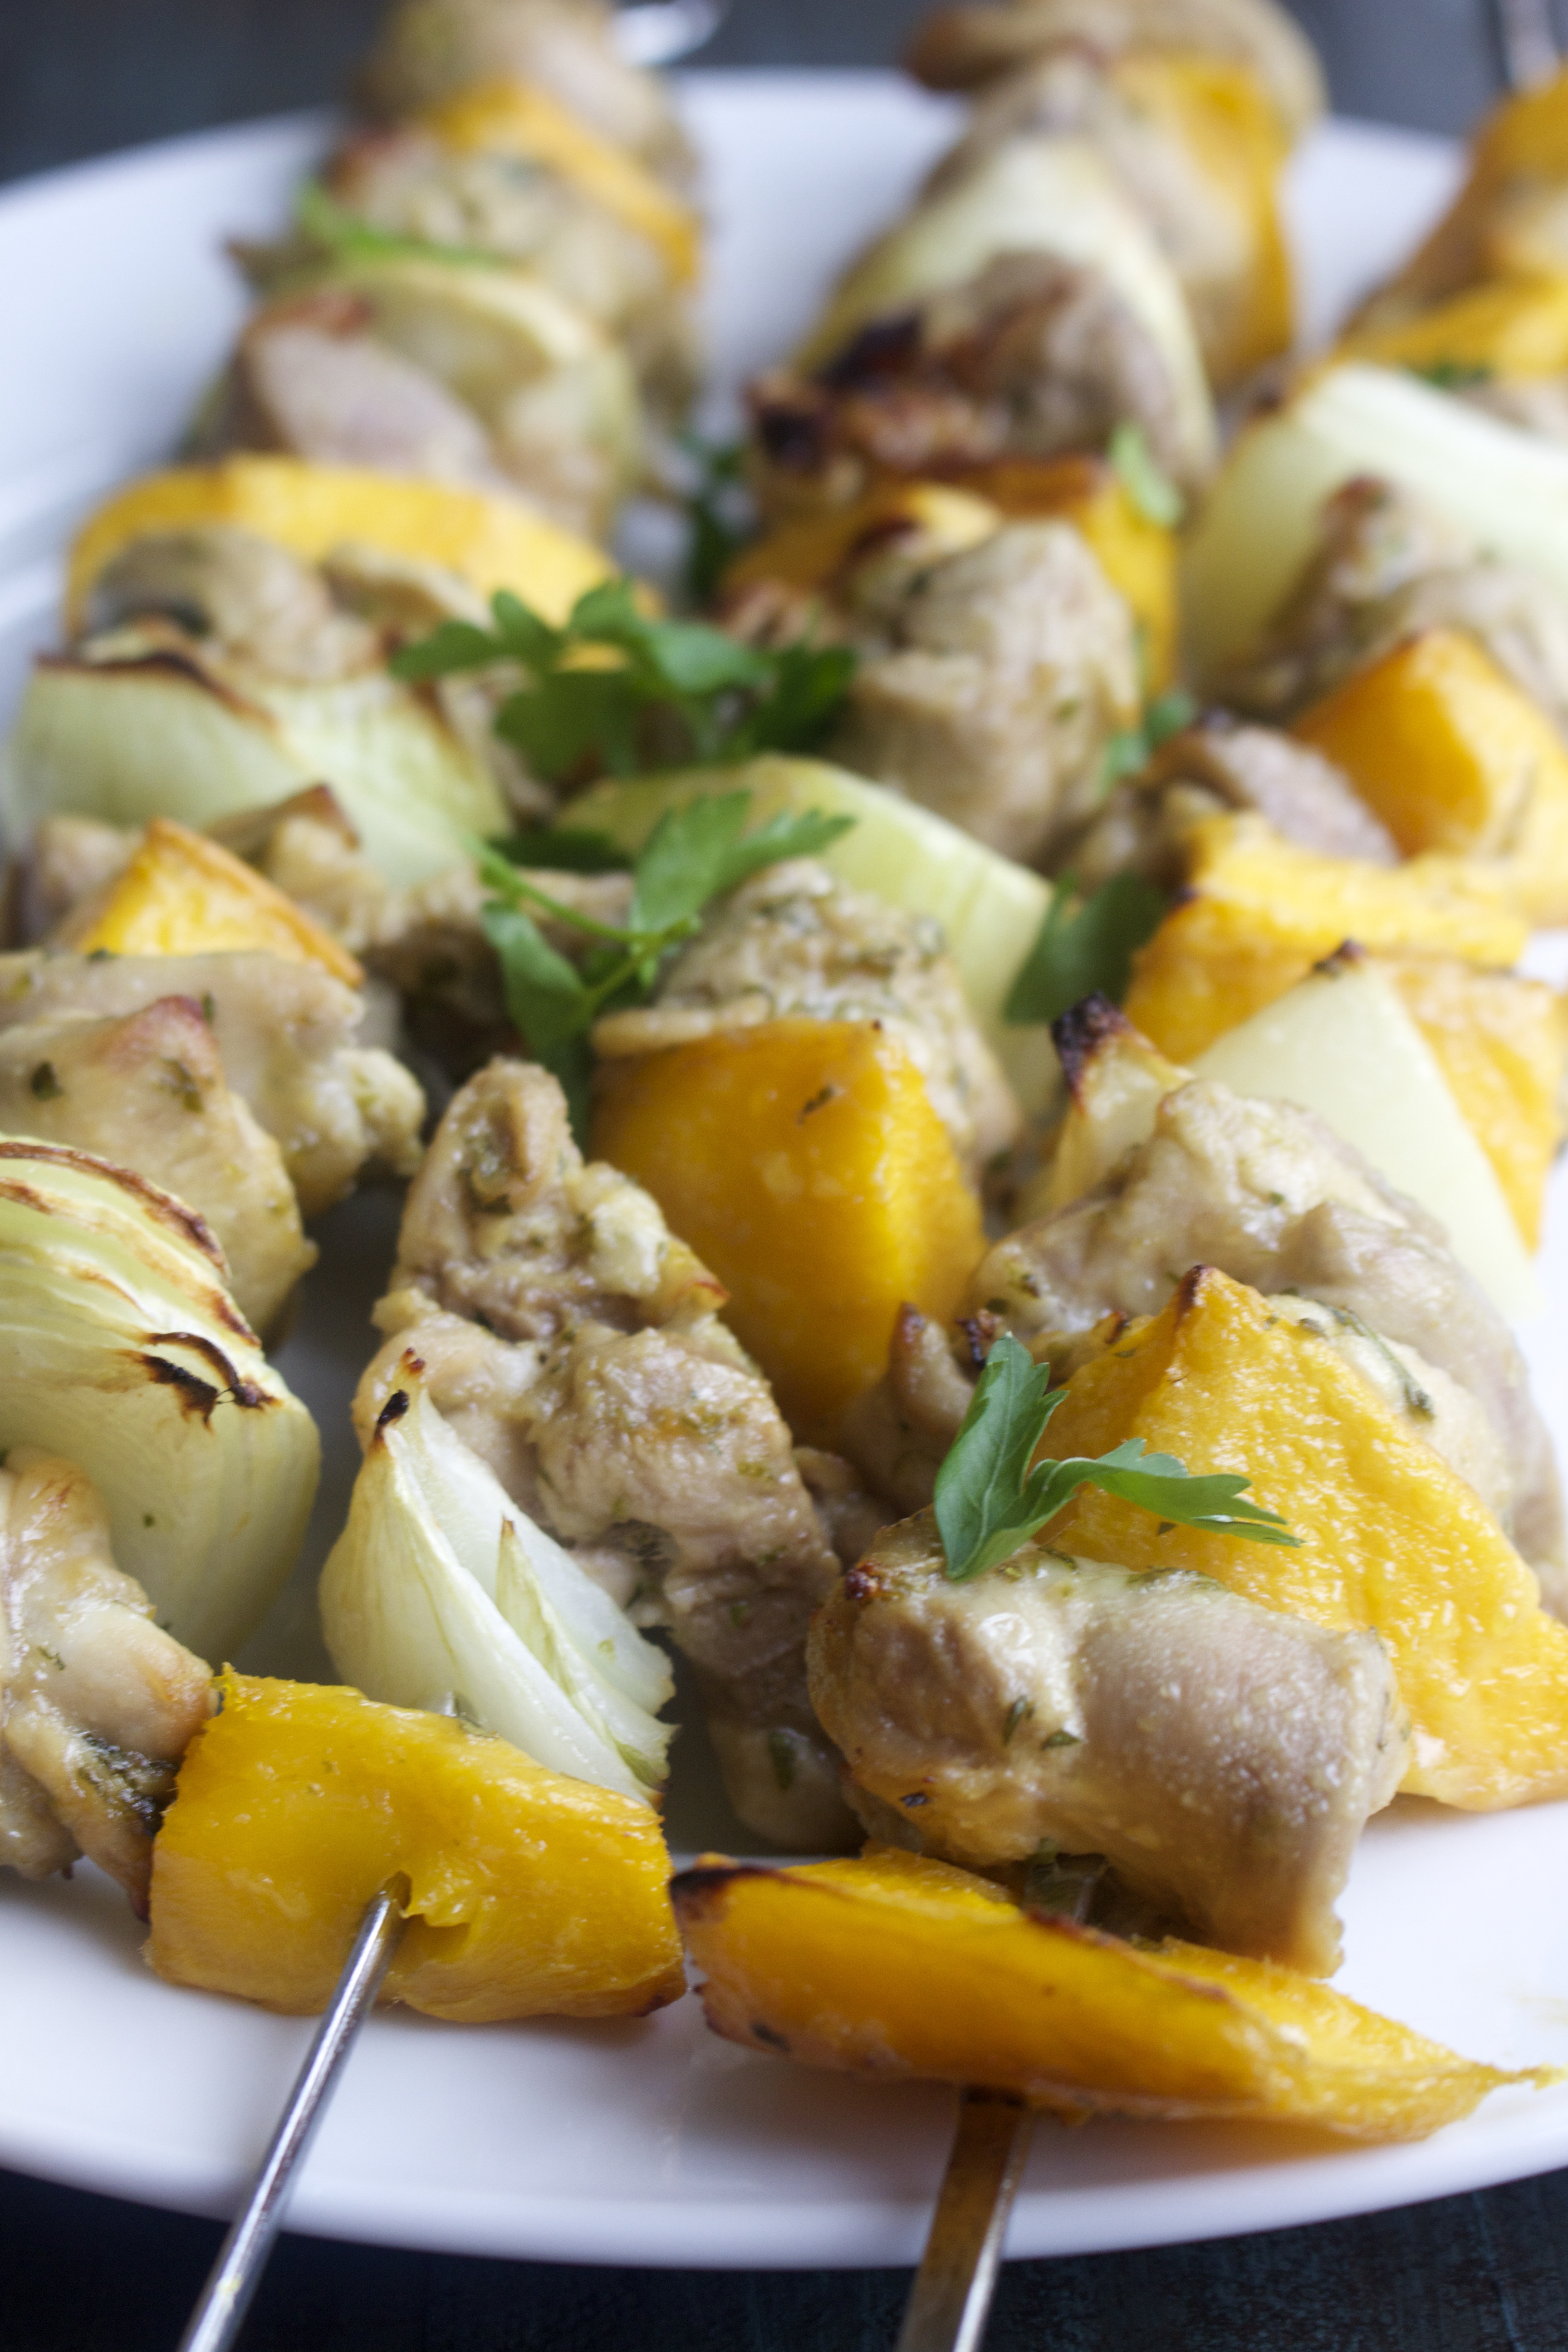
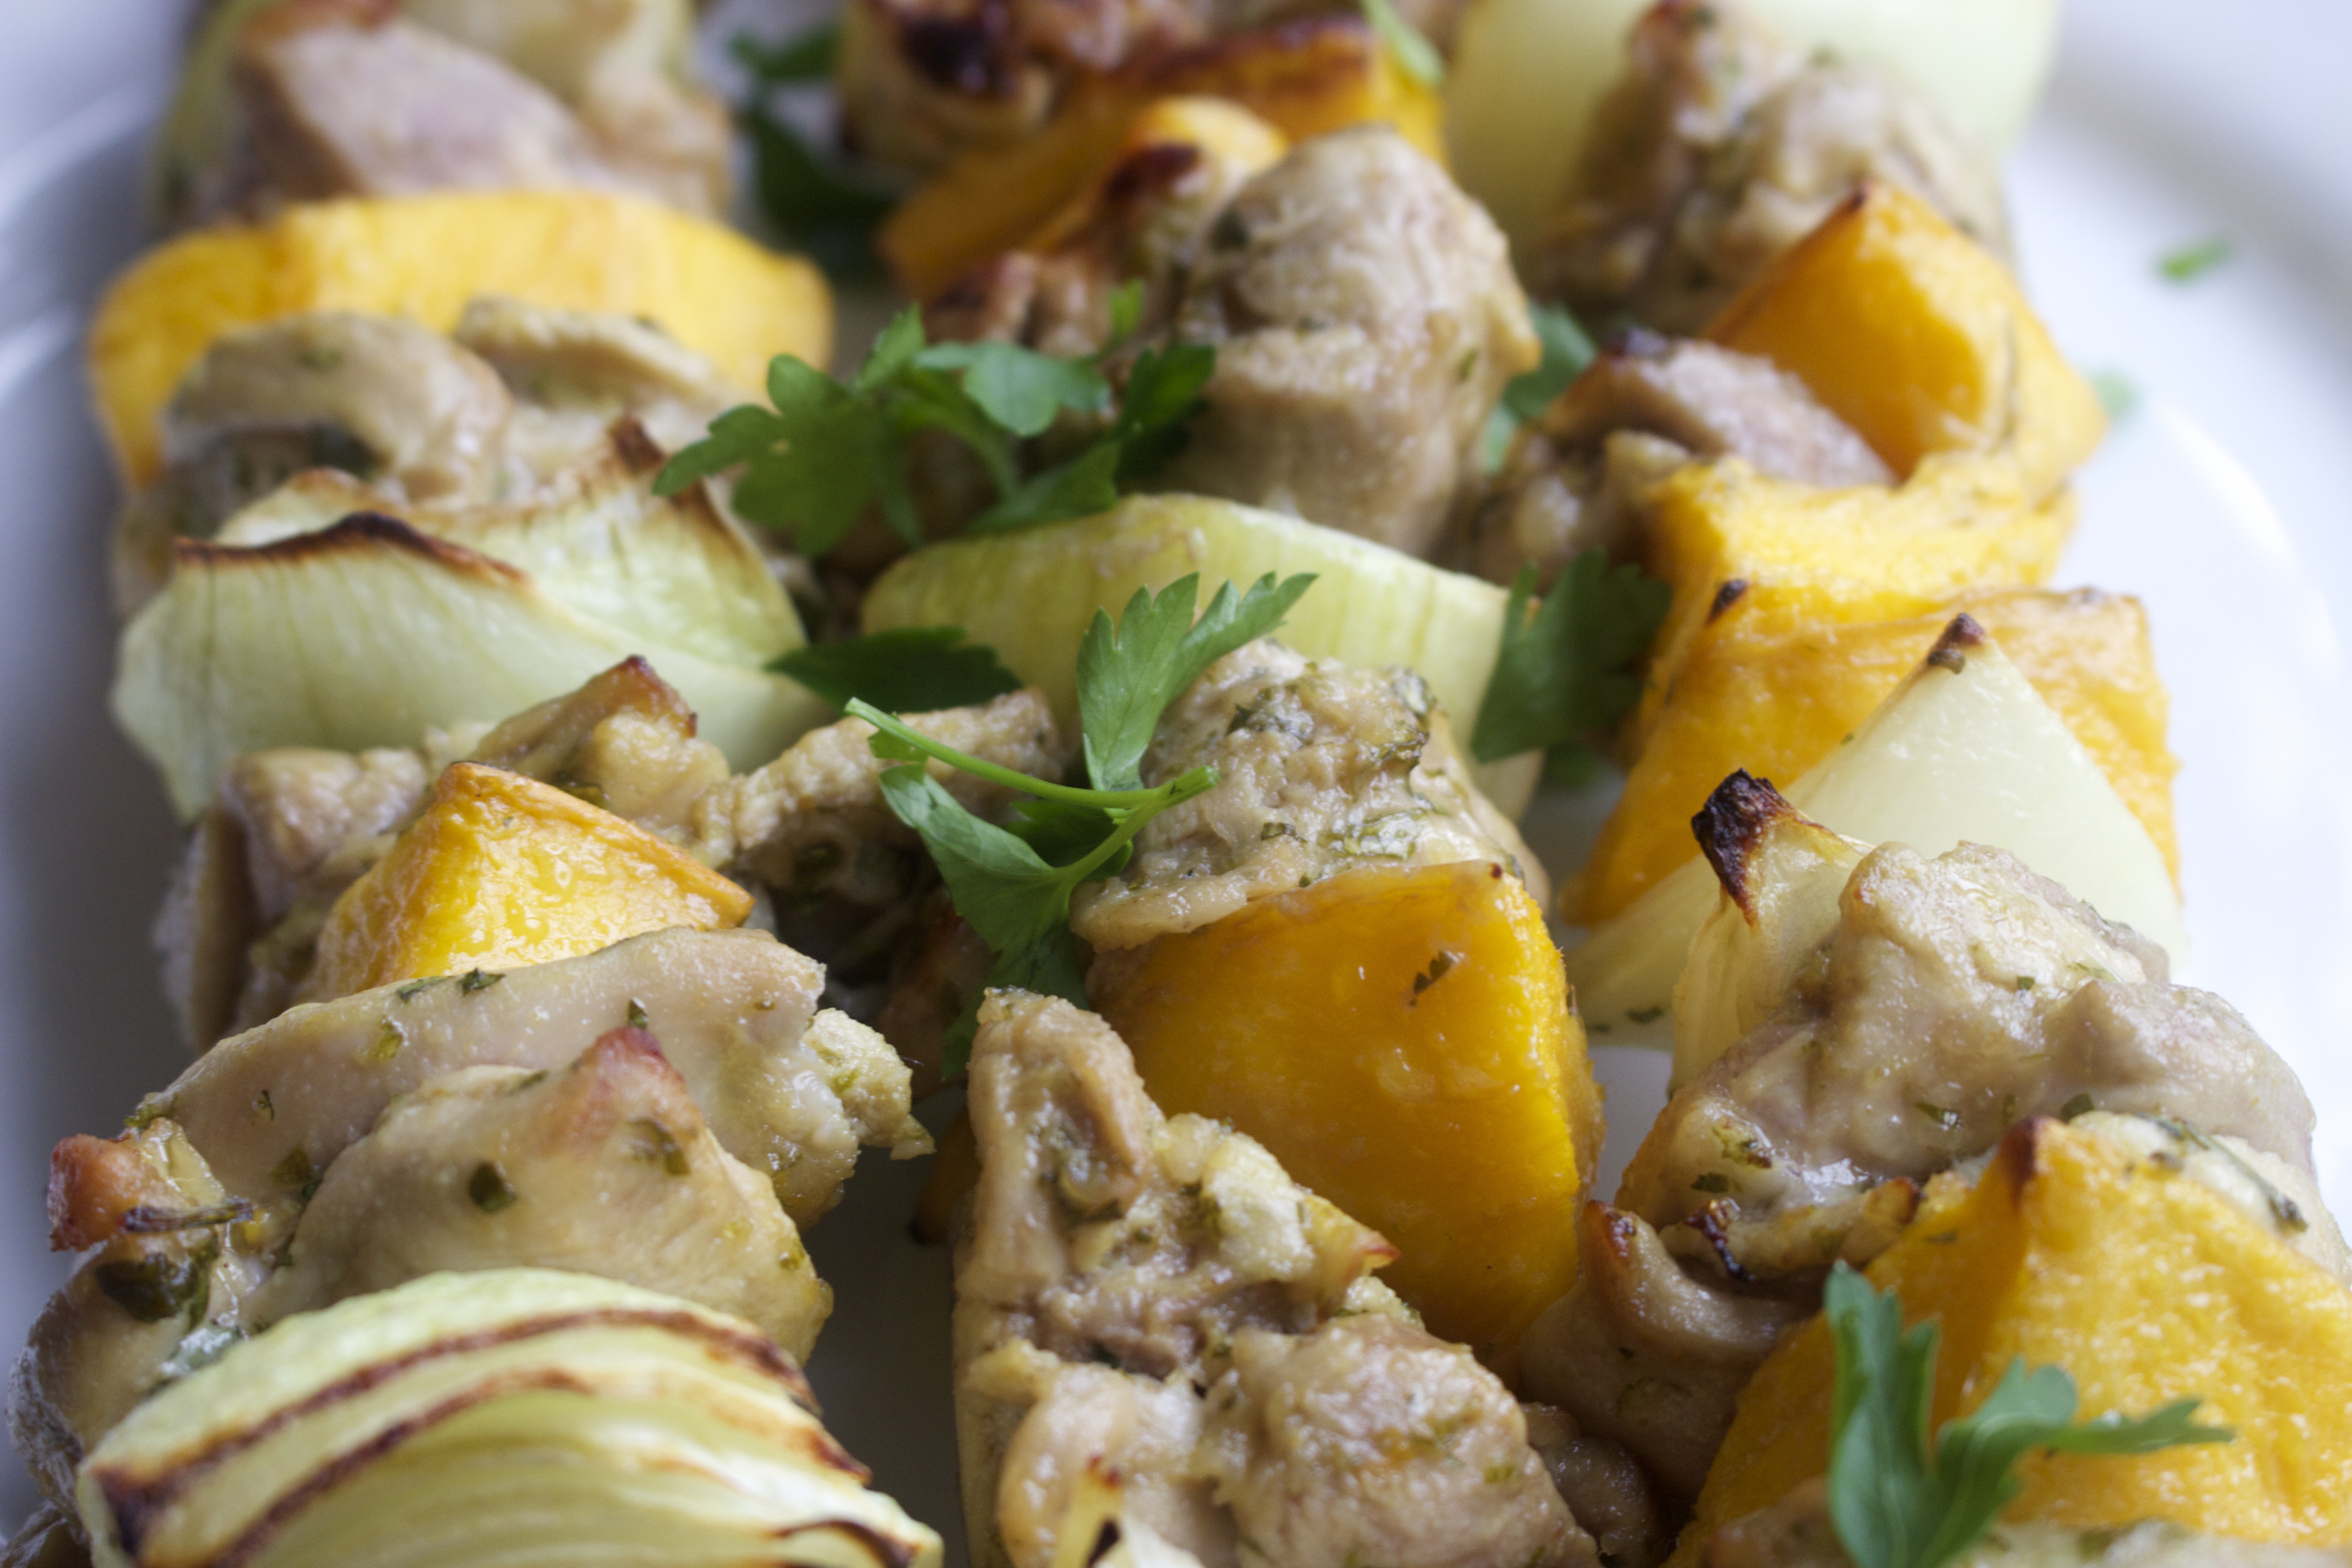
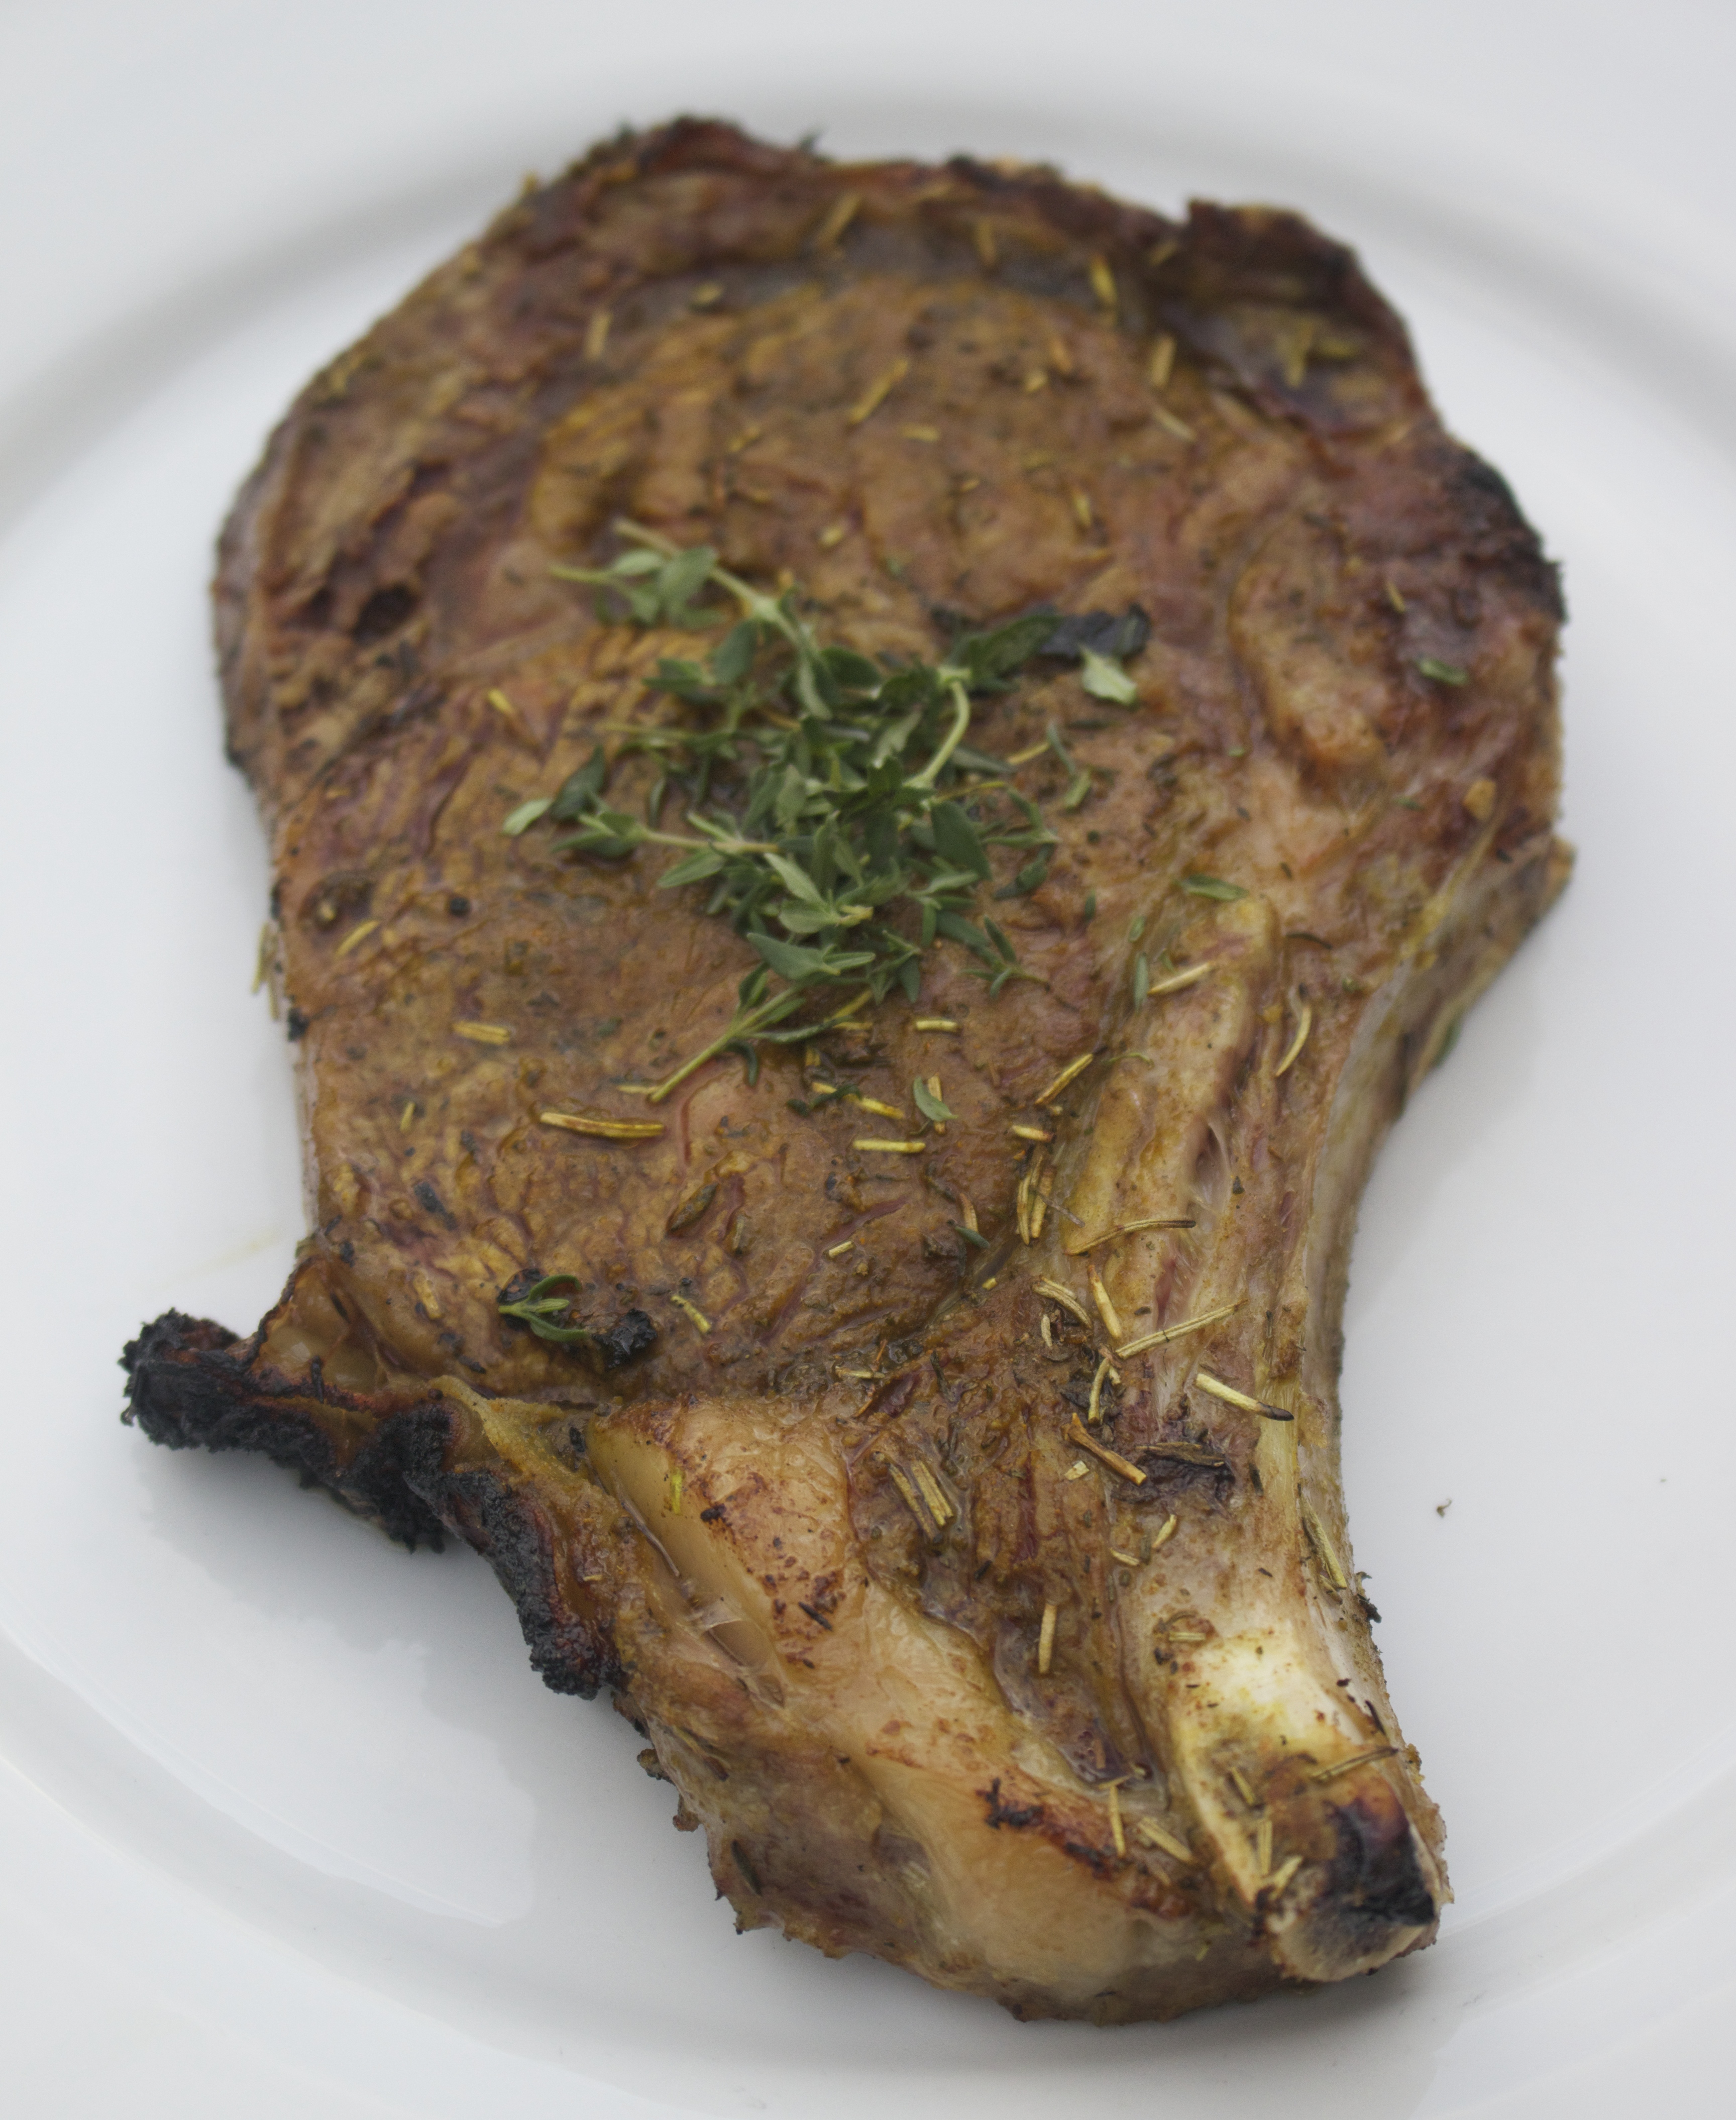
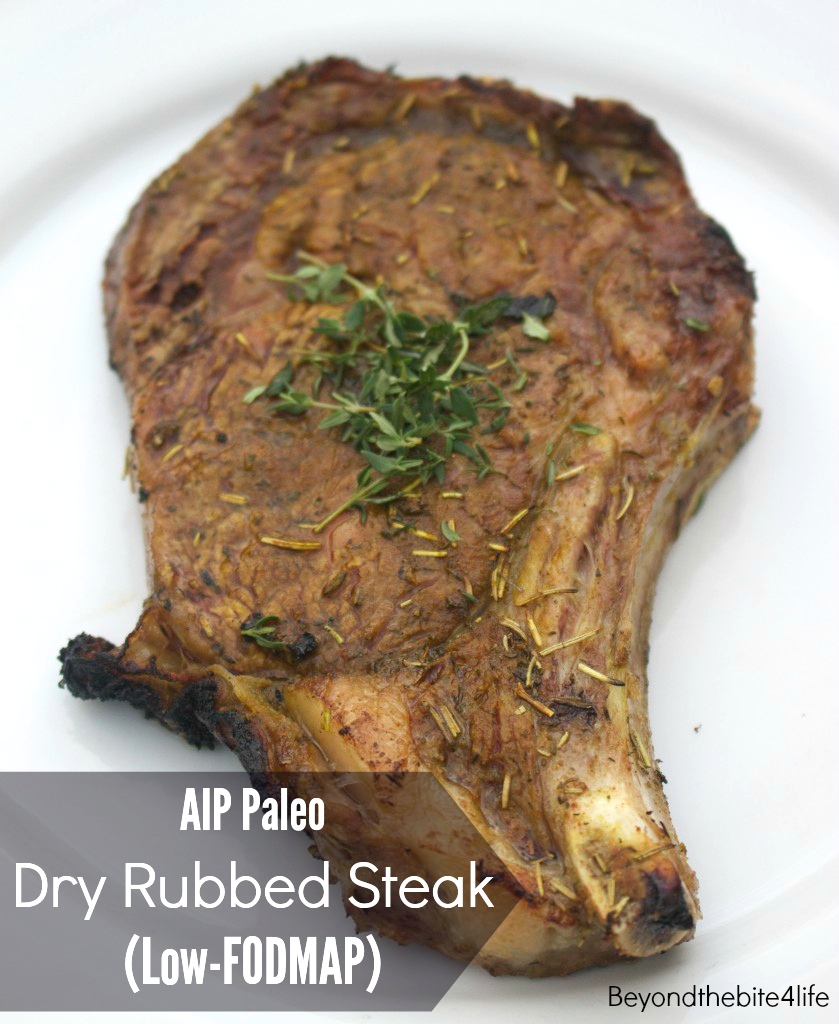
I absolutely love grilling.  Whether it be for dinner, or even breakfast, you will more than likely find me outside grilling fish, muscle meat, organ meat, and even vegetables, rain or shine.  While I am perfectly happy with a simple marinade of salt and oil on most foods that I cook, my one pet peeve is chewy food.  Don’t get me wrong, chewing is great, in fact, I tend to always make sure to chew anywhere from 20-36 times in order to help my stomach digest properly.  However, when I pull out a steak from the freezer, I don’t want it to just be any old steak, no, I wanted it to be tender, juicy, and completely mouth watering, which is why I chose to brine it.  After successfully making a single-serving pork chop recipe that I had also previously brined, it seemed as though the only way to fully guarantee a fool-proof recipe was to do just that.  Much like my broiled Garlic Sage Pork Chops, the brining process of the rib steak locks in most all of the moisture in the meat, taking away any potential of a tough, rubbery, or extra-chewy meal.  While I chose to use the rib steaks from a local half of a cow, you truly can use any piece that you have.  In fact, because the recipe calls for a 4-6 hour brine, even lean, otherwise not-so-popular cuts of meat can be revived into a delicious meal that the entire family will love.  Though the recipe is naturally low-FODMAP, and autoimmune protocol friendly, my younger brother could have cared less.  In the end, we devoured the tender cuts of meat a long side a nice green salad, roasted vegetables, and sauteed greens.

IMG_6182

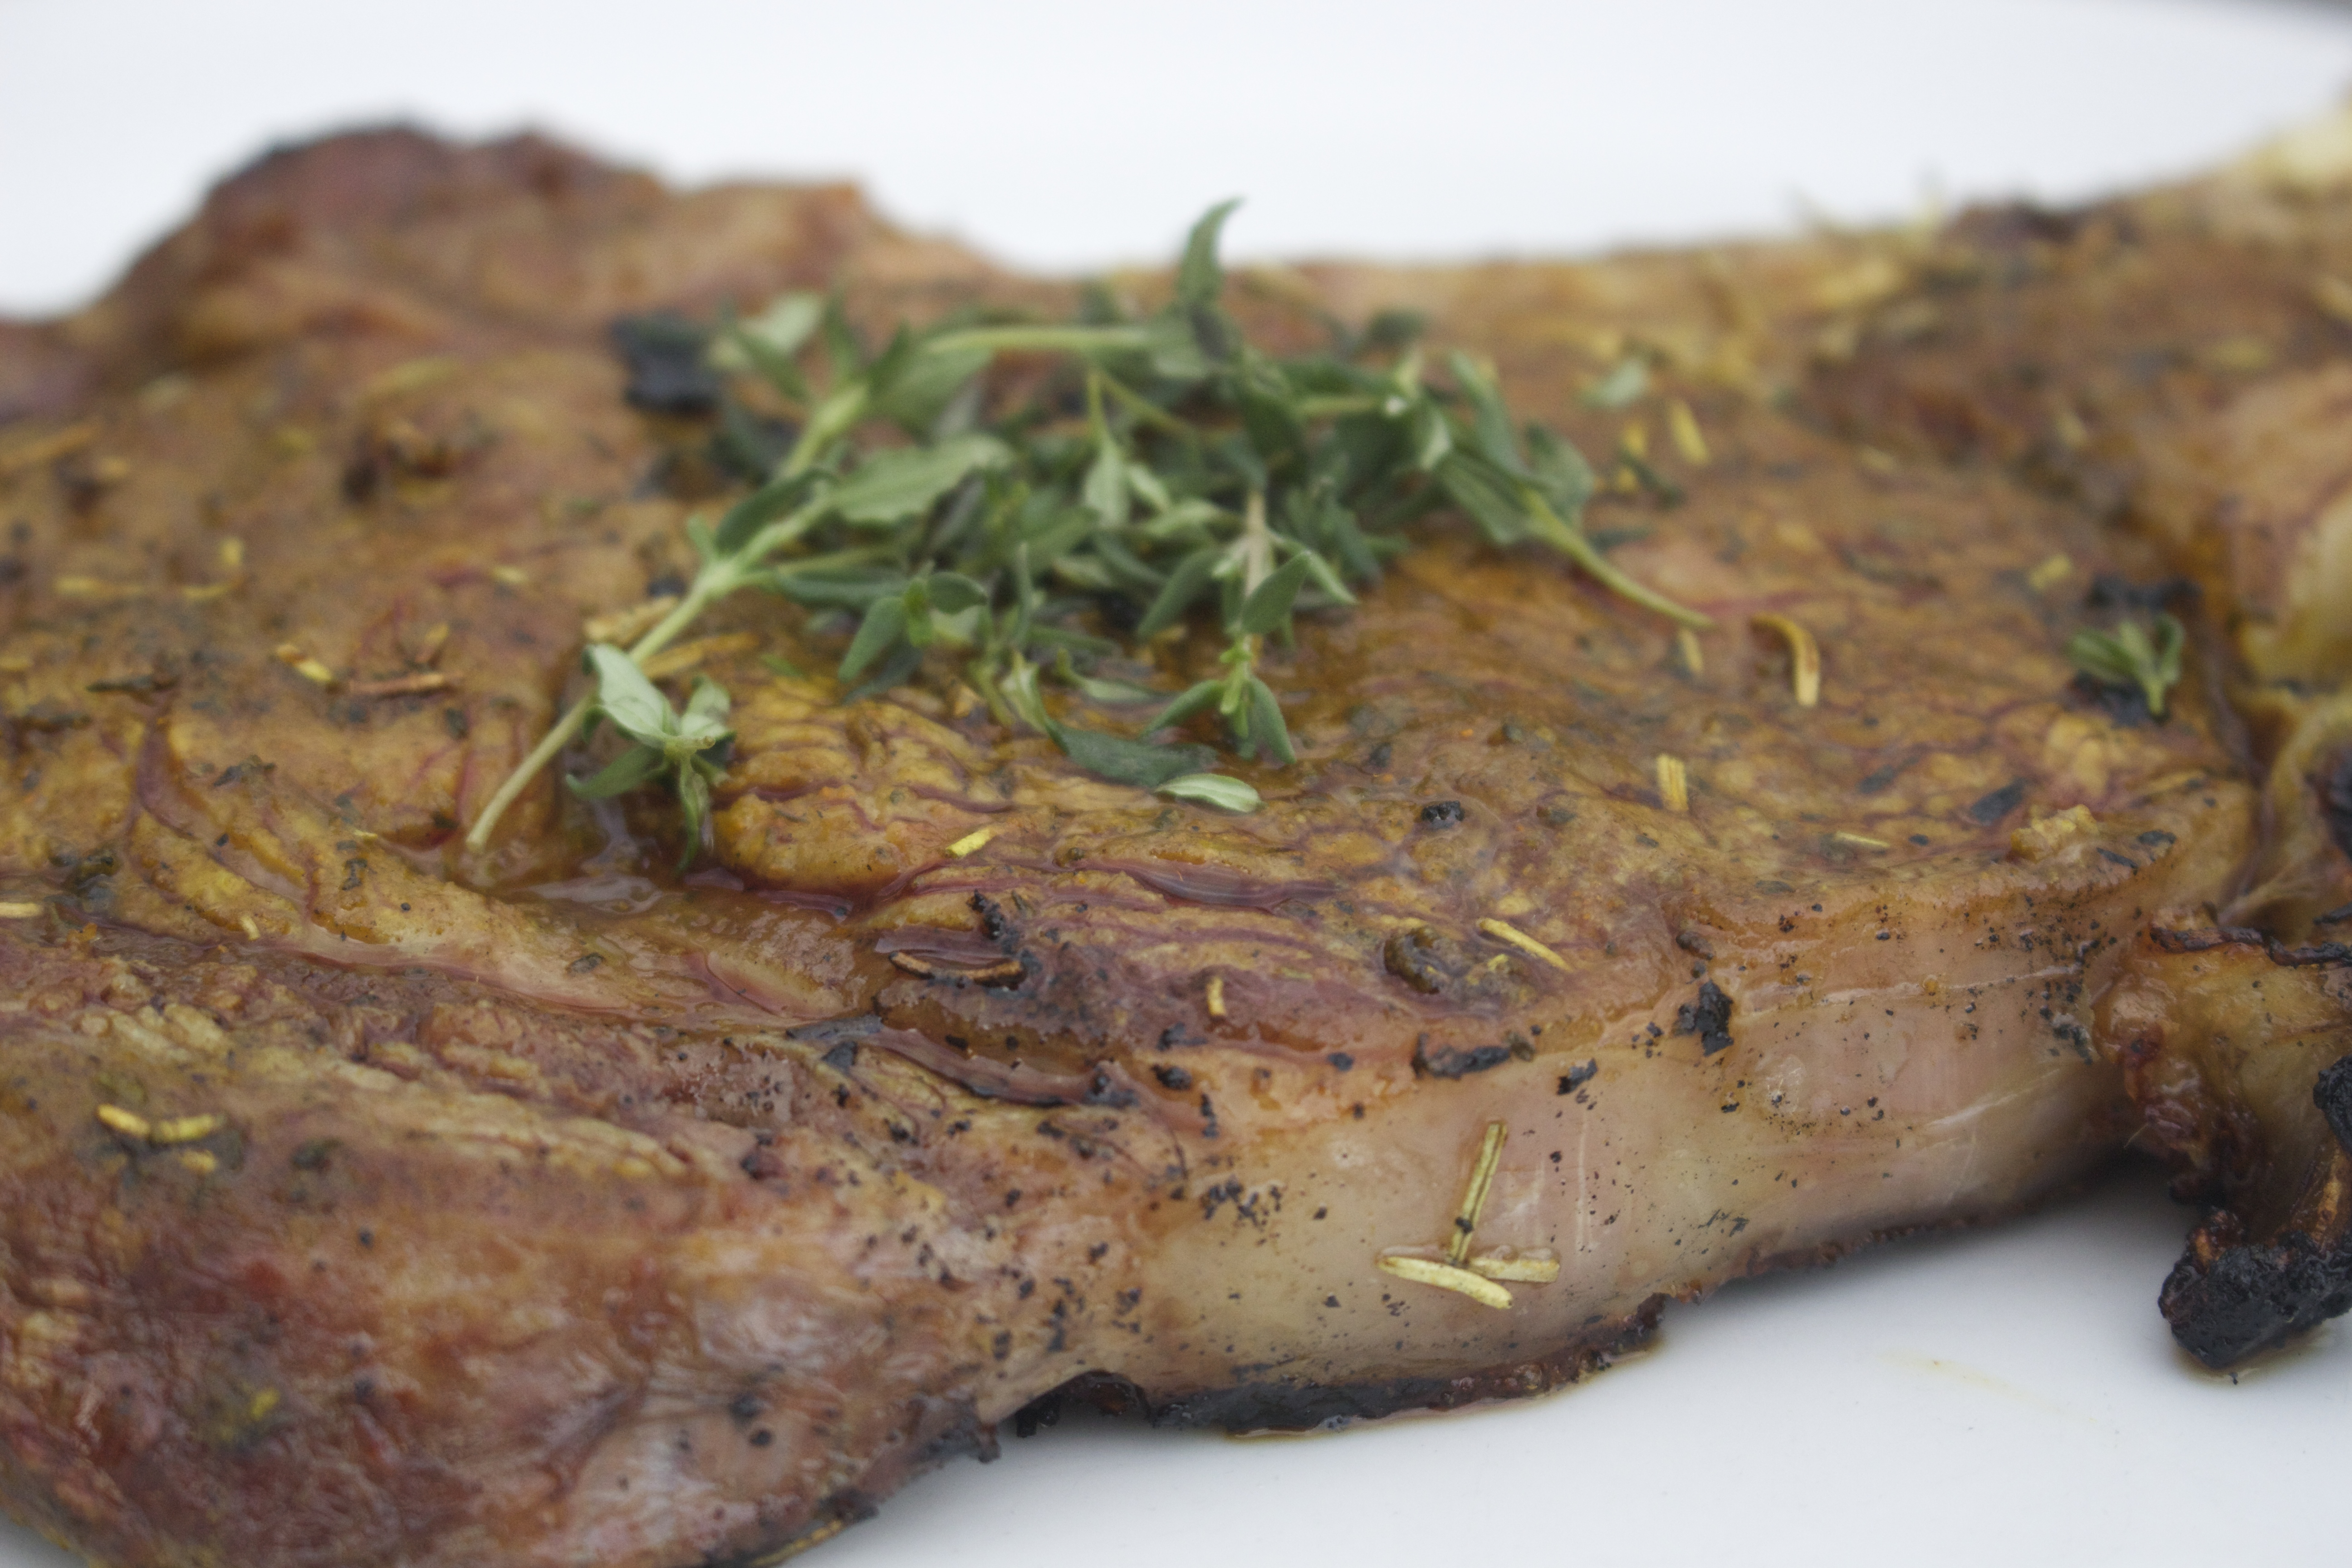
Grilled Dry Rubbed Rib Steak 

Print Recipe

(Serves 4-6)
Brine

  • 2 tbsp sea salt
  • 2 cups hot water
  • 6 cups cold water

Rub

  • 1 tbsp sea salt
  • 1 tbsp dried rosemary
  • 1 tbsp maple sugar
  • 1 tsp ground sage
  • 1 tsp dried thyme
  • 1 tsp ground ginger
  • 1/4 tsp cinnamon
  • 1/4 tsp turmeric

Meat

  • 3 lb, bone-in beef rib steaks (I used 3, 1 lb, 1 inch thick steaks)

Process

  • To make the brine, combine the sea salt in the hot water and dissolve in a large mixing bowl, then add in the remaining cups of cold water to bring the mixture to room temperature.
  • Once room temperature, submerge the steaks in the brine, cover the bowl with plastic wrap, and place the bowl in the fridge to sit for 4-6 hours.
  • After 4-6 hours have passed, turn the grill on to preheat.
  • To prepare the steaks, remove them from the brine, pat dry with a paper towel, and place in a large dish.
  • Combine the rub ingredients together in a bowl, then sprinkle over the steak, lightly rubbing in over all sides.
  • Place the steaks on a hot grill and cook 7 minutes on the first side, then flip over to cook another 3-5 minutes or more, depending the thickness and how well-done you like your meat.
  • Remove from the grill immediately and allow to sit for 5-10 minutes to lock in the juices, then cut against the grain and serve!


Luke 16:15 “He said to them, “You are the ones who justify yourselves in the eyes of others, but God knows your hearts. What people value highly is detestable in God’s sight.”

Filed Under: AIP, autoimmune friendly, beef, grilling, ketogenic, low carb, meat, paleo, Protein Dishes

AIP Paleo Rhubarb BBQ Sauce (Nightshade-Free)

June 6, 2015


BBQ Sauce

This spring (March 30th to be exact), marks the one year anniversary of Beyond the Bite. Therefore, I thought it would be rather appropriate to go back through the blog archives and re-make some of my first published Paleo recipes into autoimmune-friendly versions. One of my first posts from at the Cape was Shrimp Two Ways – BBQ and Pesto. While I have already remade an AIP-friendly pesto sauce, I wanted to begin by re-inventing BBQ sauce featuring rhubarb. As a plant that flourishes in the spring and summer months, I wanted to use it in a way outside from the typical strawberry-rhubarb combination, and I saw a nightshade-free BBQ sauce as the perfect way to do just that. While I served this to my family slathered over grilled chicken, it can easily be used in pulled pork, brisket, or any other grilling recipe that you enjoy making in the summer, including shrimp. I assume it would also be fabulous used as a dip for homemade sweet potato fries, or plantain chips. Either way, this BBQ sauce will have you reminiscing on past summer cookouts, and savoring every bite.

IMG_5974

AIP Rhubarb BBQ Sauce

Print Recipe

(Makes 2 Cups)
Ingredients

  • 3 cups chopped rhubarb  
  • 2 tbsp apple cider vinegar
  • 1/4 cup water
  • 1 tbsp garlic powder
  • 1/2 tsp ground ginger
  • 3 tbsp pure molasses
  • 3 tbsp pure maple syrup
  • 1 medium onion (1 1/2 cup chopped)
  • 1 tsp smoked sea salt

Process

  • Combine all of the ingredients in a medium sized sauce pan and bring to a low-boil on medium heat.
  • Allow the mixture to cook for 25-30 minutes until reduced by half and the rhubarb is very soft.
  • Transfer mixture to a blender and blend until smooth, then pour the sauce into a mason jar for later use, and store in the fridge.


Ephesians 3:17-19 “that Christ may dwell in your hearts through faith; that you, being rooted and grounded in love, may be able to comprehend with all the saints what is the width and length and depth and height— to know the love of Christ which passes knowledge; that you may be filled with all the fullness of God.”

Filed Under: AIP, autoimmune friendly, condiments, Condiments and Sauces, grilling, no bake Tagged With: BBQ sauce

Daily Dose of Encouragement: What We Crave

June 5, 2015

DailyDoseEncouragement

As Joel and Luke of for King and Country sing, “hope is what we crave…” But wait, is it really hope we are craving? Or is it simply us wanting to know the answer to our troubles, or the end result of our current circumstance? If it was hope we were after, we would be done searching. Why? Because our God, the Maker of  the entire universe, is the God of hope. Not only did He make the world and is actively in control of everything (Proverbs 19:21), He has also overcome it (John 16:33).  God is the essence of hope, whenever, throughout whatever, and forever. Through Christ we can have hope in the unknown, what is viewed as impossible, and the trials and pain that seem as though they will never come to an end.  Whether it is here on earth, or in our eternal home in heaven, God promises that those who trust in Him “will never be put to shame” (Romans 10:11).  Therefore, whether you have a seemingly incurable chronic illness, or are being knocked to your knees by the reoccurring storms in other ares of life, there is everlasting, unwavering hope for those who believe (1 Timothy 4:10).

FaithFrancis A. Schaeffer points out that “Christianity is realistic, because it says that if there is no truth, there is also no hope.”  Yet guess what?  There is hope, as God’s promises have reigned true for thousands of years, and are evident not only in my life, but millions of others.  Three truths that I have had written on my marker board for more than four years as I have battled chronic Lyme are, “I can do all things through God who gives me strength,” (Philippians 4:13) “God is BIGGER than any of my pain,” (Psalm 147:5), and “This is not meaningless! God has a purpose” (Jeremiah 29:11).  While these statements may seem rather simple and plain to the eye, the power behind them is truly beyond our limits to even begin to grasp.  Time and time again, these truths have pulled me through some of the darkest valleys, both physically and mentally, as my soul was supernaturally strengthened by the One who speaks and guides only in truth.  (John 16:13).  One of my all-time favorite passages resides in Romans 5, where we are told that those who are justified by faith in Christ, will also obtain peace through Him.  Not only that, but we can continue to rejoice in the hope and glory of God, even in the midst of trials,  because “tribulation produces perseverance;  and perseverance, character; and character, hope. Now hope does not disappoint, because the love of God has been poured out in our hearts by the Holy Spirit who was given to us.” In the end, the earthly craving for hope that our bodies long for can be completely satisfied through Him.  Could we ask for anything better? I don’t believe so.  Put your faith in God, find hope in all that He is doing in your life, and watch as He never lets you down (Deuteronomy 3:16). 

Psalms 46:5 “God is in the midst of her, she will not be moved; God will help her when morning dawns.”

Filed Under: beyond the bite, chronic lyme, chronic lyme disease, daily dose of encouragement, God, Personal Experiences

AIP Creamy Blueberry Tart + Q&A With The Common Woman

June 2, 2015

IMG_5593

As I write this, it is May 30th, the official 1 year anniversary of Beyond the Bite.  I truly cannot believe 365 days have passed since I posted my first recipe – Plantain Taco Shells.  It is crazy how my topics and recipes have evolved, and I couldn’t thank God more for how He has (and continues) to guide me through my journey with chronic Lyme Disease.  Throughout all the months of blogging, I have come into contact with some very extraordinary people, some of which have chosen to support and cheer me on even from the very beginning. My friend Holly Nakashima is one of these gals, and I am over-the-moon excited that she has officially launched her own website – The Common Woman! Being the kind woman that she is, Holly reached out to me with the opportunity to share a couple posts on her site, one being the blueberry tart I made for my family on Easter!  The crust features Anti-Grain sweet potato and apple flour, and utilizes Japanese sweet potato to create a luxurious, creamy filling. As a thank you, I thought it would be perfect to have a little, “Q&A” with Holly, as a way to show my support and spread the word of her new site.  Enjoy!

commonwoman

What lead you to create the Common Woman? 

The Common Woman is a place of vulnerability, honesty, and speaking heartfelt truth.  I strongly believe every woman should have a voice, shake things up, and make impact.  I am creating a loving space where freedom, creativity and woman-hood can evolve and take shape.

Can you explain the exclusive apparel aspect of the Common Woman? 

 Minimalist fashion is my love language and created a life style brand woman can wear that was comfortable and transition from any element.  I made apparel I love and live in, and want woman to join me as we create a community of Healthful Woman-Hood!

Do you follow any specific ways of eating, and if so, why?

Health and self care is my number one since I have lived my adolescent and adult life with several autoimmune diseases.  Autoimmunity does not define me but my biggest surge of healing and health was from adopting a deconstructed Ketonic Paleo Diet and creating a loving environment of self-care.  From these simple principals I was able to put my Hashimotos into remission and am now living a healthful and vibrant life.  I believe anything is possible, love heals all things and “we are community.”


To follow, support, and learn more about Holly’s endeavors, be sure to find her on Facebook, Twitter, Instagram, and on her site, The Common Woman.


1 Corinthians 1:4-5 “I thank my God always concerning you for the grace of God which was given to you by Christ Jesus, 5 that you were enriched in everything by Him in all utterance and all knowledge,”

Filed Under: AIP, apple flour, autoimmune disease, autoimmune friendly, coconut free, Dessert, egg free, nut free, paleo, sweet potato flour, Sweets and Snacks

AIP Paleo Grilled Spaghetti Squash Shrimp Scampi (Low-FODMAP)

June 1, 2015

GrilledSquash

Have you ever grilled spaghetti squash?  If not, today’s recipe will rock your world. All that is needed is a bit of aluminum foil, and you have got yourself a summer friendly meal that doesn’t require turning on the oven for even a minute! While cooking spaghetti squash in the oven, slow-cooker, or even the instant pot (as Eileen from Phoenix Helix does here) is very simple, I was looking for a way that I could prepare it without being inside, heating up the kitchen.  As I have mentioned before, the house we rent at Cape Cod does not have well functioning appliances, therefore leaving me to heavily rely on the grill for the majority of my cooking.  Because of this, I decided to start my experimentation with the grill a few months ahead of schedule, before we left our house for the summer.   At first, I wasn’t sure if the squash would cook properly, and couldn’t help imagining a partially cooked, semi-raw and hard vegetable.  However, the end results couldn’t have been more opposite, as the squash turned out to be the perfect texture and taste.  If you’ve never tried having spaghetti squash in place of noodles, I encourage you to do so, as its tender, naturally sweet flavor pairs well with any topping such as homemade pesto, sloppy joes,  or like today’s dish, a simple shrimp scampi.  Overall, I couldn’t have been more thrilled with how this recipe turned out.  As my father said, the spaghetti squash in particular was “flipping amazing,” and the marinated shrimp, equally so.

IMG_6383_2

Grilled Spaghetti Squash Shrimp Scampi

Print Recipe

(Serves 4-6) 
Spaghetti Ingredients

  • 1 medium-large spaghetti squash
  • 2-3 lemons (cut in half)
  • 1/2 tsp sea salt
  • 2 tbsp avocado oil + more for tossing

Shrimp Ingredients

  • 1 1/2 – 2 lb shrimp (peeled and deveined)
  • 1/4 cup lemon juice
  • 3/4 tsp sea salt
  • 1 tbsp fresh chopped parsley
  • 1/4 cup avocado oil

Process

  • Preheat grill to high.
  • Cut spaghetti squash in half, remove the seeds with a spoon, and place each half on a large sheet of tin foil.
  • Drizzle the inside of each half with avocado oil and sprinkle with salt, then securely wrap the tin foil around each half of squash (you may want to add an extra piece and double wrap them).
  • Place the foil packets on the grill, cover, and all allow to cook for 40 minutes until the squash is tender.
  • Cut the 2-3 lemons in half and place of the grill as well, allowing them to caramelize.
  • After 40 minutes, remove the foil packets from the grill, unwrap, and carefully use a fork to remove the squash into spaghetti like strands.
  • Transfer the cooked squash to a large serving bowl, squeeze caramelized lemons over it, and toss with lemon juice, sea salt to taste, and extra avocado oil.
  • To prepare the shrimp, place the deveined and peeled shrimp in a bowl a long with the lemon juice, sea salt, chopped parsley, and avocado, allowing them to marinate for 30 minutes.
  • Once marinated, heat the grill to high and place the shrimp on metal skewers.
  • After the grill has become hot, place the skewers on the grill and allow to cook 2-3 minutes per side.
  • Remove from the grill, and carefully take the shrimp of the skewers and toss with the prepared spaghetti squash.


Revelations 21:4 “He will wipe every tear from their eyes. There will be no more death’ or mourning or crying or pain, for the old order of things has passed away.”

Filed Under: AIP, autoimmune friendly, coconut free, ketogenic, low carb, paleo, Protein Dishes, seafood, vegetables, Vegetables and Sides

Paleo Autoimmune Protocol Tropical Guava Ice Cream (Fruit Sweetened)

May 30, 2015

GuavaIceCream2

I am super pumped about today’s ice cream.  About a month ago, I came down with highly infected wisdom teeth, putting me out (literally) for about a week until we figured out what the issue was and I got antibiotics.  With my throat and mouth on fire, the only thing that I could tolerate eating were liquids, of which came in the form of PK Protocol shakes, Tin Star Food Ghee (the very best), bone broth, and a few other odd items.  That being said, I couldn’t help myself but have a serious craving for ice cream, as it seemed that would cool the burning inside my mouth.  Therefore, once I got a bit to myself after a few days of healing, I decided to take the previously made guava paste, and make a tropical ice cream for the family.  The real test for this recipe was to see if it would hold its custard-like texture after being in the freezer.  Therefore, while I served the ice cream to my friend right after being churned, we then stuck it in the freezer for 7 hours to see what would happen.  The results were amazing, as not only did the ice cream keep a smooth (not icy) texture, but it scooped perfectly.  I know, it is hard to believe, and most recipes that do not include dairy ingredients tend to get rock hard and simply nothing like real ice cream.  However, I am happy to report that today’s recipe is not the case.  I credit this to the guava paste, as it unlike granulated sugar, and give the mixture a super creamy texture even before being place in the ice cream maker.  That being said, if your ice cream does mis-behave and turn super hard, simply allow it to thaw for 15-30 minutes on the counter before scooping. Overall, my family and friends raved for this ice cream with a tropical flare, and therefore I am certain it will be popping up further in the summer months as well!

IMG_5941_2

Tropical Guava Ice Cream

Print Recipe

(Makes 1 Quart)
Ingredients 

  • 1 cup homemade guava paste + 1/4 cup for swirl (optional)
  • Juice of 1/2 lemon
  • 2, 13.5 oz can full fat coconut milk
  • 1/8th tsp sea salt

Process

  • In a food processor or high speed blender, puree pre-made, 1 cup homemade guava past,lemon juice, coconut milk, and sea salt.
  • Pour the mixture into a mixing bowl and chill in the fridge for at least 3 hours (this stop is optional but yields in a creamier ice cream out of the maker).
  • Once chilled, pour into ice cream maker and churn for 15.
  • After 15 minutes, dollop in remaining 1/4 cup guava paste to make the swirl, and then allow it continue to churn for another 5-10 minutes  until thick and no longer mixing.
  • Serve immediately, or, for a firmer ice cream, store in the freezer for 3-5 hours.


Psalms 56:4 “In God (I will praise His word), In God I have put my trust; I will not fear. What can flesh do to me?”

Filed Under: AIP, autoimmune friendly, dairy free, Dessert, egg free, ice cream, nut free, paleo, Sweets and Snacks, vegan

Paleo Fruit Sweetened Guava Paste (AIP)

May 29, 2015


IMG_58992

If you leave in small town New England like myself, guava is certainly not a fruit that you use, or even see, on a daily basis. However, this did not stop me from picking up a few at a nearby Whole Foods to take home and experiment with.  There are many different types of guava that have been cultivated over the centuries, though the it is thought to have originated from Southern Mexico into (or) through Central America.  It is also very common in other warm climates across the glob, including tropical areas of America, the West Indies, Bahamas, Bermuda, Southern Florida, while also being adopted in Asia, Africa, and India, where the country grows a whopping 27,219 tons per year.  It is through these various cultivations of the guava, that different varieties occur, including Red Malaysian, Lemon Guava, Tropical Pink, Tropical White, Mexican Yellow, and the Apple Guava, of which is the most common in the U.S.   Today’s recipe, which is also known as ‘Dulce De Guayaba” in Spanish, or “Mexican candy” is simply made by cooking down Apple Guava flesh with sugar, letting it set until firm, and then using the paste in both sweet and savory recipes.  While it is typically used as the filling for pastry, or paired with one’s favorite cheese, the possibilities of guava paste are pretty endless. Therefore, while I will be sharing in the future what I made with today’s guava past, I first wanted to show you how to make your own.  Typically, you can find guava past in local ethnic markets, however, more than likely they will be filled with refined sugar and other, unnecessary ingredients.  On the other hand, my version simply uses medjool dates to add natural sweetness and an extra depth of flavor that white cane sugar would otherwise lack.  So, what do you do with guava paste?  Overall, it can be used in a variety of dishes, both savory and sweet.  You can use it as a glaze for grilled chicken or pork tenderloin, make a tart, crumble bars, or as I will be sharing in tomorrow’s post, a tasty tropical ice cream.

IMG_5903

Fruit Sweetened Guava Paste

Print Recipe

Ingredients

  • 2 lb fresh guava
  • 4-5 cups of water
  • 20 medjool dates (1 1/4 cups)

Process

  • Cut each guava into 4 chunks, then place the chunks in a large sauce pan and fill with water until just covered.
  • Place the pan on the stove and allow the mixture to come to a boil, then turn down to medium-low and allow to cook for simmer for 15-20 minutes until fork tender.
  • Drain the guava and place in a blender or food processor, blending until smooth, then straining through a fine mesh sieve into a large measuring bowl (you should have about 3 cups of strained guava mixture).
  • Place the strained guava mixture back in the large sauce pan, a long with 20, pitted and roughly chopped medjool dates.
  • Heat the mixture on medium till bubbling and popping, then turn the heat to low, allowing the mixture to lightly cook for 20-25 until thick, stirring every now and then to ensure the sugars don’t burn to the bottom of the pan. *You will know it is thick enough when you can draw a line through the mixture with the edge of a spatula and it stays.
  • Transfer the mixture to the blender or food processor once more, blending until smooth.
    scoop the mixture into a large mason jar or glass container and allow to cool completely before using.

Recipe Notes

See my Tropical Ice Cream that uses this guava paste, here.


Psalms 103:17-18 “But the mercy of the Lord is from everlasting to everlasting On those who fear Him, And His righteousness to children’s children, To such as keep His covenant, And to those who remember His commandments to do them”


Filed Under: autoimmune, autoimmune friendly, candy, dairy free, Dessert, egg free, gluten free, ice cream, no bake, nut free, Sweets and Snacks Tagged With: coconut free, fruit, grain free, guava, guava paste, nut free, Paleo, primal, vegan

Review: AIP Paleo Cajun Cookbook by Tara Perillo + A GIVEAWAY

May 26, 2015

AIPPCCiPadcoverYes, another cookbook in the world of AIP.  What sets this one apart from the rest?  It is Cajun.  Throughout the past year of beginning a blog, I have been blessed with the opportunity to come into contact with many amazing women who are fighting back for their health in similar ways as myself.  Tara, from The Paleo Cajun Lady, is one of these ladies, whom I just so happened to meet up with at the Paleof(x) conference in Austin this past April.  Tara has always inspired me, aside from her knowledge in the field of health, she can speak five languages, and has studied various self defense systems, including jitsu, judo, krav maga, and jiu…How cool is that?!  Not to mention, she is also very talented in the kitchen.

The AIP Paleo Cajun Lady Cookbook

Once you figure out all the “ins” and “outs” eating Paleo is rather simple, as all one must really do is eat foods that don’t have an ingredient list, are edible straight from the land or sea, and ultimately are items that were not cultivated to support society at the dawn of civilization (i.e. grains, sugar, legumes, processed food, etc…).  Yet if you are anything like me, you still like food with a creative flare, or in other words, “ethnic food.”  There is no saying that Paleo food cannot be this way, and Tara Perillo is forging the way and proving just that with her new E-book, “The AIP Paleo Cajun Lady Cookbook.” What makes Tara’s book extra special, is that it is autoimmune-friendly, meaning that she delivers a variety of cajun recipes without the common nightshade vegetables, seed-based spices, nuts, and eggs. If you are unfamiliar with what, exactly “cajun” cuisine refers to, it is said to originate from a mixture of Canadian, French, African, and Native American cooking.  However, it is said that Louisiana, USA, is the “hub” of Cajun cooking, which is precisely where Tara Parillo grew up, a long side her grandfather who had a boat named “Cajun Lady,” hence the name of her book.  Much like many individuals who find the autoimmune-protocol by Dr. Sarah Ballantyne, Tara was able to use the protocol to heal her autoimmune conditions and“reconnect with the lifestyle she was born to live.”

AIP-Shrimp-Boil1-1024x617

An Overview

The AIP Paleo Cajun Lady Cookbook starts of with a short history and introduction of Tara herself, followed by an easy-to-read list of foods to include in their healing journey.  What I enjoyed is that Tara does not harp, or even mention, foods that are not allowed on the protocol.  In a way, this makes it easier for individuals memorize and expand on those that they can cook with and eat, while also making it less overwhelming. Sections in the cookbook include soups, salads, sauces, meats, seafood, sides, sweets, drinks, and last but not least, tips and tricks, AIP resources, and a recipe index for quick and easy searching.  Together, there are 63 autoimmune-friendly, cajun recipes, of which all include links to the ingredients that are used throughout the cookbook.   Outside from the simple layout, all of the recipes fit on one page.  What does this mean?  It means that everything Tara shares is no-fuss, and available to anyone who is simply looking for flavorful dishes to fill their stomach and heal their body. Cheesy Cauli-Grits, Fried Okra, Maple Cinnamon Ice Cream, Sweet Potato Coconut Crisps, Stuffed Mushrooms, and Crispy Pork Belly, what is not to love? It is both a cajun and all-things food lovers dream! While my family had yet to ever have okra, Tara’s shrimp gumbo completely won them over.   To learn more and support Tara, you can find her at her site The Paleo Cajun Lady, or through social media channels Instagram and Facebook.  Also, for your chance to win a copy of The AIP Paleo Cajun Cookbook, enter in the giveaway below! (Open worldwide – ends June 2nd) 

a Rafflecopter giveaway

John 3:17 “For God did not send His Son into the world to condemn the world, but that the world through Him might be saved.”

Filed Under: AIP & Paleo Reviews, Uncategorized

Paleo Autoimmune Protocol Cantaloupe Cucumber Salsa (Low-FODMAP)

May 25, 2015

IMG_4420

Light and refreshing, today’s salsa recipe is the perfect addition to any meal to spring or summer.

After writing up a post on FODMAPs, and also eating low-FODMAP myself as a way to heal my GI tract, I wanted to share a few recipes that proved just how tasty eating without the common fermentable carbohydrates could be.  In fact, this salsa just so happens to pair perfectly with my Plantain Tortilla Chips as a crunchy appetizer or snack.  My parents had the pleasure of having the cantaloupe and cucumber salsa on many of their daily dishes.  This included on salad, with homemade chicken fingers, and as a side over some fried fish.  Truly, how you chose to serve the salsa is very versatile, as it is subtle enough in flavor to blend well with most all dishes, yet undoubtedly can brighten up any dish.

IMG_4423

Cantaloupe and Cucumber Salsa

Print Recipe

(Serves 4-6)
Ingredients

  • 3 cups cantaloupe chunks
  • 1 1/2 cups English cucumber
  • 1 tsp sea salt
  • 1 cup lightly packed cilantro
  • 1/4 cup avocado oil
  • 2 limes – juiced
  • 1/4 cup chopped green onion

Process 

  • Cut the cantaloupe in half, scrape out the seeds, shave the skin off, and cut into 1/4 inch cube sized chunks.
  • Peel cucumber, cut in half, then cut into further slices, and chop the slices into 1/4 inch cube-sized chunks similar to that of the cantaloupe.
  • Lightly chop the cilantro leaves, juice the limes, chop the green onion into small slivers, and place all of the items in a large mixing bowl.
  • Mix in sea salt and avocado oil to the bowl.
  • Add in chopped cantaloupe and cucumber, tossing until the ingredients are evenly incorporated with each other.

Recipe Notes

Olive oil also works great in place of avocado.

James 1:19 “So then, my beloved brethren, let every man be swift to hear, slow to speak, slow to wrath”

Filed Under: AIP, autoimmune, autoimmune friendly, condiments, Condiments and Sauces, grain free, ketogenic, no bake, paleo, vegetables, Vegetables and Sides

Paleo Autoimmune Protocol Sweet Cinnamon Tigernut Granola (Coconut-Free)

May 23, 2015


TigernutGranolaAIP

My previously posted tigernut granola seemed to be pretty well received.  However, much like many of my other recipes, I strive to make them adaptable to those who do not do well with coconut products like myself.  I have also come across individuals who do not do well with foods in the banana family, therefore, making a granola recipe without these two ingredients became my goal.  That being said, it was not until my good friend Audrea brought my attention to a new Paleo granola she picked up at her local food market that I knew what I would replace the coconut and banana with.  Though sweet potato may sound like an odd addition, it makes for a truly delicious granola.  Because it is naturally sweet, I chose to use apple sauce as the sweetener instead of maple syrup like my previous recipe.  However, if your taste buds are still not accustomed to slightly sweetened “sweets,” by all means replace the apple sauce with raw honey or maple syrup.  Instead of currents, I chose to use dried blueberries as a fun addition to the granola, as it gives it an overall “summer” feel.  I imagine this recipe could easily be turned into carrot cake flavor, with the simple substitution for shredded carrots in place of the sweet potato, and raisins for the blueberries.  All in all, I am thrilled with how this granola turned out, and just had to send it to another one of my dear friends for her approval and pleasure!  Overall, we both came to the conclusion that compared to my first version of tigernut granola, it is definitely more “earthy crunchy,” yet still equally delicious.

IMG_6229

Sweet Cinnamon Tigernut Granola

Print Recipe

Ingredients

  • 1 cup whole tigernuts
  • 2 cups shredded sweet potato
  • 1/2 cup apple sauce
  • 1/4 cup non-hydrogenated palm shortening 
  • 1 tsp ground cinnamon
  • 1/2 tsp sea salt
  • 1/2 cup dried blueberries

Process

  • Place tigernuts in a small mason jar, cover with cold water, and allow to soak anywhere from 6-48 hours (the longer, the softer and more “plump” they will become – if soaking 48 hrs, change water at 24 hours)
  • Once the tigernuts have soaked, shred your sweet potato in a food processor, and transfer to a mixing bowl for later use.
  • Switch the shredder blade to the “s” blade, and pulverize the soaked tigernuts until chopped up.
  • Add the sweet potato back in and pulse a few times until everything is combined.
  • Pour the mixture back into the mixing bowl and fold in the cinnamon, sea salt, and blueberries.
  • Add in the applesauce and melted non-hydrogenated palm shortening, and mix until well combined.
  • Preheat the oven to 300 degrees.
  • Transfer the mixture to a parchment lined baking sheet and spread out evenly to all four corners of the sheet.
  • Place in the preheated oven and bake for 45 minutes, then turn the oven up to 400 degrees, and bake for 7 more minutes until brown and crisp around the edges.
  • Remove the granola from the oven and allow to cool, then transfer to a mason jar and eat as desired.

Recipe Notes

See more original tigernut granola recipe here


Galatians 5:13 “For you, brethren, have been called to liberty; only do not use liberty as an opportunity for the flesh, but through love serve one another.”

Filed Under: AIP, autoimmune friendly, breakfast, coconut free, dairy free, egg free, nut free, paleo, Sweets and Snacks, tigernuts, vegetables

Daily Dose of Encouragement: Prayer

May 22, 2015


DailyDoseEncouragement

One of the greatest gifts from God that we humans have is prayer.  While I grew up in a Christian home, always said prayers before every meal, before bed, and occasionally when a crisis arose, it was not until I began my battle with chronic Lyme Disease that I truly learned the power of prayer.  Whether in moments of desperation, or thankfulness, praying has become an aspect of my daily life that I simply could not live without.  I remember many times where I was too weak to get up from my bed and take my weekly bath.  It was during these moments where I found my own physical being to be completely powerless, that the omnipotent aspect of Christ became completely evident.  While I laid in a hospital bed alone, confined in a room where I was accused of being a liar, for making my illness up in my head, ignored when asking if certain tests could be done, and forced to do things that only damaged my deteriorated body further, I learned to confide in God through prayer.  When the doctors can’t seem to come up with any answers on why my body is like it is, and when my parents have no words that would make things “right,” prayer has, and still does, give me direct communication with the One who knows all things. Through all of the excruciating pain, moments of collapsing to the floor in utter weakness, inability to walk, stand, or even sit upright, prayer is available.  Whether the few minutes before being put under for various major surgeries, or simply sitting alone in my room trying to make the minutes pass, prayer has become a stronghold.  Yet I am not boasting in this, no, prayer is available to all, and it can become the same  for you as well.

PrayerDD

When everything here on this earth may seem as though it has been striped away from you, never to return, there is one thing that can never be taken, and that is prayer.  So why pray?  For one it connects you to the One that has put you in a given circumstance in the first place.  It allows your soul to be filled with strength, courage, peace, hope, comfort, and even joy in the most inhumane conditions. While God may know all things, this does not mean that He doesn’t want His children to keep our request from Him.  In fact, He commands us in His word to “pray without ceasing” (1 Thessalonians 5:16-18). While praying before meals, before falling asleep, or during our devotion time that we have set apart is very important, prayer is not meant to be “scheduled,” nor is it supposed to be structured or follow a certain repetition of thoughts you have been taught to be “acceptable” to ask or talk to God about.  No, you can bring anything and everything to God.  Your darkest fears, deepest “secrets,” the good, the bad, the ugly.  You don’t have to act perfect, rather you can discuss both your struggles and desires openly.  Yet if we neglect this act of communication with God, our world becomes like a whirlwind.  Suddenly everything becomes overwhelming, we feel hopeless and helpless.  As George Mueller writes in his autobiography, “If I desire more power over temptations, wisdom, grace, or anything else that I may need in service for my God, what else should I do but make use of my fellowship with the Father and with the Son?  By prayer and faith, we may obtain necessary temporal and spiritual help and blessings.” “In all simplicity, we can pour out our hearts before God.”  “Then we have to believe He will give us according to our need.” Overall, real, unrestrained prayer takes courage, and sometimes, may very well evoke hidden emotions.  Why?  Because if we are truly asking God everything He says He is capable of, we are inevitably stepping out of our comfort zone,  recognizing our inadequacy, God’s sovereignty, and ultimately having faith in the limitless abilities of our Creator (Hebrews 11:1).

Psalms 145:18 “The LORD is near to all them that call on him, to all that call on him in truth.”

Filed Under: chronic illness, chronic lyme, daily dose of encouragement, Personal Experiences

Chronic Lyme Disease and Paleo: Victoria Faling of Lemons’N Lyme

May 19, 2015

cropped-B1For the past couple of months I have been working away hard at Beyond the Bite Community. Essentially, this group is for those with chronic Lyme Disease to connect, inspire, and encourage one another that there is life beyond Lyme! While I have yet to write up a post and “announce” this community on Beyond the Bite, I thought that highlighting some of the members during the month of May (i.e Lyme Disease Awareness month), would be a great way to share what we in BTBC are all about! As you can read here, the three pillars of Beyond the Bite Community are paleo, prayer, and perseverance.  It is not a place that individuals dwell on one’s illness, rather how we can use these three concepts to overcome our current circumstances and live a healthy, joy filled life. Today’s guest post serves as just that, as I chose to have Victoria Faling from the blog Lemons ‘N Lyme share a bit about her story.  You can view the community site here, where I share some of the information posted in the exclusive, weekly newsletter that is sent out to all community members.

Victoria’s Story

Hi, I’m Victoria! Some of you may already know me from my blog Lemons ‘N Lyme. I’ve had Lyme for over 10 years but was not diagnosed until 3 years ago. I’m 24 and currently living in Santa Fe, NM. I grew up in Washington DC (where I contracted Lyme) and went to college in Colorado. I’ve been through it all in my Lyme journey from many mis-diagnoses, to every oral antibiotic and anti malarial you can think of, to IV medication, to mold and heavy metal treatments, to herbal protocols, and now focusing on a very holistic and well rounded approach to healing. Although I am still going through treatment, I’m at a point where I can work and lead a relatively productive life. I still have some progress to make, though!

Victoria2

I have been lucky enough to find a fantastic doctor who treats for Lyme here in Santa Fe. We are focusing on building my system back up and supporting every aspect of my body. I’m currently taking many supplements, Byron White formulas for Lyme and Babesia, completing UVBI treatments and an array of other IV therapies (phosphatidyl choline, Meyers cocktails, glutathione pushes), and have just added in low dose immunotherapy for Lyme and co-infections. I also focus heavily on detoxing which includes green juices every day, detox teas, dry brushing, using my far-infrared sauna, detox baths, and castor oil packs (when I have time!).  My doctor also believes diet plays a huge role in healing, just as I do! I actually discovered the paleo way of eating a few months before I got very sick 3 years ago. I was dealing with a bad bout of candida and discovered paleo as a way to help treat the candida. I had suffered with gut issues since I was in high school (my first major Lyme symptom) and adapting a more paleo diet began to help for the first time in years! The constant bloating decreased, I actually started eating during the day (I would go all day without eating because it made me feel so sick and so bloated that I would not want to move), and my digestive system felt less stressed. I was astonished and began researching as much as I could. I connected with all of the information I read, it made so much sense that I decided to continue with paleo eating even after the initial 30 days (Whole 30).  Then, when I first fell extremely ill with Lyme I fell off the paleo wagon because I did not know what was going on, was exhausted, had horrible cravings, and was very depressed so I just didn’t care. Once I got my Lyme diagnosis and began treatment, I knew I needed to get my diet back in line. This is when I started my blog, as a way to document my treatment and the recipes I tried and developed. I have always been interested in health and I knew food played a huge role so now that I understood what was going on inside my diseased body, I knew I had to make an effort to improve my healing with food.

Victoria

Over the past three years, my research on the connection between diet and disease and health continued. The more I learned the more excited and fascinated I became with using food to heal. Last year, when I completely relapsed after coming off of IV medication, I turned to juicing and a raw food diet. I truly believe in the power of a raw food diet as much as I believe in paleo. I basically ate paleo-raw (although did include some sprouted grains). My gut was a mess from antibiotics and juicing finally allowed my system to absorb nutrients easily. I began juicing 3x a day and now I continue to juice to improve and maintain my health. Green juice is excellent for detoxing, boosting energy, and cleansing your system, so I still am able to enjoy the benefits of juice.  Constitutionally, I believe my body does need some animal protein and I feel better when I include it in my diet, so I transitioned from less of a raw diet back into paleo and eating more meat again. My diet now consists of NO grains, legumes, dairy, processed sugar, minimal natural sugars (I try and avoid most fruit but I have a BIG sweet tooth and I do use honey occasionally). I focus on eating as many vegetables as I can, include meat (I try to only buy free-range and organic), and lots of healthy fats (coconut oil, avocado, some nuts and seeds). I eat almost 100% organic since the pesticides in conventional food are extremely harmful and can make us sick! I think the phrase “Let Food Be They Medicine” (Hippocrates) could not be more true! As soon as I slip on my paleo way of eating, I feel it. If I eat anything “non-paleo” I immediately become extremely bloated, feel hung-over, have horrible stomach pain, and many of my Lyme symptoms flair for the next 1-5 days. This is how I know that my diet has a huge impact on the way I feel and my healing. When I stick to a 100% paleo diet, I feel almost normal again- my symptoms decrease dramatically, I have more energy, my digestive system bothers meless, and I’m in a way better mood. I’m still constantly learning about nutrition and healing and plan to continue to do so for the rest of my life. I make small tweaks in my diet as I learn new information but I know that I will stick to the general paleo style of eating for the rest of my life. I have played around with variations of paleo, including autoimmune paleo (AIP) and cutting out nightshades. Although I am not following AIP 100% at the moment, I have discovered some, normally paleo, foods that cause major symptoms for me through testing out AIP. I love food so it can be tough at times to know I can’t taste or eat certain things, but that is what allows me to be creative in the kitchen and develop recipes that work with my diet and still allow me to heal. 

Connect with Victoria on Facebook and Instagram, or on her site Lemons’N Lyme

Zephaniah 3:17 “The Lord your God is with you, the Mighty Warrior who saves. He will take great delight in you; in his love he will no longer rebuke you, but will rejoice over you with singing.”

Filed Under: AIP, beyond the bite community, chronic illness, chronic lyme, chronic lyme disease, Personal Experiences Tagged With: beyond the bite community, chronic lyme

Single Serving Paleo Braised Lamb Shank (AIP)

May 18, 2015

IMG_5997

Rarely do I upload a recipe to my blog the day of making it. Usually, it takes a few days for me to get everything together, write up my thoughts, and then put it in my lineup for future posts. However, this lamb shank recipe was too good not to share almost immediately. As someone who has to a variety of different ways to heal from the effects of Chronic Lyme Disease, it was not long into my illness that I took over preparing my own meals, as a way to take away any extra stress from my mother creating two completely different dishes every.single.meal. Subsequently, this causes most everything I make to be single servings, as I cannot eat leftovers due to a histamine-induced allergic response when I eat foods too close together. Cooking for one can be tricky and I’m often tempted to just get meal delivery for one person, but it’s important to also learn a few basic recipes that you can do yourself. Today’s recipe is completely mouthwatering. If you are not familiar with the term “braised,” it is when a cut of meat is seared in a hot pan or pot until brown, then water, stock, or some other type of liquid is added to the pan, it is covered, and the protein is allowed to cook at a slow, low temperature until it is practically falling apart. This lamb shank is no exception, as 2 hours in the oven produced succulent, tender meat, that was salty, a bit sweet, and completely mind blowing delicious. Not only does the meat become to-die-for, but because you are cooking the bone in liquid, the end result is a sticky, sweet, and gelatinous mixture, almost like a roux (minus the flour). In the end, I couldn’t be more happy, and to be honest, a bit surprised on how tasty this lamb shank turned out, despite the rather simple ingredients used. Whether you are a single gal like myself, or are simply trying to save money, you must make this recipe! What is even greater, is that if you are looking to serve more than one person, doubling, tripling, or even quadrupling the ingredients is as easy as pie.

IMG_6011

Braised Lamb Shank (Single Serving)

Print Recipe

Ingredients

  • 1 lamb shank (0.5-0.75 oz)
  • 2 cup chicken broth (or) water
  • 1 1/2 tsp sea salt
  • 1/2 tsp ground cinnamon
  • 1 tbsp maple syrup
  • 1 dried bay leaf
  • 1 tsp apple cider vinegar
  • 2 tbsp grass-fed tallow

Process

  • Preheat the oven to 350 degrees.
  • In medium sized pan (or) dutch over, heat tallow on medium-low until hot.
  • Season lamb shank all over with 1/2 tsp sea salt and then place in the pan, searing on all sides until crispy and brown (about 5-7 minutes per side).
  • In a small bowl, combine broth (or) water, remaining 1 tsp sea salt, cinnamon, maple syrup, and apple cider vinegar.
  • Once the shank has fully browned, remove the pot from the stove and add in the chicken broth mixture, drop the bay leaf in, and cover the pot.
  • Place the pot in the preheated oven to bake for 2 hours until the lamb is falling off of the bone.


Romans 11:33 “Oh, the depth of the riches of the wisdom and knowledge of God! How unsearchable his judgments, and his paths beyond tracing out!”

Filed Under: autoimmune friendly, autoimmune paleo, lamb, meat, paleo, Protein Dishes Tagged With: aip, Dinner, ketogenic, lamb, single serving

Paleo Raspberry Acai Smoothie Bowl (Dairy-Free): A Guest Post by Macy of Paleo Crumbs

May 13, 2015


unnamed-1

Blogging has opened up a whole other world of individuals with similar interests like myself, and I absolutely love it!  One of these lovely ladies is Macy, the blogger behind Paleo Crumbs.  Not only isMacy a fantastic baker and paleo-foodie, but she is also a follow of Christ, of which makes our friendship extra special.  After meeting up at Paleof(x) just last month, both of us decided it would be fun to guest post on each others blogs, on the same day.  While you can find my Autoimmune-Paleo Veggie Bacon Bites on her site, I hope you will enjoy Macy’s equally fun and delicious take on the typical smoothie.  You can reach Macy through her blog, Paleo Crumbs, as well as through Facebook, Pinterest, Twitter, and Instagram.

IMG_6318_2

Hi everyone! I’m Macy the blogger from Paleo Crumbs! And I am so excited to be guest posting on Gabriella’s blog today! Gabriella and I quickly became friends with our shared love for being in the kitchen, living with a chronic illness, and being teen foodie bloggers, as well as just having a passion for real food! I am so glad to have met Gabriella in this blogging community and was glad to get the chance to meet her in person at Paleo f(x) this year! We have been talking about doing this guest post/ recipe swap for a while now and I am so excited to share this recipe with you!  I make smoothies pretty much daily as they are easy to digest for my stomach, so I love trying out new smoothie recipes and getting creative with my own! Smoothie bowls are pretty much just another fun way to eat a smoothie but thicker and eaten with a spoon instead of through a straw! But the real fun part is the toppings!  Once you make your smoothie and pour it into your favorite bowl, top it with fresh fruit, grain free granola, shredded coconut, hemp seeds, or whatever your heart desires! And get creative and make your smoothie bowl a piece of art by arranging your fruit and toppings in fun ways! If you are like me and just prefer to enjoy your smoothie with a straw, just skip the toppings step and use more liquid while blending! Have fun making your smoothie bowl art and enjoy! And, thanks, Gabriella, for inviting me to share this recipe on your blog! 😀

unnamed-2

Raspberry Acai Smoothie Bowl (dairy free & paleo)

Print Recipe

By: Macy Diulus
(Serves: 1)
Time: 5 min.
Ingredients

  • 1/3 cup raspberries, frozen
  • ½ frozen acai packet
  • ½ cup organic baby spinach
  • ½ banana, frozen
  • 4-6 chunks of frozen mango
  • ½ cup maple water (or coconut water)
  • 1 tbsp. coconut oil
  • 1 tbsp. hemp seeds
  • ½ – 1 tbsp collagen
  • 1 tsp. chia seeds

Topping ideas

  • Fresh fruit and berries
  • Hemp seeds
  •  Chia seeds
  •  Grain free granola
  •  Shredded coconut
  •  Nut/seed butter

Process 

  • In a blender (preferably high-speed) blend together all the ingredients until smooth and creamy. Pour into a bowl and top with desired toppings! Eat with a spoon and enjoy!

Recipe Notes

Generally, smoothie bowls are a thicker consistency, but if you prefer them to be thinner or want to drink this with a straw, just blend with more maple water to reach your desired consistency.
Use organic produce when possible.
Frozen fruit and fresh fruit can be subbed interchangeably, but frozen fruit produces a thicker and colder smoothie!
Maple water can easily be subbed for coconut water!
Frozen acai packets can be found in the frozen fruit section of most grocery stores, if you aren’t able to find it, just use more berries!


Proverbs 31:30 “Charm is deceptive, and beauty is fleeting; but a woman who fears the Lord is to be praised.”

Filed Under: dairy free, drinks, egg free, no bake, paleo, Sweets and Snacks

Paleo Autoimmune Protocol Sea Salt and Vinegar Rutabaga Fries

May 12, 2015


RutabagaFries

There are some dishes that never stop being a classic.  Sea salt and vinegar chips are always something that reminds me of the summertime fair that is held in a few towns over from where I live, of which my brothers and I would attend one day out of the year.  Though those fries are cooked in damaged oils and made with potatoes, I sought to replicate this delicious flavor combination with the use of rutabaga,  a rather underused, under appreciated root vegetable. If you have never cooked with rutabaga, they are a bit like turnips in that their water content is higher than that of a starchy vegetable such as sweet potatoes or parsnips.  That being said, they are certainly not as pungent as turnips, and a lot easier to love. Though we Americans call them rutabagas, the vegetable is typically known as “swedes” around the world.  Because they are likened to turnips, my mother was not entirely sure I could make something that would fit her fancy.  However, as I was sprinkling on the truffle salt, I instantly new that I had her.  In the end, the fries turned out amazing, and even my parents said so themselves as they ate away.

IMG_5850 2

Sea Salt and Vinegar Rutabaga Fries

Print Recipe

(Serves 4-6)
Ingredients

  • 1 lb rutabaga
  • 1/2 cup apple cider vinegar
  • 1 tbsp sea salt
  • 1/4 cup avocado oil
  • 1/2 tsp truffle salt
  • Fresh rosemary (optional)

Process

  • Peel rutabaga, and cut into match stick sized fries.
  • Place the chopped rutabaga in a shallow bowl and toss with sea salt and vinegar
  • Cover the bowl with plastic wrap, and allow to sit in the fridge for 1-2 hours.
  • Preheat oven to 425 degrees.
  • After the rutabaga has marinated, remove from the bowl and place on a large baking sheet, and pat dry with paper towels.
  • Toss the fries with avocado oil and truffle salt, and place in the preheated oven to bake for 35-40 minutes until beginning to brown around the edges.
  • Remove from the oven and sprinkle with fresh chopped rosemary if desired.


 Ephesians 4:32 “Be kind and compassionate to one another, forgiving each other, just as in Christ God forgave you.”

Filed Under: AIP, autoimmune friendly, autoimmune paleo, ketogenic, low carb, vegan, vegetables, Vegetables and Sides Tagged With: fries, Paleo, primal, rutabaga, sea salt and vinegar

Paleo Autoimmune Protocol Cookbook Review: Nourish by Rachael Bryant

May 11, 2015

IMG_6041

This past month, Rachael Bryant of the blog “Meatified,” came out with her very own book, of which she was so kind to send me.  So far, my family and I have made quite a few dishes from Nourish, and truly don’t plan on stop anytime soon. After quickly flipping through the pages of Rachael Bryant’s cookbook, I then went through and slowly read through each and every recipe, deciding with my mother which ones we could add to the weekly menu.  Overall, there were so many recipes that we already had the ingredients for, that it was not hard to get started right away trying the recipes.

Nourish

Though all cookbooks that we have are amazing, and certainly useful when trying to come up with meals during the weeks, my mother typically already has the meals already planned out.  Therefore, if I come to her saying I would like to change things up, it can be a bit stressful.  However, this was not the case with Nourish, as all of the recipes were right in my mother and I’s wheel house, whether due to the ingredients, or simply the flavor combinations being what we naturally steered towards.  I decided to first make the asparagus with creamy apple dressing, of which my brother thought was cheese, and therefore was actually a bit jealous of my father’s dinner plate.  That being said, both of my parents thoroughly enjoyed the dish, and we have been using the dressing to dress our salads throughout the week.  Next up, we made the carrot parsnip salad, of which we served a long side some grilled chicken.  My mother thought it was certainly a dish that would be great served on a hot summer night, something that we are all looking forward too. With this past weekend being Mother’s Day, I wanted to make a special meal for my mother, where she did not have to do any of the cooking.  Because she likes anything related to Mexican food, I chose to make the chicken tacos with blueberry salsa.  Both our dinner guest and family members loved the flavor combinations, including the one year old.  Despite making a triple recipe, everything was quickly eating.  While my family enjoyed many of the recipes, I decided to try out one that I knew non one else would volunteer for – crispy fried sardine salad.  Overall, I thought it was delicious, and definitely a nice way to change up how I typically eat sardines (i.e. right out of a can).  It would also be a recipe fantastic for those looking to introduce sardines into their life, and are a bit hesitant at the thought.

MeatifiedRecipeCollage

What I especially love about Nourish, is that despite being a cookbook directed towards those on the Autoimmune Protocol, it is also very friendly for other modifications of Paleo, including Ketogenic, which is currently how I must eat for the PK Protocol (a protocol for Chronic Lyme).  Therefore, while some recipes may be off limits due to being higher in carbohydrates than my body can tolerate at the moment, there is a wide variety of recipes that I can (and will) be making for myself, such as the beef tongue collard wraps.  Rachel’s book also features some creative ideas for flavoring agents when cooking, such as the infused sea salts.  In all seriousness, you would think you had bought the salts at a speciality store, but no, you can make them at home in absolutely no time, taking an otherwise simple meal into a flavor wonderland.  Overall, Nourish by Rachael Bryant is a diverse cookbook filled with accessible, family-friendly, yet nutrient-dense, creative (but not foreign), recipes that the entire family will love.  If I had to rate it, I would most certainly give it five golden stars!

A Sneak Peak

Pan Fried Sardines (Recipe Featured in Nourish)

Print Recipe

(Serves 4)

Ingredients 

  • 2 limes
  • 1 tbsp (15 ml) coconut or avocado oil
  • 4 cloves garlic, minced
  • 4 (3.75 [106 g]) cans of Brisling sardines in olive oil, drained
  • ¼ cup (10 g) fresh cilantro leaves, chopped
  • ¼ cup (10 g) fresh mint leaves, chopped
  • 1 ½ tbsp. (14 g) salted capers
  • 4 cups (100 g) arugula
  • ½ oz (15 g) crushed pork rinds

WARM: 

  • Zest and juice the limes, reserving both the zest and the juice for later. Heat the oil in a skillet over low-medium heat. Add the garlic and cook until softened and fragrant, about a minute. Pour in the lime juice and cook until it bubbles and reduces a little, about a minute. Add the drained sardines to the pan and stir them through the oil to coat. Cook until the sardines are warmed through, another 2-3 minutes.

TOSS:

  •  Remove the pan from the heat and add the lime zest, cilantro, mint and capers, tossing to combine. Divide the arugula between plates and top the leaves with the pan-fried sardines. Sprinkle the crushed pork rinds on top and serve immediately!


Exodus 15:13 “You in Your mercy have led forth The people whom You have redeemed; You have guided them in Your strength To Your holy habitation.”

Filed Under: AIP, AIP & Paleo Reviews, autoimmune paleo, egg free, no bake, paleo, Protein Dishes, seafood Tagged With: book review, cookbook, grain free, nourish, rachael bryant

Paleo Autoimmune Protocol Strawberry Peach Hand Pies (Coconut Free)

May 8, 2015

I love being creative in the kitchen.  Of course, this most likely will not come to a surprise to many of you who follow Beyond the Bite.   However, I truly do love seeing how different ingredients work together, or in some cases, don’t work together at all.  Today’s recipe features Organic Gemini tigernut flour, and Anti-Grain apple flour, two companies that I have come to support 100%, not simply because of their products, but because of the genuine individuals that are behind the companies.  As for today’s hand pies, I wanted to challenge myself a bit further than the average AIP, coconut-free cookie that I would typically post (though I seriously cannot get enough of making the various types of cookies using autoimmune-friendly ingredients).  My father thought they were “fantastic,” and that the filling was “absolutely amazing.”   Much to his surprise, they were not made out of almond flour, but rather apple and tigernut, a tasty combination that makes for a soft, lightly sweetened crust.  My parents especially liked the combination of strawberry and peach, as it’s natural sweetness of the fresh  fruit explode in their mouth.  Of course, if you do not have fresh fruit on hand, feel free to use frozen varieties, as long as that they are thoroughly thawed and drained before put into the pies, as this will undoubtedly make them soggy.  If you do not have tigernut or apple flour, make sure to check out my other pie crust of which I based today’s recipe off of, here.  Also, you are able to eat nuts, go ahead and use almond flour.  Overall, the beauty of hand pies is that they do not have to be absolutely perfect.  Rather, they are unique and different according to the hands that prepare them.  All that is needed is a little love and patience, and you will end up with a dessert that  is absolutely scrumptious, not to mention in the perfect, individual portions, which makes them even better for this week’s Mothers Day!

SPHandpies

Strawberry Peach Hand Pies

Print Recipe

(Makes 6-8 Individual Pies) 
Crust

  • 1 cup tigernut flour
  • 1 cup Anti-grain apple flour
  • 1/2 tsp sea salt
  • 2 tbsp maple sugar
  • 1/2 cup pureed green plantain (from 1 plantain)
  • 1/2 cup cold lard
  • 3-4 tbsp cold water

Filling

  • 1 cup fresh chopped strawberry
  • 1 cup chopped fresh peach
  • 2 tbsp arrowroot flour (plus more for dusting)
  • 2 tbsp maple sugar
  • 1 tsp vanilla extract
  • 1/4 tsp sea salt
  • 1/4 tsp ground cinnamon
  • 2 tbsp lard – melted

Process

  • In a food processor puree 1 green plantain, transfer mixture to a bowl once blended smooth, and set aside for later use.
  • Back in the food processor, pulse together the tigernut flour, apple flour, sea salt, maple sugar, and 1/2 cup pureed green plantain.
  • Once crumbly, pulse in lard one tbsp at a time, then the cold water, until a ball of dough has just begun to form.
  • Transfer the dough to plastic wrap, form into a flat circle, and wrap up, allowing to chill in the fridge for at least 1 hour.
  • To make the filling, chop fresh strawberry and peaches into like-size chunks.
  • Place the fruit in a bowl and mix together with the arrowroot flour, maple sugar, vanilla, sea salt, and ground cinnamon.
  • Once the dough has chilled, flour your work space with arrowroot flour, and roll the dough out to about 1/4 inch thick rectangle.
  • Use a circular cut-out (such as a biscuit cutter, or the top of a mason jar)  to cut an even amount of dough circles, transferring them to a parchment lined baking sheet. *Repeat with dough until all is used up.
  • Next, spoon 1 tbsp of the filling into the center of half of the prepared circles, use your fingers to rim the bottom circle with melted lard, and  then lightly place a second circle of dough on top of each filled pie, lightly pressing down the edges with your fingers.
  • Use a fork to create a textured boarder around the rim of each pie, and then use a knife to slit a criss cross in the top of each pie.
  • Brush the tops of each pie lightly with remaining lard, and then place the baking sheet in the freezer for 15 minutes.
  • Preheat the oven to 350 degrees, and once the pies are done chilling for 15 minutes, bake them for 20-25 minutes until lightly golden.
  • Remove the baking sheet from the oven and allow the pies to cool at the least, 10 minutes, for serving.

Recipes Notes

For another pie crust alternative to today’s recipe, click here.
You can fill your pies with whatever you like, just be aware of the water content of the fruit you choose.
You are used to low-sugar treats, simply omit the maple sugar that is used in the filling.
If you can eat egg yolks, use a beaten egg yolk in place of the lard for both sealing and brushing the pies.


Colossians 4:5-6 “Be wise in the way you act toward outsiders; make the most of every opportunity. Let your conversation be always full of grace, seasoned with salt, so that you may know how to answer everyone.”

Filed Under: AIP, apple flour, autoimmune, autoimmune friendly, autoimmune paleo, coconut free, dairy free, Dessert, egg free, gluten free, grain free, paleo, plantains, Sweets and Snacks, tigernut flour Tagged With: 1 john 3:11, apple flour, coconut free, egg free, grain free, hand pies, lard, maple sugar, nut free, Paleo, peach, plantain, primal, strawberry, tigernut flour

Daily Dose of Encouragement: Waiting

May 8, 2015

DailyDoseEncouragement

“Wait,” the word everyone naturally despises.  If you are one with a chronic illness, you also know that half of getting better includes the very act of “waiting.”  Whether it be on a doctor, treatment, test, or simply your body to come around, healing requires time, and passing time inevitably requires lots, and lots, of waiting.  Despite its importance, we as humans come to hate “the action of staying where one is or delaying action until a particular time or until something else happens.”  We find it pointless, completely meaningless, and tend to never be able to see the good is what we view as “so bad.”  It can sometimes even feel as though times of waiting will never pass, and thus they become seemingly unbearable to our physical and mental well being.  It is during these situations that we become discontent, fidgety, and irritated with pretty much everything around us.  We want this moment, season, or circumstance in life to just be over with already.  Yet there is meant to be so much more than frustration in moments of waiting, whether it be a day, week, month, or years, and that is through trust in Jesus Christ.

WaitingDD

When we put our trust in Him as our Lord and Savior, who died and rose again as a covering for our sins, we become a son (or) daughter of God’s kingdom.  It is through this act of surrender that God says He will direct our paths, giving us the very best in our life that we couldn’t possibly obtain on our own.  However, in order to completely do so, we must wipe our sense of schedule and business, and realize that when waiting comes, it is not that God has forgotten our request, nor has he left us waiting without a reason. Of course, we as humans aren’t completely helpless, and could very well go right ahead and try and hurry things along.  Yet as man can attest to, this only will lead to more confusion, as you simply can’t hurry the perfect will of God in your life.  If we go ahead and try to act on our behalf because we think it’s better, it’s what we want, and we can get it faster, we’re not going to get Gods best.   We will be left in subpar situations and wonder why things didn’t turn out the way we thought they would or that God supposedly said they would.   Yet it all comes back to us and our pride and our need for things to happen right here, right now, when we want them to.  Instead, we can commit to waiting, and while this may sound like the act of “doing nothing,” it is quite the opposite.  In order to get anything out of seasons of waiting, we must actively surrender everything in our lives.  Overall, resting in God’s arms is a deliberate action, not something we can do without any thought or effort.  Yet when we learn to position ourselves in a way that is open to hearing His voice, waiting for His timing becomes a time of great blessing.  It is when we lay down our own earthly desires, personal opinions,  and accept what God is doing even though we cannot necessarily see it, that He is able to work the most through us.  Not only that, but times of waiting will suddenly become exciting and beautiful, as we realize God is using it for our best, and truly, there is nothing better we as humans could ever ask, want, or need in our limited time here on earth.

Lamentations 3:25 “The Lord is good unto them that wait for him, to the soul that seek him.”

Filed Under: Personal Experiences, Uncategorized

Paleo Autoimmune Protocol Crispy Plantain Tortilla Chips

May 5, 2015

There are truly so many ways that you can use plantains.  Whether green and starchy, or ripe and sweet, the possibilities pose to be endless.  While I may not be eating them now due to following the PK Protocol as part of my treatment for chronic Lyme, I certainly do not give up the opportunity to experiment with them for my families sake. Because green plantains are not always around, I typically stock up on them when I do happen to stumble upon them at our local Stop and Shop.  If the plantains begin to ripen faster than I would like, even after keeping them in the fridge, I will puree them and keep them in the freezer for later use.  Though the plantains will inevitably turn brown when thawing, the overall texture is quite exact to that of when they are fresh.  Because plantains are so versatile, there are many recipes in the “paleosphere,” including those similar to today’s recipe.  Therefore, of course I cannot take full credit for the idea of baked plantain chips.  That being said, I still wanted to share my rendition simply because the more options out there for people scouring the internet for recipes, the better.  The difference in my recipe is that it uses lamb tallow, which may sound completely foreign at first, but really it just like the more common beef tallow, simply from lamb instead.  Though I purchase my lamb tallow from Miller’s Organic Farm, you can also do so through US Wellness Meats, of which is where I get many of my delicious grass-fed muscle and organ meat products.  One of my most recent orders included chicken feet, lamb sweetbreads, and duck hearts.  Talk about being excited?! Anyways, back to the recipe.  Due to the fatty acid content of tallow making it harden at room temperature, these chips get super crispy after coming out of the oven and cooling.  My parents both enjoyed there chips both plane, however, it is for certain that they would also be great dipped in guacamole, my sweet garlic dip, or even my sweet avocado cream.  Truly the ways you enjoy this crispy and crunchy snack is up to you!

IMG_5025

Crispy Plantain Tortilla Chips

Print Recipe

(Serves 2-4) 
Ingredients

  • 1 cup pureed green-yellow plantain
  • 1 1/4 tsp sea salt
  • 1 tsp garlic powder
  • 1 tsp onion powder
  • 1/2 cup lamb tallow

Process

  • Preheat oven to 350 degrees.
  • Peel and chop plantains into small chunks, puree them in a food processor until smooth, then transfer them to a bowl for later use.
  • Melt lard and then pour into the food processor until fully incorporated with the plantain.
  • On a parchment lined baking sheet, spread the plantain mixture out to about 1/4th inch thick with the back of a wet spoon or spatula, then place another piece of parchment paper over the mixture and use a rolling pin to further spread it to 1/8th inch thick.
  • Place in the pre-heated oven bake for 350 degrees for 15 minutes, then use a pizza roller to cut into triangles
  • Allow the chips to cook for another 8-10 minutes, then remove from the oven, flip over, and break apart into the chips, placing back in a oven that is preheated to 425 and allow them to bake for 3-5 more minutes. *The time will vary depending on the thickness of your chips.  *DO NOT STEP AWAY FROM THE OVEN OR YOU RUN THE RISK OF BURNING YOUR CHIPS.
  • Remove from the oven and allow to cool before serving with my roasted garlic dip, or anything else that you enjoy.

Recipe Notes

Lard or bacon fat may work in place of tallow
See my plantain tortillas for another fun plantain recipe.
Store the chips in a mason jar or plastic bag in the fridge for optimal shelf life.


2 Chronicles 7:14 “if my people, who are called by my name, will humble themselves and pray and seek my face and turn from their wicked ways, then I will hear from heaven, and I will forgive their sin and will heal their land.”

Filed Under: AIP, autoimmune, autoimmune friendly, dairy free, egg free, gluten free, grain free, nut free, paleo, plantains, Sweets and Snacks Tagged With: grain free, lamb tallow, Paleo, plantain, tortilla chips

Autoimmune Paleo Batch Cooking by Mickey Trescott

May 4, 2015

aipbatchcooksidebar

I am excited to announce the one and only, AIP Batch Cook by Mickey Trescott of the Autoimmune Paleo.

What is Batch Cooking?

Batch cooking is a method of preparing food that allows one to save time, money, and energy.  By cooking dishes in large batches, food is readily available throughout the remainder of the week.  In AIP Batch Cook, one is brought through all of the steps to prepare and cook meals for the week ahead, without any stress, confusion, or hassle.   Instead, one can be assured that there is always food stocked in the fridge or freezer, according to your dietary needs, and ready at your disposal.

Why is Batch Cooking Helpful?

Everyone knows what it is like to have a busy day, only to come home at the end and be left without a proper meal.  However, batch cooking fixes that.  Whether you suffer from a chronic illness and do not have enough stamina to be in the kitchen everyday, or a part who is toting their kids around everything, batch cooking is for you.  This method of cooking also comes very handy for those who simply do not like to cook, yet understand the importance of eating real, nourishing food (not out of a package and prepared in the microwave).  For those like myself, who enjoy being in the kitchen and creating new dishes, batch cooking also is a great option, as after all, a break is something we all long for every now and then.  Batch cooking is also a helpful in the scheme of getting the most out of all your purchases and making sure that no ingredient goes wasted.  Overall, you truly can not lose with batch cooking!

aipbatchcookbanner

One of the most common questions or concerns that I get when one is inquiring about the Autoimmune-Protocol, or Paleo in general is, “where do I start?” While those looking to make healthy choices in their diet and lifestyle may begin enthusiastic, this excitement typically dwindles when they are faced with the task of getting in the kitchen and cooking from scratch.  On top of having to learn a whole new area of skill, eating paleo (or) AIP typically introduces one to a variety of new produce items, that don’t come from a bag or container.  This ultimately can make transitioning a bit daunting, and quite frequently, is used as an excuse to continue in one’s old ways.  Yet with AIP Batch Cook, one is able to mitigate the hectic lifestyle of this modern world, conserve energy, heal their body, and ultimately live a convenient, sustainable lifestyle.

As a whole, AIP Batch Cook is a program that walks people through the planning and cooking of all of their meals for one week on the Autoimmune Protocol. Each session includes: 

  • A program guide walking users through what batch cooking is and how to use the materials properly.
  • A one-week meal plan for breakfast, lunch, and dinner on the Autoimmune Protocol.
  • Two instructional videos walking users through the preparation of all of the food on the meal plan.
  • Shopping lists, chop lists, and tool lists that help them get organized for each batch-cooking session.
  • Video tutorials for making staples like bone broth, rendering their own solid cooking fat, and making their own kombucha.
  • Digital versions of every recipe and tutorial we cook together in the instructional videos.

Everything in AIP Batch Cook is laid out in such a way that is very understandable, easy to use and find. navigate. Not only that, but all of the recipe presented include ingredients that are very accessible, affordable, and prove just how easy and delicious recipes according to the Autoimmune Protocol are.  You learn how to make the most of oven and stove time, how to plan ahead accordingly, all while being opened up to various culinary techniques, tips, and ingredients that you will undoubtedly take a hold of and use for the rest of your life .  On top of that, the videos are high quality, the layout is easy to navigate, and there truly couldn’t be anything easier than having meals for the week just the click of a button away.  Mickey is like your very own tutor, walking you through every step, and making cooking an enjoyable, rewarding experience, while also giving  members access to many resources from which she gets her differing ingredients, such as solid cooking fat, cooking tools, snacks, protein sources, and more. Ultimately, if you have any hesitations or questions regarding beginning AIP or even Paleo, AIP Batch Cook has got you covered.

If you are interested, you can sign up for Mickey’s program through my affiliate link below.

Note: Mickey will be extending her price of $47 until May 8th, after which the price will be going up to $67.  

——-> AIP Batch Cook <——-


Romans 14:11 “For it is written: “As I live, says the Lord, Every knee shall bow to Me, And every tongue shall confess to God.”

Filed Under: AIP, AIP & Paleo Reviews, autoimmune friendly, autoimmune paleo Tagged With: AIP Batch Cook, Mickey Trescott

Paleo Autoimmune Protocol Tropical Chicken Skewers

May 2, 2015

IMG_5881_2

With the four feet of snow melted away on our back patio, it is officially grilling season.  One thing I love about grilling is that there is hardly any mess to clean up.  Not only that, but the various ways that you can use the fire as a heat source is innumerable.  Truly, there is nothing like the smell of someone barbecuing, not to mention the taste of charred meat and vegetables is umatchable.  All winter my family yearns to grill, so I thought there would be no greater way to please them than doing just that.  With hints of citrus, sweetness from the mango, and a bit of spice from the ginger and cilantro, these chicken skewers are a delicious dish to make all the way through early spring, into the late summer months.  Overall, everyone around the dinner table was a big fan of their chicken skewers, and loved the tropical flavors that reminded them of the summer that is coming.

IMG_5879

Tropical Chicken Skewers

Print Recipe

(Serves 3-4)
Ingredients

  • 1 1/2 lb boneless organic chicken thighs
  • 1/4 cup avocado oil
  • Juice of 2 limes
  • Zest of lime zest (1 1/4 tsp)
  • 2 firm mangoes (2 cups chopped)
  • 2 tbsp chopped cilantro
  • 1  tsp sea salt
  • 1 tsp ground ginger
  • 1 large onion
Process
  • Cut chicken thighs into like-size chunks (about 1/2-1 inch), and place in a medium sized mixing bowl.
  • To the bowl, add juice of 2 limes, avocado oil, chopped cilantro, sea salt, ground ginger, and zest of one lime.
  • Peel and chop mangoes into similar size chunks as the chicken, then add them to the bowl as well, mixing everything together with a spatula, covering with plastic wrap, and allowing to marinate for 2-4 hours.
  • Once the chicken mixture has marinated, chop one large onion into 1/2-1 inch chunks.
  • Using medal skewers, or soaked wooden skewers, rotate pieces of chicken, mango, and onion on each skewer.
  • Preheat grill (or) preheat your oven to 425 degrees.
  • Depending on your cooking method, either place your chicken skewers on the grill and cook for about 5 minutes per side until a nice char has formed (or) place skewers on a baking sheet and bake in the preheated oven for 20 minutes.

Psalms 121:1-2 “I will lift up my eyes to the hills—From where does my help come from? My help comes from the Lord, who made heaven and earth. 

Filed Under: AIP, autoimmune friendly, autoimmune paleo, chicken, grilling, meat, Protein Dishes Tagged With: chicken skewers, grilling, Paleo, primal, tropical

« Previous Page
Next Page »

Primary Sidebar

Recent Posts

My Guide to Practical Animal-based Eating

Paleo Banana Collagen Bars with Coconut Flour (Nut-free)

Paleo AIP Cinnamon Raisin Collagen Bars (Fruit-sweetened, Coconut-free)

Coconut Flour Molasses Spice Cookie Bites (AIP-friendly, Nut-free)

Crustless Keto Cheesecake (Carnivore-friendly)

Paleo Fruit Sweetened Harvest Bread (Gluten-free)

Copyright © 2025 · LBD Pro V on Genesis Framework · WordPress · Log in