• Skip to primary navigation
  • Skip to main content
  • Skip to primary sidebar
  • Home
  • About Me
    • My Videos
    • Organ Meat Makeover
  • Recipes
  • Health Articles
  • Resources
    • Young Living Essential Oils

Beyond the Bite

Get Beyond the Tick Bite and Eat Right For Your Life.

  • E-books
    • Organ Meat Makeover
    • Practical Animal-Based Eating
  • About Me
    • Videos
    • Health Articles
  • Recipes
    • Email
    • Facebook
    • Instagram
    • Pinterest
    • YouTube

Recipe Index

My Guide to Practical Animal-based Eating

January 23, 2022

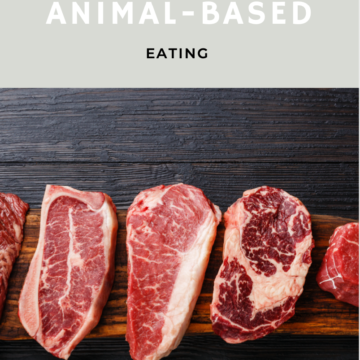
I recently created by second e-book all about animal-based and am super excited to share it with you all!

Why Animal-based?

With a variety of healing diets out there, it can be hard to know which one to choose. I get it.

As someone whose battled the effects of chronic Lyme Disease for over a decade, it feels like I have tried them all.

Paleo, SIBO elimination, low-FODMAP, the Autoimmune Protocol, Ketogenic…You name it, I’ve done it!

So what makes animal-based so special?

The beauty of an animal-based diet is that it naturally combines may of these approaches to eating all in one place.

This is because animal-based eating is the true ancestral diet meant to heal, support, and fuel your body on all levels, all at once.

While we are constantly learning new things about the human body, an animal-based diet is believed to be the most evolutionarily consistent with what our bodies were meant to eat. What’s even better about an animal-based diet is that it does not get stuck in dogmatic thinking very prevalent in diet culture today.

Instead, an animal-based “diet” leaves room for new discoveries, understanding, and better yet, for you to use your intuition and find what feels best for your body. I put quotations around diet because if we are being real, animal-based is much more than a diet. It’s a change of thinking and living. It is a true lifestyle.

After learning the why’s behind an animal-based approach to eating, I realized it truly was the best way to heal my gut, improve my digestion, get rid of persistent infections, better my sleep, increase my strength, heal my thyroid, and ultimately, kick Lyme’s butt.

Overall, it’s had such an influential impact on my life, I couldn’t help but want to share it all with you.

Practical Animal-Based Eating includes:

  • Over 50 pages of resources for anyone looking to begin an animal-based diet but is not sure where to start.
  • FAQ – Is animal-based eating low in carbohydrates? Do I have to give up coffee? What about baking?
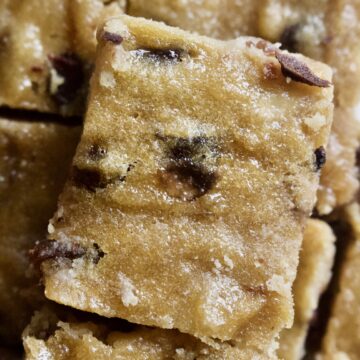
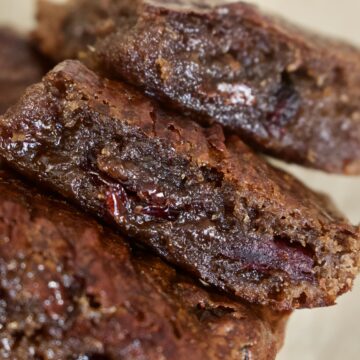
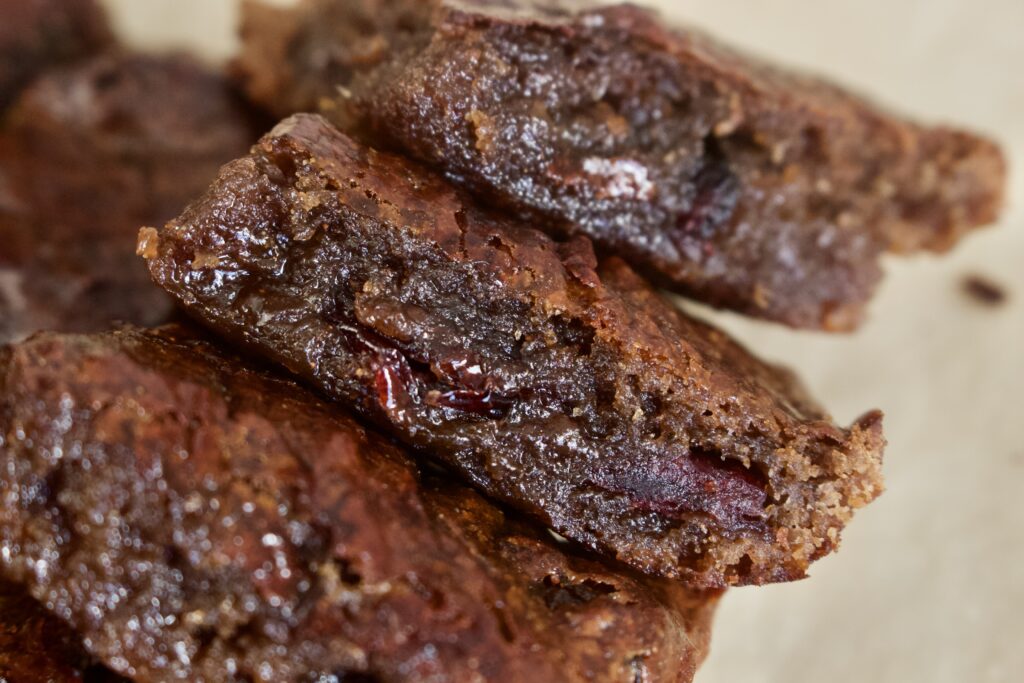
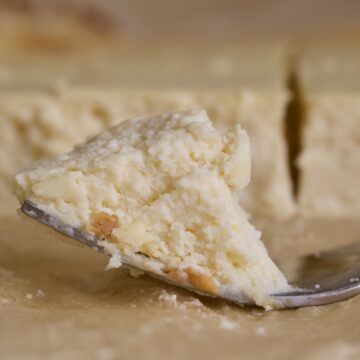
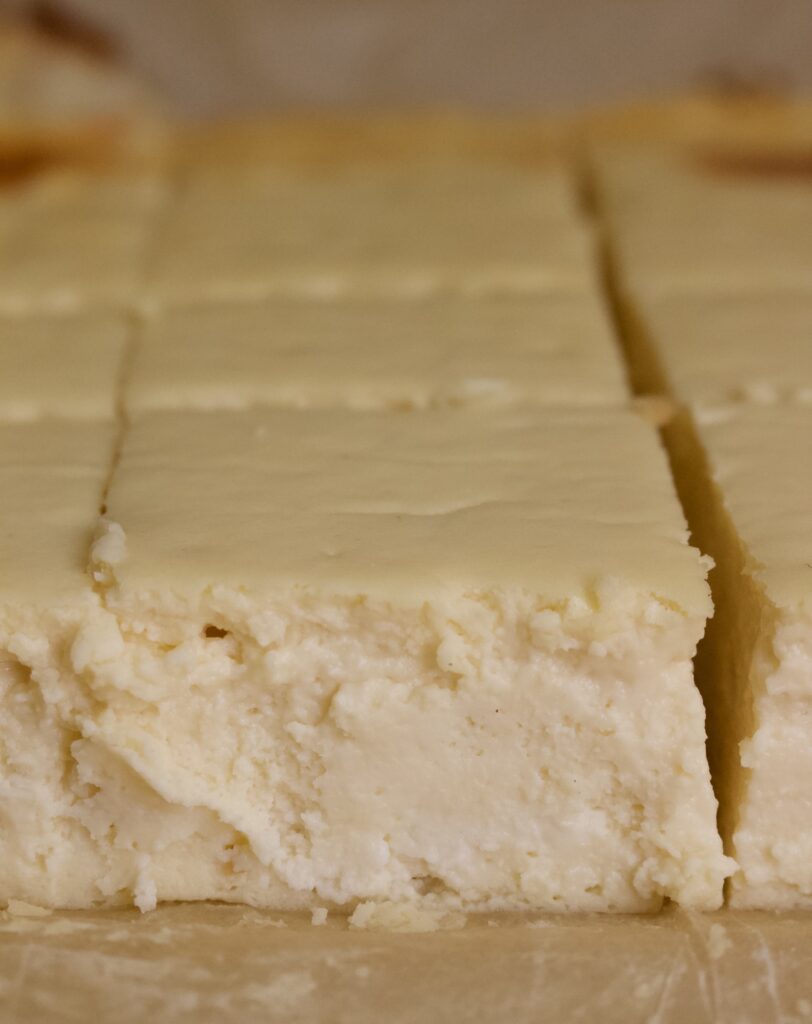
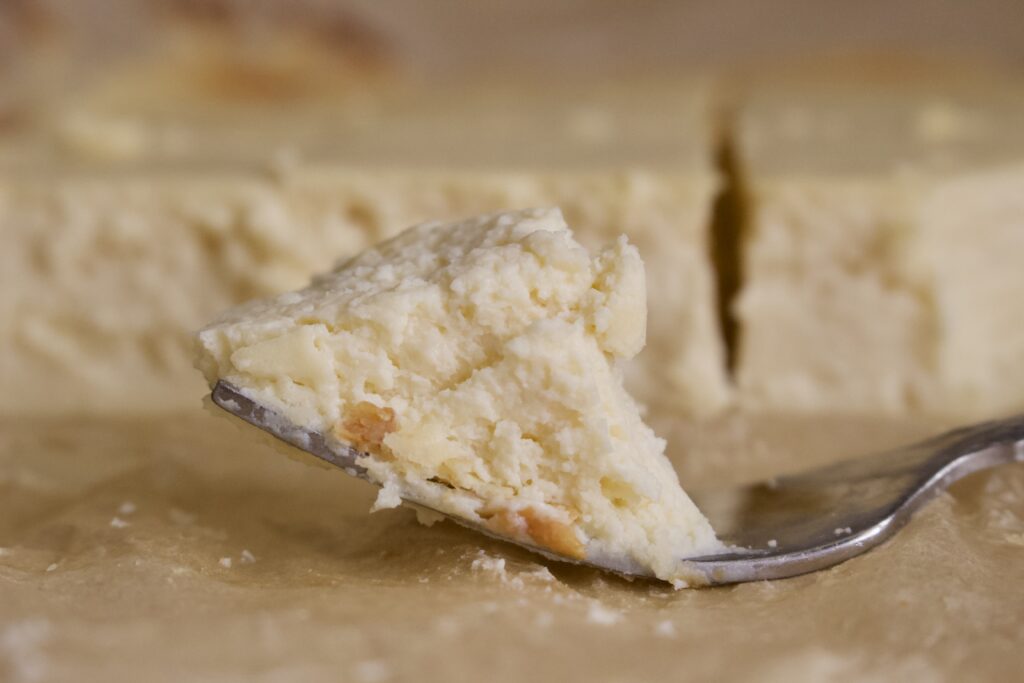
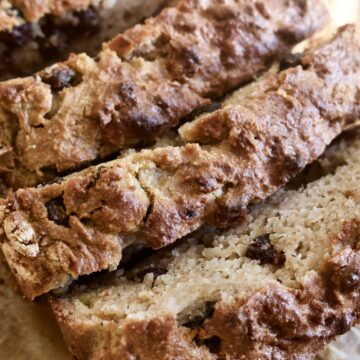
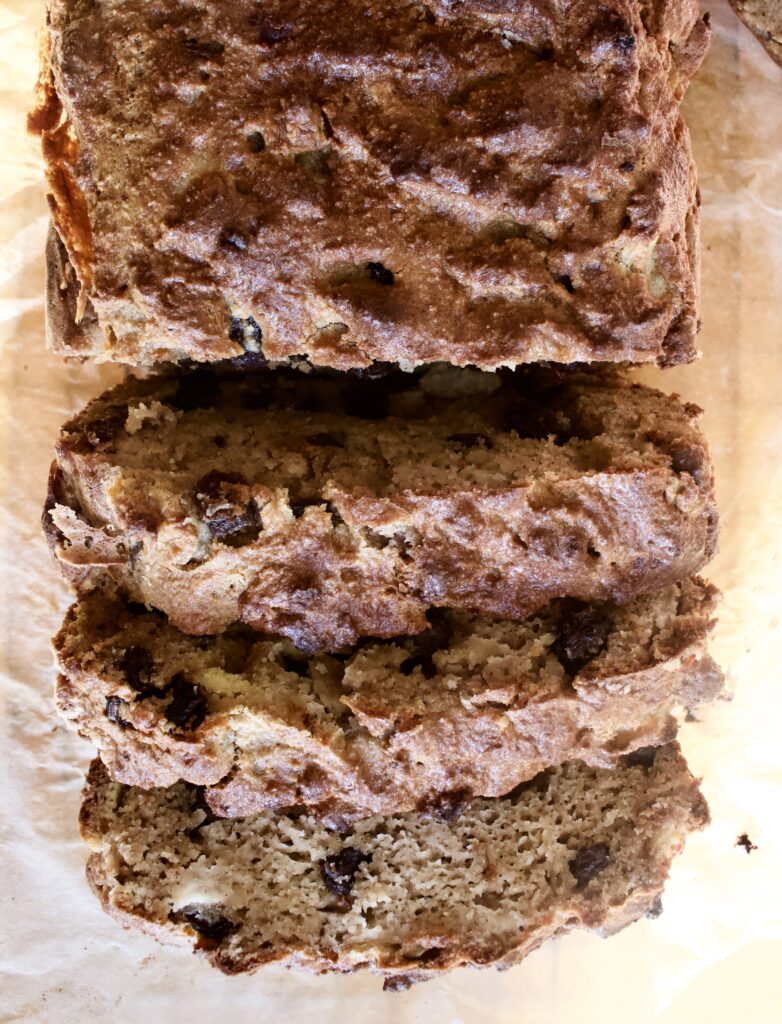
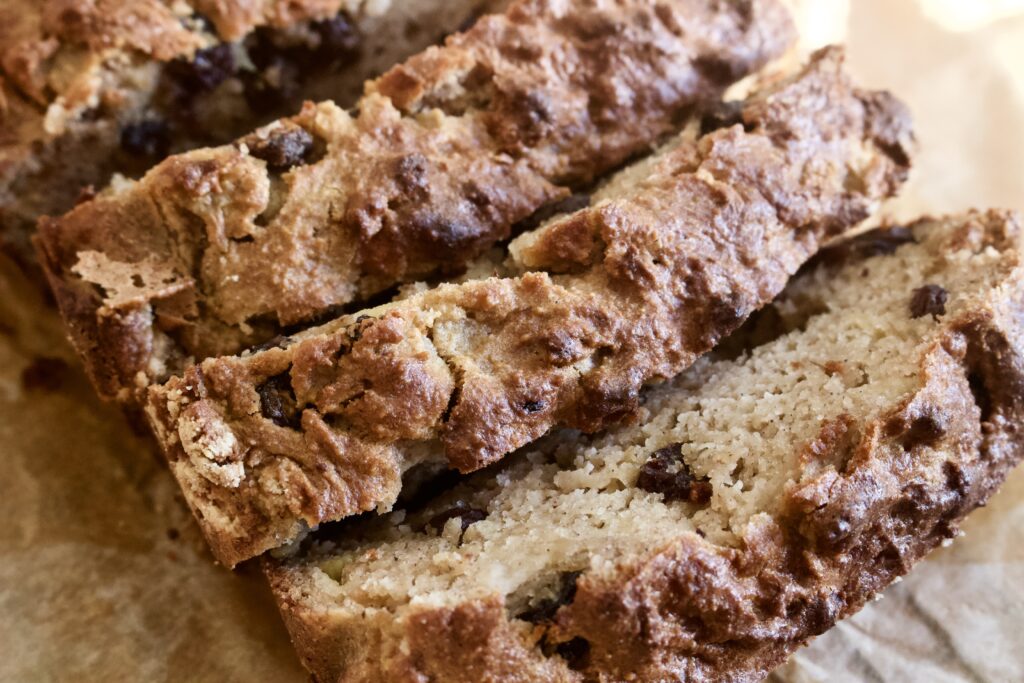
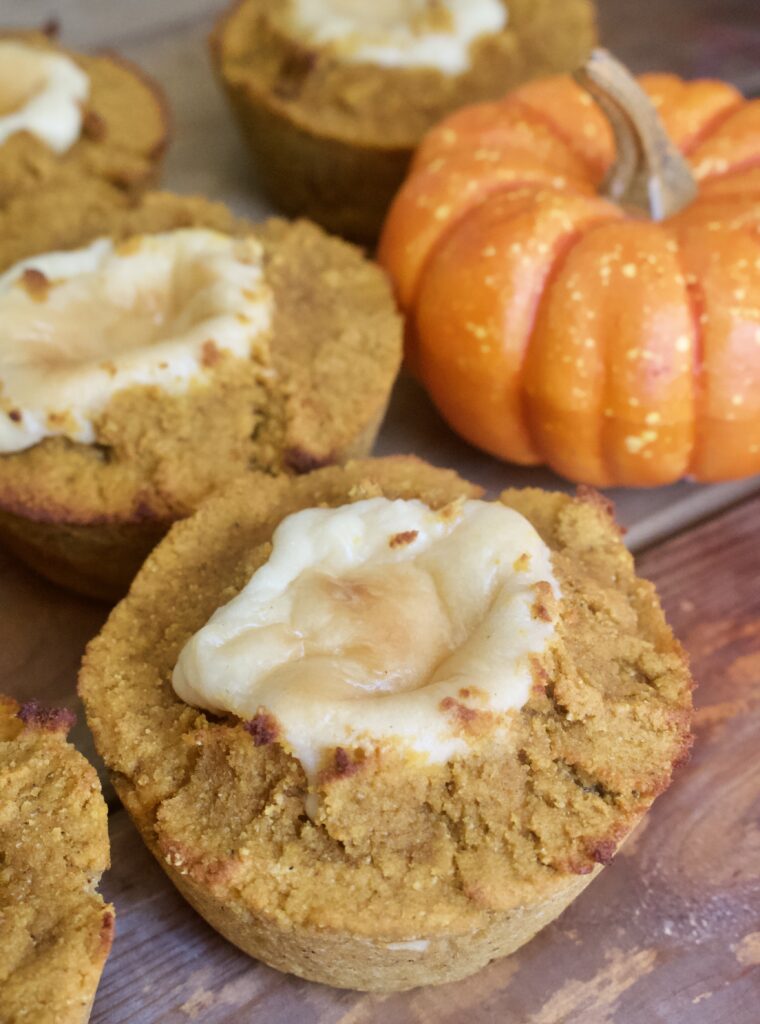
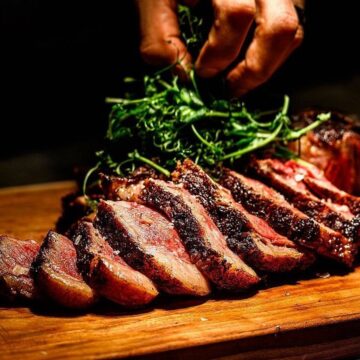
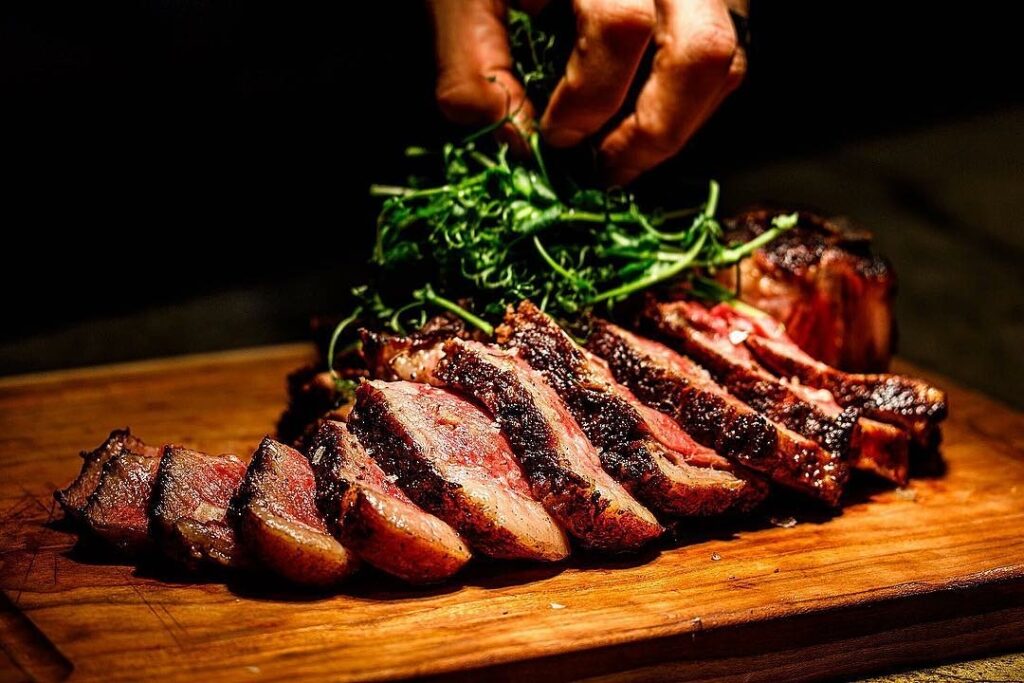
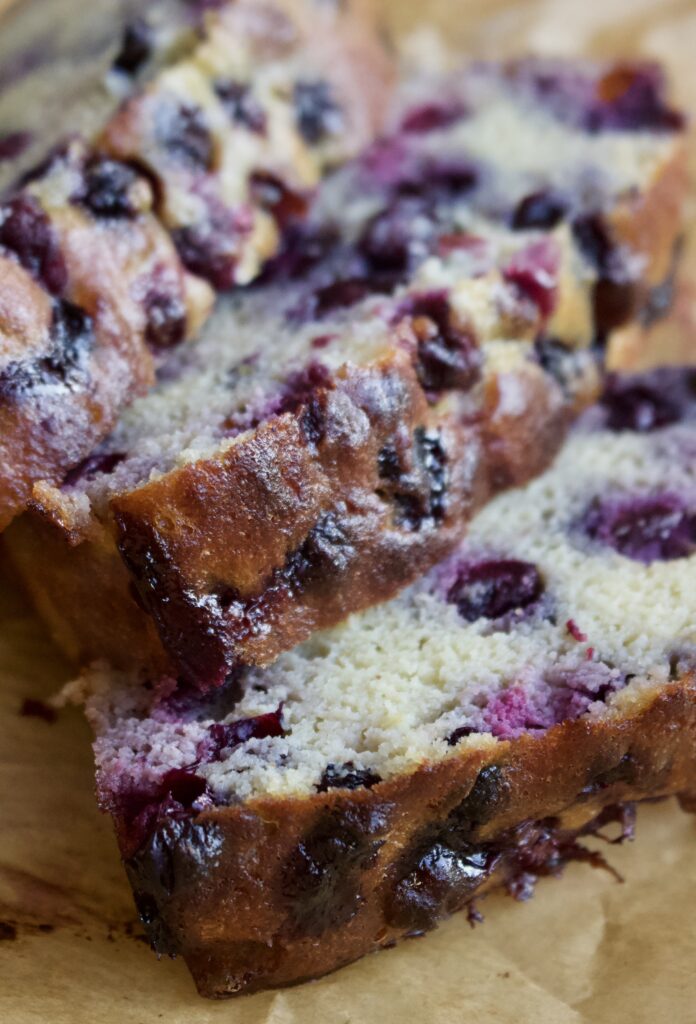
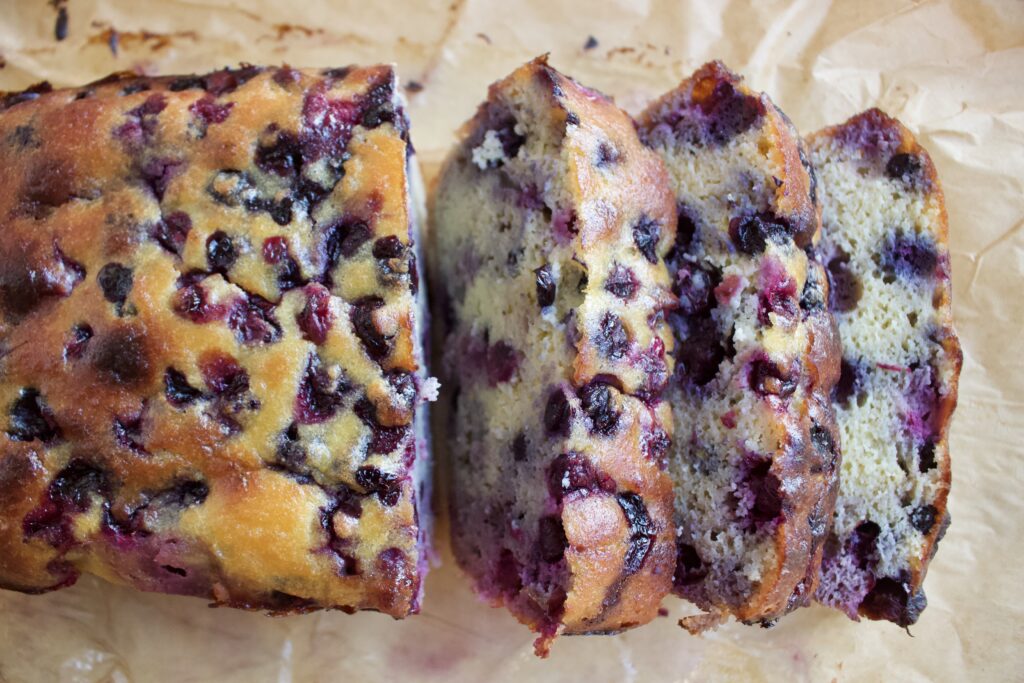
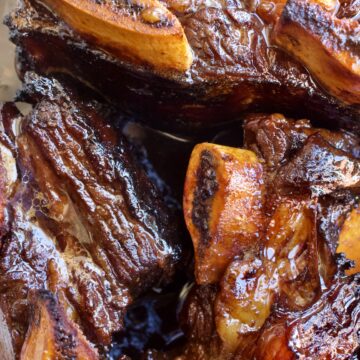
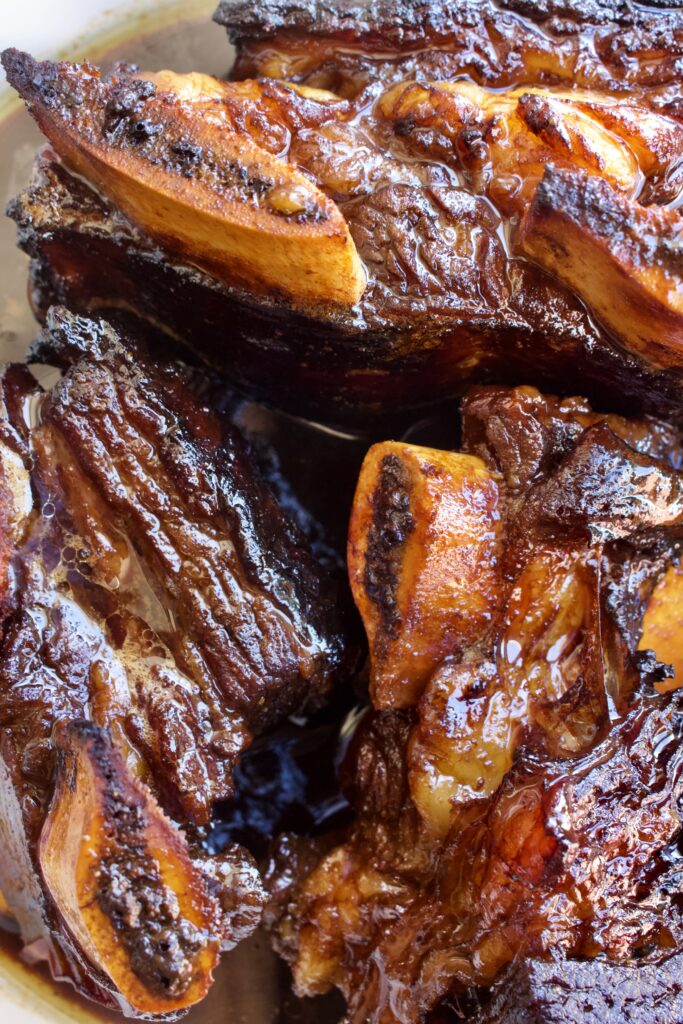
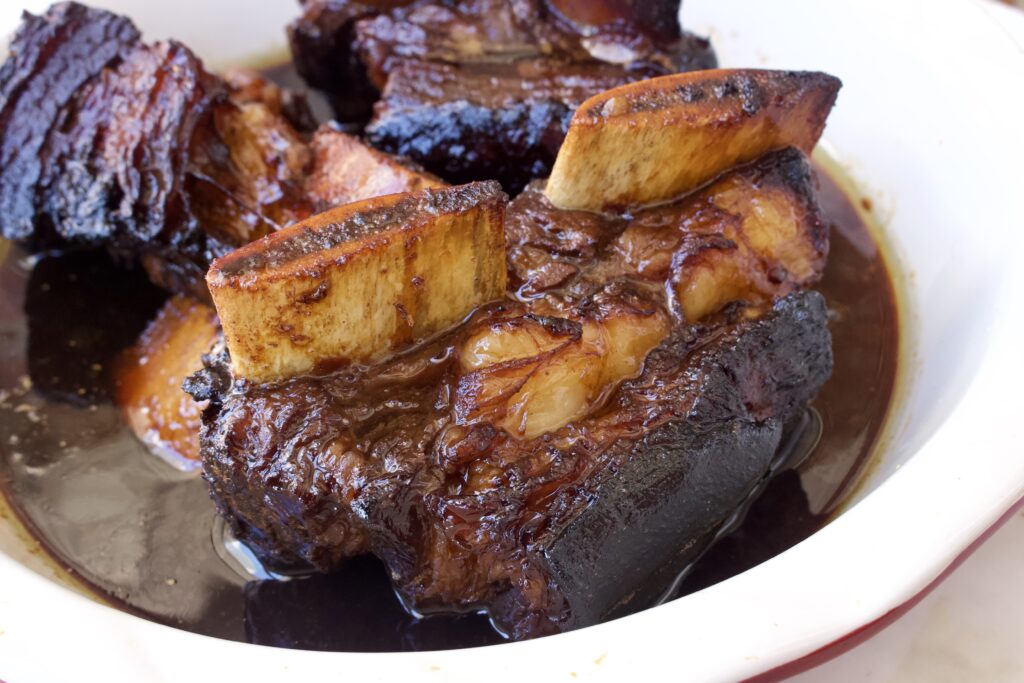
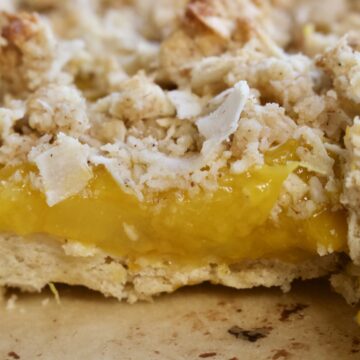
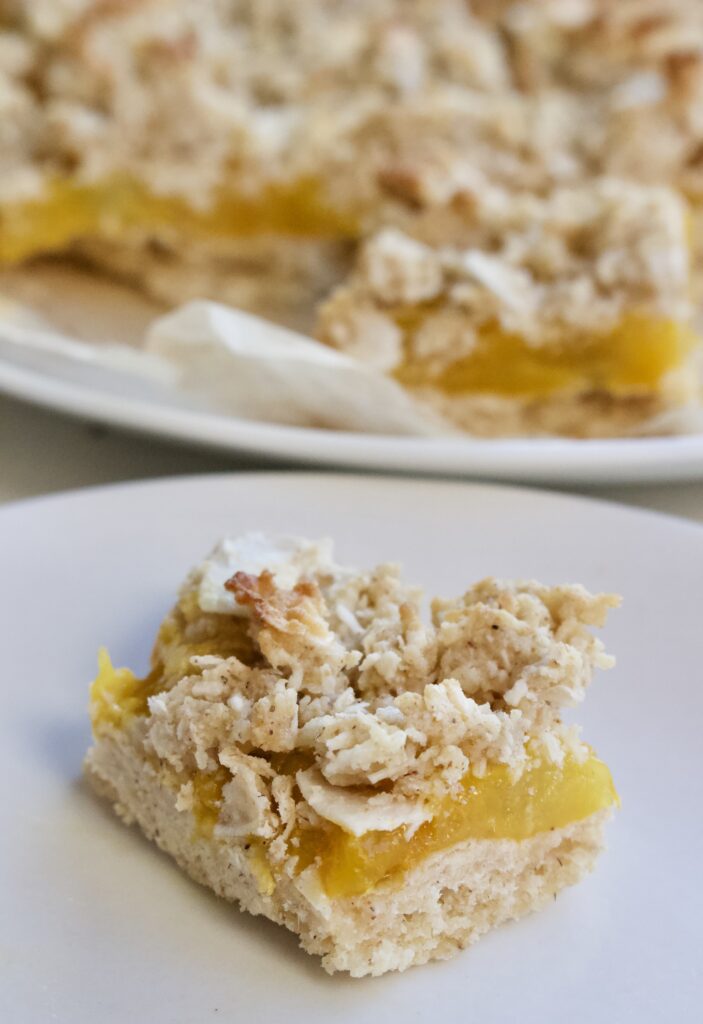
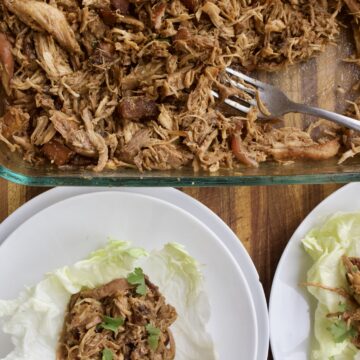
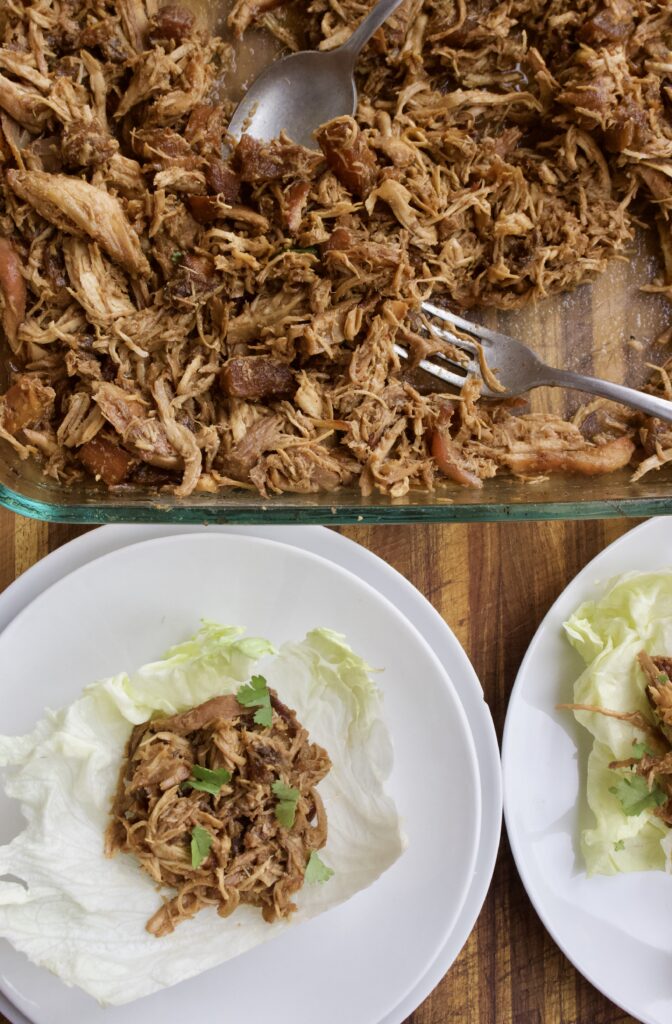
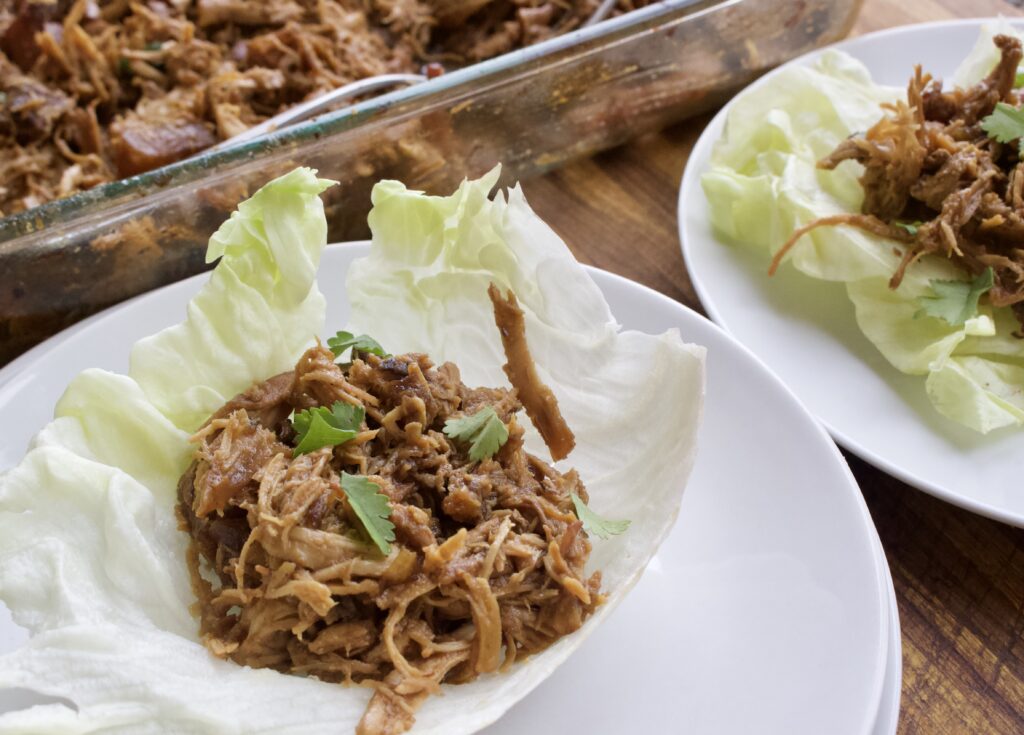
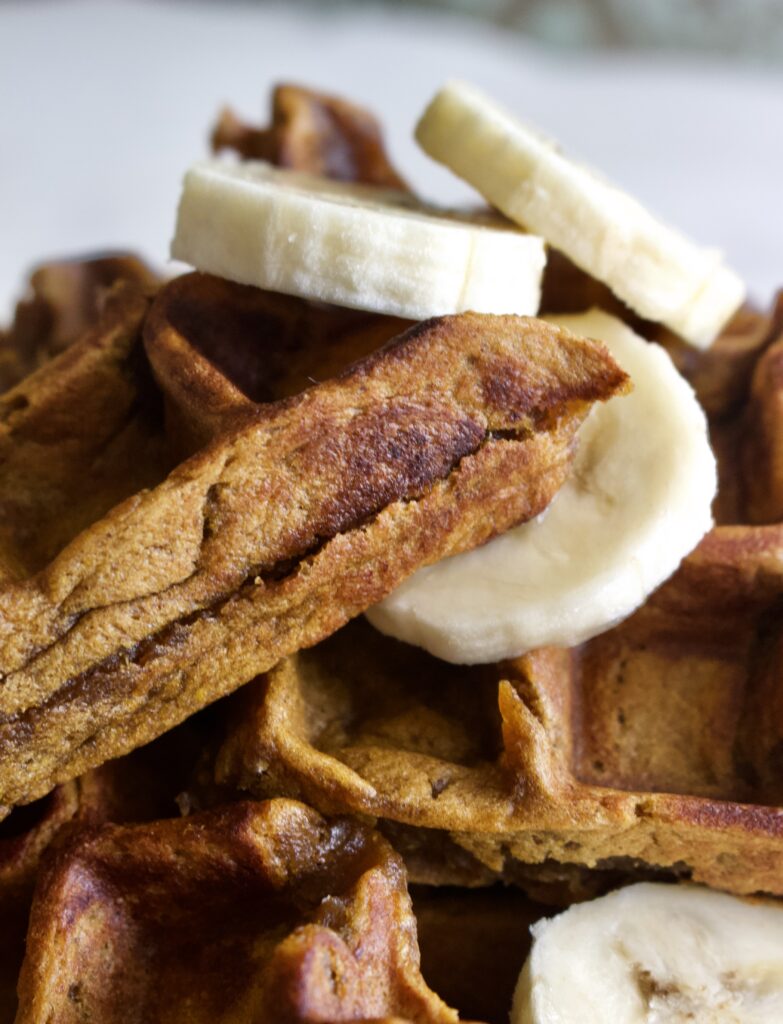
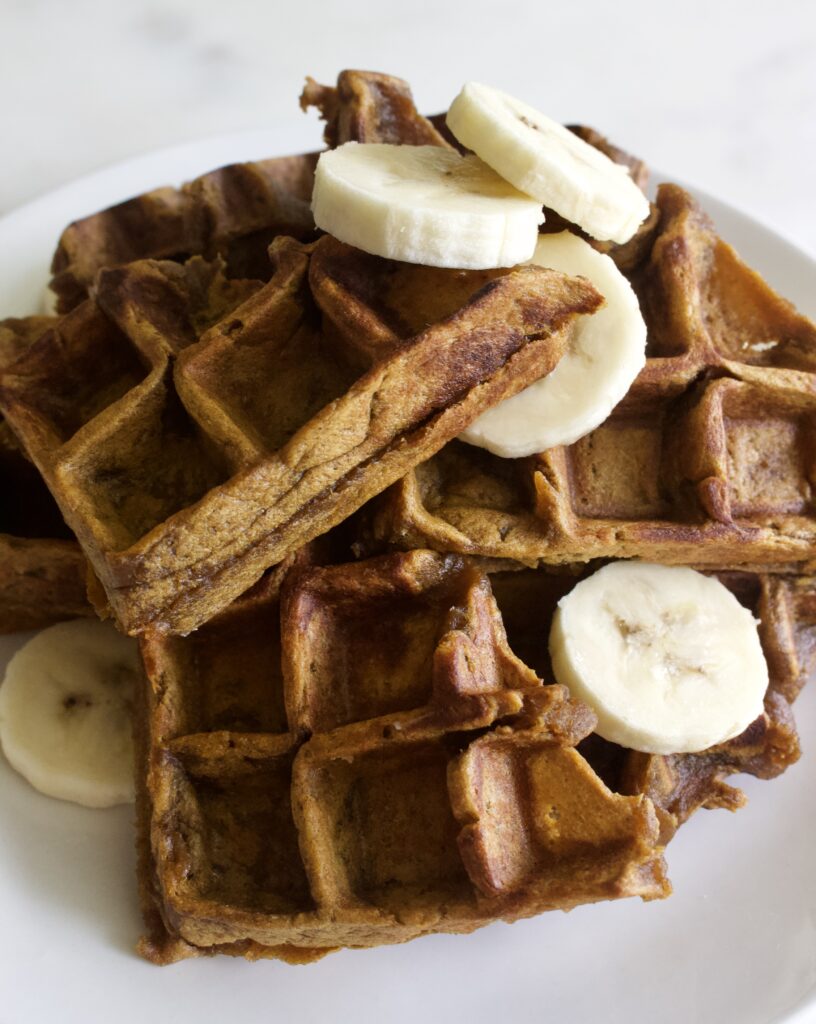
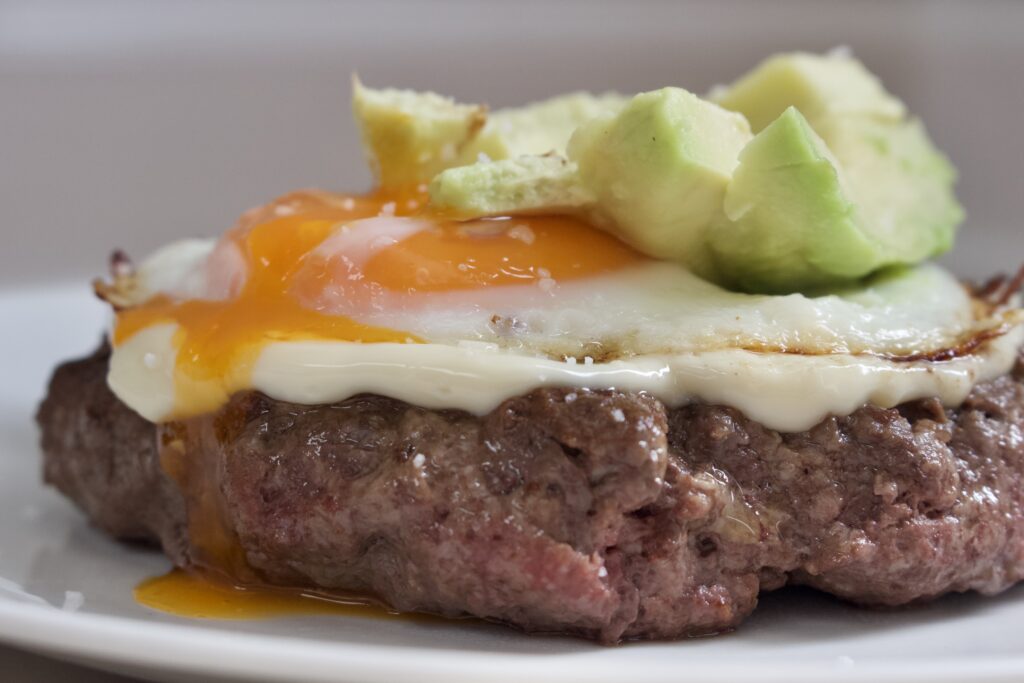
  • 20+ animal-based recipes including pork rind crusted chicken tenders, braised pineapple pork neck, greek lamb koftas, and many more
  • Generalized weekly meal plans
  • Topics include why we avoid plants, an animal-based oxalate list, a note on cooking oils & fats, foods to eat, how to make the switch with kids, kitchen & pantry essentials, and much more.

Buy Now

Filed Under: autoimmune, autoimmune disease, autoimmune paleo, beyond the bite, carnivore, Food and The Human Body, ketogenic, low carb, meat, paleo, Primal

Paleo Banana Collagen Bars with Coconut Flour (Nut-free)

January 15, 2022

I love throwing collagen into my kids baked goods.

There’s really no reason not to add a little bit of protein to make their snack a little more filling and satisfying.

My most recent collagen bar recipe was autoimmune-protocol friendly and made with green banana flour and sweetened with apple sauce.

On the flip side, today’s recipe uses coconut flour and banana as its primary source of sweetness. They taste just like a good banana bread. Soft, sweet, and perfect for little hands and mouths.

I’ve been on a mission to make more baked goods without nuts yet equally great in taste and texture.

This can be difficult with coconut flour due to the high amount of eggs needed. If you’ve baked with coconut flour, you know what I’m talking about.

However, I am pleased to say these banana collagen bars are neither too egg-y or coconut-y.

For mix-ins, I used a mix of dark chocolate and raisins, though chopped nuts or shredded coconut are also great options. Additionally, you can make them completely fruit sweetened by omitting the honey and simply using super ripe bananas. The choice is yours as always, enjoy!

Paleo Banana Collagen Bars with Coconut Flour (Nut-free)

Ingredients

  • 1/2 cup coconut flour
  • 1/2 cup collagen peptides
  • 1/2 tsp sea salt
  • 1/4 cup ghee, melted
  • 4 eggs
  • 2 bananas, ripe
  • 2-4 tbsp honey
  • 1/2 cup raisins (or) chocolate chips

Process

  • In a mixing bowl, mash together honey, bananas, eggs, and ghee until fully incorporated with each other.
  • Sift in collagen, coconut flour, and sea salt, mixing with a spatula until combined.
  • Fold in raisins or chocolate chips and scoop batter into a parchment lined 9×13 baking dish.
  • Place the bars in a 350 dg F preheated oven and bake for 20-25 minutes.
  • Allow to cool fully before slicing and serving.

John 8:31-32 “…Jesus said, “If you hold to my teaching, you are really my disciples. Then you will know the truth, and the truth will set you free.””

Filed Under: baked goods, coconut flour, dairy free, paleo, Recipes Tagged With: grain free, nut free, Paleo

Paleo AIP Cinnamon Raisin Collagen Bars (Fruit-sweetened, Coconut-free)

December 11, 2021

My original collagen bar recipe is one of the household’s favorites. I made the recipe as a way to get protein into my kids when they are, well, being kids and not wanting to eat their regular food. The original collagen bar recipe uses almond flour, with the option of tigernut flour. However it does use eggs, which I know some people have to avoid. I tried making a paleo autoimmune protocol friendly collagen bar originally with banana, but found that it was too gummy. When using green banana flour, these cinnamon raisin collagen bars are naturally chewy, which makes applesauce and gelatin the perfect egg substitution. In a way, they remind me of fig bars, as they are not inherently sweet, but the use of dried raisins and cranberries adds a nice natural sweetness to each bite. I’ve also made this recipe using sweet potato flour and almond flour. Either version comes out delicious, and you can feel good that these bars are not only rich in collagen, but only contain fruit sugar and highlight some whole-food ingredients.  My one year old is the biggest fan of these bars and will devour them any chance I give him.  If green banana flour sounds weird and hard to find, have no fear, Thrive Market sells most all of the ingredients I used. You can also find many unique alternative flours at local ethnic grocery stores.  

AIP Paleo Cinnamon Raisin Collagen Bars

Ingredients

  • 1 cup collagen
  • 1 cup green banana flour
  • 1 tbsp gelatin
  • 1/2 cup unsweetened apple sauce
  • 1/4 cup non-hydrogenated palm shortening, melted
  • 1 tsp vanilla
  • 1/2 tsp sea salt
  • 1 tsp cinnamon
  • 1/2 cup raisins
  • 1/4 cup dried cranberries

Process

  • In a large bowl mix together collagen, gelatin, banana flour, sea salt, and cinnamon until combined.
  • Pour in melted coconut oil, vanilla, and apple sauce, mixing until a sticky batter has formed.
  • Fold in raisins and cranberries and then transfer batter to a parchment lined 8×8 baking dish.
  • Bake for 20 minutes in a 350 preheated oven.
  • Remove from the oven and allow to fully cool before placing in the fridge to chill, then slice and enjoy.

Notes: if you want a sweeter collagen bar but still want to keep it fruit-sweetened, add a couple tbsp of pure date paste syrup to the batter.

Sweet potato and almond flour can be used in place of the banana flour.

1 John 5:1 “Everyone who believes that Jesus is the Christ is born of God, and everyone who loves the father loves his child as well.”

Filed Under: AIP, autoimmune, autoimmune disease, autoimmune friendly, autoimmune paleo, baked goods, coconut flour, coconut free, egg free, grain free, green banana flour, nut free, paleo, Recipes

Coconut Flour Molasses Spice Cookie Bites (AIP-friendly, Nut-free)

December 3, 2021

I love a good no-bake treat, and these molasses spice cookie bites are the perfect Christmas inspired treat for the holidays. There is something super nostalgic about molasses Christmas cookies. For me, it brings me back to my childhood (aka the simpler times). While those molasses cookies may have been made with regular ole’wheat flour and sugar, in today’s recipe I chose to use coconut flour. I found last year this worked amazing in my dark chocolate truffle recipe. If you are not AIP and follow a lower-carb diet, be sure to go check out that recipe. That being said, today’s no-bake molasses cookie bites are one I made with all of my nut-free, autoimmune protocol peeps in mind. While I did make a chocolate drizzle for my truffles (which is not AIP), you can easily substitute a carob drizzle like the one found here. I also used pumpkin pie spice to simplify things, but a mixture of cinnamon and ginger would also do the trick for those on strict AIP. Overall, this is a tried and true recipe that’s super simple to put together and loved by all.

Coconut Flour Molasses Spice Cookie Bites

Ingredients

  • 3/4 cup coconut flour
  • 1/4 cup collagen peptides
  • 1/3 cup maple sugar
  • 1/4 cup molasses
  • 1/4 tsp sea salt
  • 1 1/2 tsp pumpkin pie spice
  • 1/2 cup non-hydrogenated palm shortening, melted

Chocolate Drizzle

  • 1/3 cup Lily’s chocolate chips
  • 1 tsp non-hydrogenated palm shortening

Process

  • In a mixing bowl sift together coconut flour, maple sugar, sea salt, pumpkin pie spice, and collagen.
  • Mix in melted shortening and molasses, beating until a dough has formed.
  • Form dough into like-size balls and place in the fridge to set.
  • If making a chocolate drizzle, slowly heat chocolate chips and palm shortening in a small pot over low heat on the stove until melted.

Notes

For AIP substitute a homemade chocolate drizzle made with carob powder and non-hydrogenated palm shortening or coconut oil – Also replace pumpkin pie spice with a mix of 3/4 tsp cinnamon and ginger powder.

Matthew 10:26 “So have no fear of them, for nothing is covered that will not be revealed, or hidden that will not be known.”

Filed Under: AIP, autoimmune friendly, autoimmune paleo, coconut flour, cookies, dairy free, Dessert, egg free, nut free, Recipes

Crustless Keto Cheesecake (Carnivore-friendly)

November 12, 2021

Holidays can be a difficult time for people on a healing diet. With so many different foods around, it can be hard to want to stick to what you know works and makes your body feel ok. Desserts are especially tricky because they can either be enjoyed in moderation when modified, or are super triggering for other folks. I respect both sides of the spectrum, but personally have always enjoyed baking during the holidays even if I cannot eat the product myself. I’ve loved cheesecake since I was a little girl, but making a paleo-friendly crust has always been interesting. To me there is just nothing like a good, classic graham cracker crust. Almond flour crusts can work in their place, but this time around I wanted to opt out of a crust all together to make the recipe easy both on time and preparation. If you have never tried a crustless cheesecake and are a bit skeptical, you are in for a real treat! Overall, this crustless cheesecake can easily be made keto with the use of powdered monk fruit or honey for an animal-based, carnivore-friendly version. I like to use powdered monk fruit because it yields a creamier texture and helps avoid a gritty filling. Maple syrup or maple sugar would also be great sweetener options if that is what you’re into. There is really no way to go wrong with this recipe except for maybe, not having all your ingredients at room temperature (chunky cheesecake anyone? yeah, don’t do that). Enjoy!

Ingredients

  • 3, 8 oz blocks of cream cheese
  • 1/4 cup heavy cream
  • 3 eggs
  • 1 tsp vanilla
  • 1/4 tsp sea salt
  • 3/4 cup powdered monk fruit (or) 1/2 cup honey

Process

  • In a mixture beat cream cheese and sweetener of choice until creamy.
  • Add in heavy cream, vanilla, and sea salt and mix until fully incorporated, then beat in eggs slowly one at a time until just combined.
  • Pour mixture into a parchment lined 8×8 square baking dish and bake at 325 for 25 minutes until just set.
  • Remove from the oven and allow to cool fully then transfer to the fridge to set over night.

Colossians 1:9 “For this reason, since the day we heard about you, we have not stopped praying for you. We continually ask God to fill you with the knowledge of his will through all the wisdom and understanding that the Spirit gives”

Filed Under: Dessert, grain free, ketogenic, low carb, nut free, paleo, Recipes, Sweets and Snacks Tagged With: animalbased, carnivore, coconut free, grain free, ketogenic, nut free, Paleo, primal

Paleo Fruit Sweetened Harvest Bread (Gluten-free)

October 28, 2021

My youngest is almost a year old now and he continues to be a bottomless pit. I seriously run out of things to feed him. That being said, he loves my baked goods, especially muffins. However, I wanted to create a recipe that didn’t have any added sweeteners and relied solely on fruit instead. While I started off on a whim and wasn’t exactly sure how it’d turn out, to my delight it came out perfect. It bakes up to have a soft inside and a nice crusty golden outside. Overall, this Paleo fruit sweetened harvest bread bread tastes mildly sweet with cooked banana and apple, with little punches of sweetness thanks to the added raisins. Not only did my baby love the end result, my toddler and parents gobbled it up as well.

Paleo Fruit Sweetened Harvest Bread

Ingredients

  • 3 cups almond flour
  • 1 tsp cinnamon
  • 1/4 tsp sea salt
  • 1 tsp baking soda
  • 1 ripe banana
  • 2 medium apples
  • 1/2 cup water
  • 1/2 cup raisins
  • 3 eggs
  • 1/4 cup ghee, melted

Process

  • In a sauce pot add peeled and diced banana and apples and 1/2 cup of water, cooking until soft and can be easily mashed with a fork or potato masher. Remove from the pot and allow to cool. Should yield around 1 cup of mash.
  • In a large bowl whisk together almond flour, cinnamon, sea salt, and baking soda.
  • Add in fruit mash, eggs and melted ghee, mixing until fully combined, then fold in raisins.
  • Transfer batter to a parchment lined loaf pan and bake at 375 degrees for 35 minutes until the top is golden and crusty.
  • Remove from the oven and allow to cool before slicing and serving.

1 Peter 1:24-25 “For, “All people are like grass, and all their glory is like the flowers of the field; the grass withers and the flowers fall, but the word of the Lord endures forever.” And this is the word that was preached to you.”

Filed Under: Fruit sweetened, paleo, Recipes, Sweets and Snacks

Paleo Pumpkin Cream Cheese Muffins (Nut-free, Keto-friendly)

September 26, 2021

Last week I got sick for the first time in almost exactly a year, and I mean, really sick. It lasted about ten days and I am thankfully doing much better. Eating and drinking was very difficult, but as I slowly got better I started craving the pumpkin cream cheese from Starbucks that I had a few times as a kid. It was a super random craving, but I knew when I got better I wanted to make my own version and share it with ya’ll. I’ve made the recipe 3 times now in the past week and a half. Partially to perfect it, but also because each time I made them they would get devoured too quickly for me to actually photograph them. I’ve made them keto-friendly with granulated monk fruit, and lightly sweetened with maple syrup. Either version comes out great, just make sure to include the amount of water noted below if you choose to use the monk fruit. Overall, these muffins are everything you can expect from a traditional pumpkin bread. Soft, not dry, and lightly sweetened with a hint of pumpkin pie spice. Happy fall ya’ll! P.S. be sure to also check out my Keto Spiced Pumpkin Bread recipe.

Coconut Flour Pumpkin Cream Cheese Muffins

Ingredients

Yields 12 muffins

  • 1 1/4 cup coconut flour
  • 1/2 tsp sea salt
  • 1 tsp baking soda
  • 1 tbsp pumpkin pie spice
  • 1/4 cup avocado oil
  • 15 oz can pumpkin
  • 4 eggs
  • 1/2 cup maple syrup (or) granulated monk fruit
  • 1/3 cup water *only if using monk fruit
  • 8 oz cream cheese
  • 1/4 cup maple syrup (or) granulated monk fruit
  • 1 tsp vanilla extract

Process

  • In a large mixing bowl whisk together pumpkin, avocado oil, eggs, sweetener of choice, and water if using granulated monk fruit.
  • Mix in coconut flour, sea salt, pumpkin pie spice, and baking soda until a smooth batter has formed.
  • Scoop batter into 12 muffin tins and form a little hole in the middle of each for the cream cheese.
  • Mix together cream cheese, sweetener of choice, and vanilla extract until smooth, then spoon into the middle of each muffin.
  • Bake in a 350 degree preheated oven for 25 minutes until the cream cheese is just golden.
  • Allow to cool completely before removing from the muffin tin and serving.

Daniel 2:22 “He reveals deep and hidden things; he knows what lies in darkness, and light dwells with him.”

Filed Under: baked goods, coconut free, Dessert, ketogenic, nut free, paleo, pumpkin, Recipes

Sweet & Salty Watermelon Slushies (Ft. LMNT electrolytes – Low carb, AIP-friendly)

September 11, 2021

Anyone like a salty melon? Just me? Ok. Well, as a kid I never really had watermelon in my house as a staple fruit. The only time I’d have it was at friend’s houses or gatherings. I honestly wasn’t ever a huge fan of it, until I tried it with salt. To me, adding a bit of salt to watermelon or any melon, such as cantaloupe, really brings out the natural sweetness while also adding a bit of savoriness. I prefer this combo over what is otherwise a very sweet fruit (atleast to me). This summer we grew a variety of different watermelons in our no-till garden on the side of the house. We got over 10 watermelons in our little patch and I wanted to make something a little different than just serving it sliced. Hence, today’s recipe was born. While any lemon-lime flavored electrolyte powder would likely work, LMNT is our choice of electrolytes as it is low in carbs, there’s nothing artificial, it’s rich in the right kind of salt, and is just overall a solid product. While I have no tried it, I have a feeling the lemon flavored Ultima electrolyte powder will work similarly well. Not only does the LMNT add a nice citrus flavor, it add the perfect amount of salt to the sweetness of the slushy. I’ve never had a margarita, but I imagine it would taste something like this.

Sweet & Salty Watermelon Slushies

Ingredients

  • 1 ripe watermelon (4-6 cups blended)
  • 2, citrus LMNT packs

Process

  • Peel watermelon and cut into chunks, then blend the flesh until smooth with the LMNT.
  • Pour through a fine mesh sieve to catch any seeds, then pour the mixture into a parchment lined baking dish.
  • Place the dish in the freezer and allow to freezer over night.
  • Once completely frozen, remove the dish from the freezer and shave with a fork or place back in a blender and blend until crushed.
  • Portion into cups and enjoy with a spoon and straw.

Psalm 121:1-2 “I lift up my eyes to the mountains— where does my help come from? My help comes from the Lord, the Maker of heaven and earth.”

Filed Under: AIP, coconut free, Dessert, Fruit sweetened, low carb, no bake, nut free, paleo, Recipes, vegan

Paleo Coconut Flour Cinnamon Sugar Pumpkin Waffles (Nut-free, Low-Carb)

August 20, 2021

A recipe highlighting pumpkin and cinnamon in August may seem a little early in the year. However, I had a bunch of leftover canned pumpkin from last year and I wanted to be resourceful and make it anyways. So here we are. These waffles (or cookies, as my two year old calls them – any sweet treat or baked good is a “cookie”) are super easy to whip up and are a great variation to the classic waffle. Coconut-flour baked goods can be a little on the egg-y tasting side, but the pumpkin in today’s recipe helps cover this up nicely. We had ours smothered in butter and sprinkled with a cinnamon and sugar mixture, but they would be equally delicious spread with almond butter or maple syrup. Funny enough, my toddler insists on eating her waffles plain, with no “fixings.” I guess this goes to show how tasty they are on their own. My waffle ironed yielded 2 large circle waffles, or 8 triangle pieces and was perfect for serving 2-3 people depending on their appetite. If you want to make them lower in sugar, simply substitute granulated monk fruit for the coconut sugar. I like to use this brand here. As always, I prefer to get my baking ingredients from Thrive Market, as it is the easiest and most affordable way. Enjoy!

Coconut Flour Cinnamon Sugar Pumpkin Waffles

Waffles

  • 1/2 cup coconut flour
  • 1/2 cup canned pumpkin
  • 4 eggs
  • 1 tsp cinnamon
  • 1/4 cup avocado oil 
  • 1 tbsp coconut sugar
  • Pinch of salt 

Topping

  • 2 tbsp coconut sugar
  • 1 tsp cinnamon

Process

  • In a large bowl whisk together coconut flour, cinnamon, salt, and coconut sugar, then add in eggs, pumpkin, and avocado oil, mixing until a smooth batter has formed.
  • Scoop batter into a heated and greased waffle iron, cooking as as directed until golden.
  • Remove the cooked waffles from the iron and sprinkle with cinnamon sugar topping, butter, or ghee and serve.

Psalm 16:8 “I keep my eyes always on the Lord. With him at my right hand, I will not be shaken.”

Filed Under: coconut flour, gluten free, grain free, ketogenic, low carb, nut free, paleo, Recipes

Chronic Lyme & Carnivore: A Day in the Life

August 1, 2021

I recently announced on Instagram that I had started eating “carnivore.” Many of you wanted to hear more so here I am. There’s a lot I could say about the why’s behind carnivore, but I’ll leave that to Dr. Paul Saladino for now. In a nut shell, carnivore centers around eating meats derived from animals (muscle meat, organs, eggs, dairy products, & some seafood). Depending on how “hardcore” you are, non-toxic plant foods such as avocado, berries, olives, and even high quality honey are included. Plant derived foods (yes, even AIP/Paleo/Keto friendly veggies) are omitted for the simple reason that they are not necessary for optimal human health. I know, it sounds crazy at first glance. However, with my limited, but growing knowledge of this approach to eating, as well as personal experience and those of others, I am finding it to be quite true. For more information and to dispellany doubts you may have, be sure to check out Dr. Paul Saladino’s podcast and website here. In the meantime, back to my experience.

My Hangup

I’ve always been intrigued by the carnivore lifestyle. However, after many years of elimination diets necessary during specific periods of my healing journey, the last thing I wanted to do was decrease my diet’s diversity again. During both of my pregnancies I was able to drastically increase the variety in my diet thanks to a lowered immune response to things I’d previously react to. Some of these include but are not limited to…cruciferous veggies, avocado, vinegar, chocolate, seafood, berries, dairy products, nuts/seeds, etc… It doesn’t seem like a lot to most, but it was a huge accomplishment for me. Overall, I feared carnivore would make me feel restricted and while healthy for my body, would not healthy for my mental health. Despite still having these doubts, my husband and I decided to plunge in head first back at the beginning of June, 2021.

My Why

Like I said, carnivore has always interested me. While plants/plant derived foods have come and gone throughout my healing journey (Paleo to the AIP, SIBO elimination diet to Low-FODMAP & Ketogenic), one thing that’s always remained is meats and fish. Even at my sickest with chronic Lyme and co-infections, these foods remained in my healing diet. At one point I only could handle eating local fish, organ meat, and some beef products. These foods kept me alive , which is why I’ve always had a pull toward carnivore.

I also chose carnivore to learn more about my body. It’s easy to get in a routine of what you’re eating without much thought if something is adversely affecting you. For so many years I simply strove to not allergically react to foods. Yet with my MCAS somewhat under control I decided it was time to change my mindset a bit and dig a little deeper. I may not be getting anaphylaxis from a given food, but is it putting a damper on my energy in any way? Is it causing unnecessary GI symptoms? Is my mood as stable as it could be? Are my hormones running optimally? Am I recovering well from my workouts? Is my sleep suffering in any way? Is there any way I can increase my health and help my body function optimally? I wanted to find the answers to these questions and knew “going carnivore” would help me do just that. 

My Struggle

I didn’t want carnivore to mess with my mental health. It sounds silly, but despite the years of chronic illness I had managed to keep a healthy relationship with food and didn’t want restricting my diet to ruin this. I also didn’t want to give up my keto-friendly chocolate. It was a struggle at first but I really pushed myself. I ate, and if I was still hungry, I ate more. I snacked when I wanted and found after the first couple of weeks that my appetite regulated greatly. When I was dying a little inside for some coconut butter fat bombs or Lily’s dark chocolate, I’d allow myself the indulgence. Yet it wasn’t long before I didn’t even feel the need to eat anything other than animal products and low-toxic plant foods. The funny thing is, I most certainly don’t miss vegetables.

Another thing I struggled a bit with was bowel movements. While I wasn’t necessarily constipated, for the first couple weeks I kept skipping days where I went the bathroom. Despite this I rarely was bloated or uncomfortable and after a couple weeks things regulated themself. Even in this, it seems the quantity in my bowel movements have decreased. Without all the excess and indigestible plant materials, there’e just seems to be less waste to go around.

My Grocery List

We like to source most all of our meat from local farmers. It really is the healthiest and most affordable in the long run. Going carnivore and having others in the house eat primarily this way has also opened up some of our budget to prioritize high quality animal products. That being said, while we purchase these products as much as we can possibly afford, it’s not always financially possible. I don’t believe this is a reason not to give carnivore a shot. Just keep in mind processed meats and dairy products may not be tolerated as well by your body as their minimally processed, probiotic rich, local, and raw equivalents.  Another note to make is that my husband and I still do consume homemade cold brew coffee on a regular basis. This is not considered “carnivore,” mainly due to the mold that coffee can grow, but I will not get in to that now. We choose to include low-toxic plant items such as avocado into our weekly routine for more diversity, while others strictly live off of eggs and organ meat.

Monthly menu items:

  • Beef
  • Pork 
  • Chicken
  • Fish (canned/fresh)
  • Pork rinds
  • Organic hot dogs
  • Cheese (in many forms)
  • Yogurt, cottage cheese, cream cheese, sour cream, etc…
  • Heavy cream
  • Olives 
  • Avocados
  • Berries (occasionally)
  • Cucumber (home grown, no seeds/skin)
  • Honey (for husbands coffee) 
  • Jerky (for husband) 
  • Avocado or coconut-oil based mayo
  • Seasoning (minimally – usually green herbs or garlic & onion) 
  • Butter
  • Lard
  • Tallow

My Thoughts 

Is carnivore the magic cure? Am I healed of all my lingering health issues from chronic Lyme and resulting illnesses? The short answer is no, but I definitely have seen some differences in my overall health that I’m unwilling to passively give up. GI issues have always been central in my health problems and continue to be to this day. I struggle with persistent yeast issues, possibly due to mold exposure (more on that in a later post), and nothing ever stays good and happy “forever.” While carnivore hasn’t completely eliminated all my gut issues it has gotten rid of a lot of additional ones caused by food and it is helping me pin point underlying issues in my body that may potentially be contributing to the imbalances I still face in my GIT. 

The biggest area I’ve seen carnivore help is my energy source. It just feels like good, clean energy. I don’t know how else to explain it. It hasn’t made me superwoman by any means. I still get fatigued and tired, but my energy throughout the day stays stable and my performance in workouts has increased. Not only that, but I don’t feel constantly hungry. I can go hours without eating and not even mean too, simply because I’m satiated and full on nutrient dense calories that don’t mess with my blood sugar or signal my brain that I’m hungry when I’m really not.

Overall, carnivore hasn’t been the answer to all my questions. But it is helping me learn more about my body, and to me that is priceless. It is pushing me to explore new possibilities for my continued GI issues, headaches, infections, allergies, etc…and while it hasn’t gotten rid of these issues, it has allowed my body to perform as optimal as it can under the conditions that it has been given. On top of that, it’s made cooking a cleanup for a family of six way less time consuming. So hey, what’s not to love? Be sure to watch my new day-in-the-life video for a sneak peak of how unglamorous and fancy yet satisfying my carnivore life is and comment below to have your question answered in an upcoming Q&A video!

~~~~~~

~~~~~

Psalm 119:114 “You are my refuge and my shield; I have put my hope in your word.”

Filed Under: autoimmune disease, carnivore, chronic illness, chronic lyme, chronic lyme disease, coffee, Food, Food and The Human Body, Gabriella's Updates, organ meat, seafood, Thrive Market

Paleo Maple Cinnamon Crunch Muffins ft. Thrive Market Paleo Pancake & Waffle Mix

July 18, 2021

As a chef and purest I rarely ever use pre-mixed or pre-packaged foods for cooking. To me, that’s not real cooking (or baking), and most of the time these mixes are filled with unhealthy preservatives or other gross ingredients. An exception to this would be taco night, where I’ll happily use pre-made mixes from Thrive Market to season our meat. Another exception would be today’s recipe, which just so happens to feature another 100% healthy baking mix from Thrive. Somehow I’ve managed to collect a variety of Paleo pancake and waffle mixes over the year and I wanted to do something other than, you know, pancakes or waffles. I also had also previously ordered a few bags of grain-free granola from Target, as Fage 5% fat yogurt (aka thick, creamy, and amazing) with Paleo “cereal” is a regular breakfast for the kiddos. Therefore, with both of these items on hand and a weirdly quiet Saturday morning (somehow all the babies actually slept past 6:30), I decided to whip up a quick batch of these maple cinnamon crunch muffins. To my delight, the results were fantastic. Not only were they super quick to make, they were fluffy, with the perfect amount of sweetness, crunch, and moistness. Allie had hers cut in half and served with a slice of Vital Farm’s sea salt butter, while my husband simply gobbled them up on their own. Overall, if you’re a busy person that strives to eat healthy but loves a good cooking hack every now and then, today’s recipe is for you. Enjoy its simplicity!

Paleo Maple Cinnamon Crunch Muffins

Ingredients

  • 1 bag Thrive Market Paleo Pancake & Waffle Mix
  • 1 bag Nature’s Path Grain-free Maple Almond Granola
  • 1/4 cup coconut oil, melted
  • 4 eggs
  • 1/3 cup maple syrup

Process

  • In a large bowl, whisk together pancake and waffle mix, coconut oil, eggs, and maple syrup until a smooth batter has formed.
  • Scoop batter into prepared muffin tin and sprinkle with grain-free granola and bake in a 350 degree oven for 15-20 minutes until golden on top.
  • Remove from the oven and allow to cool before transferring muffins to a cooling rack.

Romans 1:16 “For I am not ashamed of the gospel, because it is the power of God that brings salvation to everyone who believes…”

Filed Under: baked goods, breakfast, coconut flour, dairy free, grain free, paleo, Recipes, Thrive Market

4 Ingredient – Autoimmune Protocol Friendly Mango Lime Popsicles (Dairy-free)

July 11, 2021

Popsicles have become a staple in our household this summer. After receiving a few fruit-sweetened packets of yummy popsicles from Thrive Market as free gifts, the kids were all hooked. However, the freebies quickly disappeared and I decided it was the perfect opportunity to make some homemade pops. The idea of homemade pops became so popular my oldest decided she wanted to create a popsicle business called “Mia’s Mexi-pops” where we sell Mexican-inspired popsicles (paletas). With the logo and menu made, we are in the recipe-development phase of the “business,” which is where today’s recipe comes from. So far we have made yogurt blueberry, sour limemade, and today’s recipe, mango lime. If you’ve had my mango sorbet recipe before, today’s popsicles are very similar. The only difference is that this recipe contains a bit of coconut milk to make them extra creamy. That being said, while I chose to add a bit of honey for extra sweetness, this is completely optional. The key, however, is to wait until your mangos are super ripe and sweet. This helps make sure the mixture can be blended very smooth, is naturally sweet, and the texture is at optimal (no one likes a sour, crunchy “pop”, just saying).

Autoimmune Protocol Paleo Mango Lime Popsicles

Ingredients

  • 2 ripe mangos
  • 1/4 cup fresh lime juice
  • Pinch of salt
  • 5.4 oz can full-fat coconut milk
  • 1-2 tbsp raw honey (optional)

Process

  • Peel mangos and place in a blender or food processor.
  • Add remaining ingredients and blend until smooth.
  • Pour into popsicle molds or bags and freeze until firm.

Jeremiah 32:17 “Ah, Sovereign Lord, you have made the heavens and the earth by your great power and outstretched arm. Nothing is too hard for you.”

Filed Under: AIP, autoimmune, autoimmune friendly, autoimmune paleo, dairy free, Dessert, fruit, Fruit sweetened, ice cream, no bake, nut free, Recipes, Sweets and Snacks

Keto Blueberry Loaf Bread (Low-carb, Nut-free)

June 29, 2021

My family and I went blueberry picking for the first time together this year at Kelley’s Berry Farm. If you’re ever in the middle TN area in July, you definitely should check it out. I grew up picking blueberries at a local farm and Kelley’s definitely brought me back to the good’ole days. We ended up with a few big buckets of blueberries and I knew that I had to make something out of them to share with ya’ll. Blueberry muffins are definitely my favorite, but this loaf bread comes to a very close second. It’s everything you’d want in a great quick bread recipe…It’s moist (yeah – all you proper food description police, I said it), airy, and has just the right amount of lemon flavor to highlight the blueberries perfectly. While I made it in a loaf pan, you certainly could make it into muffins with an adjustment to the baking time. You could also bake it in a 8×8 brownie pan or a 9 inch circle cake pan and serve it with freshly whipped coconut cream or heavy cream. That being said, I would definitely use fresh berries and not frozen, as they tend to hold more moisture that could mess with the texture of your finished product. Overall, this blueberry loaf bread is a tasty snack or treat that everyone will love. Enjoy!

Keto Blueberry Loaf Bread

Ingredients

  • 2/3 cup coconut flour
  • 1/2 tsp baking soda 
  • 1/4 tsp sea salt
  • 1/2 cup monk fruit
  • 8 eggs
  • Juice & zest of 1 lemon
  • 1 tsp vanilla extract
  • 1/2 cup avocado oil 
  • 1/3 cup water
  • 1 1/2 cup fresh blueberries

Process

  • In a large bowl whisk together eggs, monk fruit, lemon zest and juice, vanilla, oil, and water until smooth.
  • Add in dry ingredients and stir until combined.
  • Fold in 1 cup of blueberries and then transfer the batter into a parchment lined loaf pan.
  • Spread the remaining 1/2 cup of blueberries on top of the batter and bake for 50-55 minutes at 375 degrees.
  • Remove the pan from the oven and allow to cool fully before removing from the pan and slicing.

Psalm 138:8 “The Lord will vindicate me; your love, Lord, endures forever— do not abandon the works of your hands.”

Filed Under: baked goods, fruit, low carb, paleo, Recipes

Autoimmune Protocol Paleo Braised Kalbi Short Ribs

June 15, 2021

With our freezer newly stocked with a local half cow I decided it was time to share more meat recipes with ya’ll. Aside from ribeye (and maybe a good, fatty smoked brisket), short ribs are easily one of my favorite cuts of beef. Braising the ribs in a coconut-amino based marinade infuses them with a perfect savory flavor and makes them super tender and succulent. What more could you want from a rib? While the addition of honey is not completely necessary, it aids in the ribs developing a nice golden color around the edges as they roast. On another note, not everyone has tigernut oil stocked in their pantry, I get it. This can be used in AIP-friendly cooking in place of nut and seed based oils. I’ve found tigernut oil gives dishes a similar nutty flavor found in sesame oil, which is why you will find it in today’s recipe. However, if you are not in the elimination phase of the Autoimmune Protocol, feel free to sub it out using sesame oil or omit all together if necessary. It definitely won’t make or break the recipe as a whole. You can also omit the salt and use gluten-free tamari in place of the coconut aminos and any plain, homemade bone broth you may have on hand. For an extra authentic dish, you can also substitute out the apple cider vinegar for rice vinegar. The choice is yours, so enjoy. These ribs are great garnished with thinly sliced scallion and a side of broccoli, cauliflower rice, or my Yellow Lebanese Rice recipe.

Kalbi Marinated Short Ribs

Ingredients

  • 5 lb beef short ribs 
  • 16.9 oz carton of Thrive Market’s beef broth
  • 1 tbsp garlic powder
  • 1 tbsp ground ginger
  • 1 tbsp fish sauce
  • 1 tbsp tigernut oil 
  • 1/2 cup apple cider vinegar
  • 2 cups coconut aminos
  • 1/2 cup honey
  • 1 tsp sea salt

Process

  • In a large bowl whisk together broth, garlic, ginger, fish sauce, tigernut oil, apple cider vinegar, coconut aminos, and sea salt.
  • Place short ribs in a large plastic bag and pour in the marinade. Allow to marinade over night for best results.
  • To cook, place the beef and marinade in a large baking dish and cook for 1 hour in a 375 degree oven, then turn down the heat to 275 and cook another 1-2 hours.

Notes: Omit tigernut oil or replace with sesame oil. Omit the salt and replace coconut aminos with gluten-free tamari.

Philippians 3:20 “But our citizenship is in heaven. And we eagerly await a Savior from there, the Lord Jesus Christ,”

Filed Under: AIP, autoimmune, autoimmune paleo, Food, meat, paleo, Protein Dishes, Recipes

Paleo Chocolate Chip Cookie Ice Cream Sandwiches (Dairy-free, Nut-free)

June 8, 2021

The funny thing about having a recipe blog is that somedays figuring out what to write in the body of your post can be the most difficult. The irony of this is that, most of the time, when someone is searching the web for a recipe, the body of a blog post is the last thing they read. Maybe it’s just me, but rarely will I sit and take the time to read what the author and chef has to say about the recipe. And this folks, is where I am today. I truly don’t have much to write about this recipe except for, ice cream sandwiches….do I REALLY need to say more? I chose to go with a simple, unsweetened filling made with banana and coconut. However, the choice is truly up to you on what you fill the cookies with. You can even omit the ice cream and simply make killer chocolate chip cookies. The choice is yours, and I promise I won’t go off on any more “random” rambling. Enjoy.

Paleo Chocolate Chip Cookie Ice Cream Sandwiches (Dairy-free, Nut-free)

Cookie Ingredients

  • 140 g cassava flour
  • 1/4 tsp sea salt
  • 1/2 tsp baking soda
  • 1/3 cup coconut sugar
  • 1/3 cup granulated monk fruit
  • 1 tsp vanilla extract
  • 1 eggs
  • 1/2 cup non-hydrogenated palm shortening
  • 3/4 cup Lily’s chocolate chips

Filling Ingredients

  • 3 very ripe bananas
  • 1 cup full-fat coconut cream
  • 1/2 tsp vanilla extract 
  • 1/8th tsp sea salt

Process

  • To make the cookies, a large mixing bowl, beat together palm shortening, vanilla, monk fruit, and coconut sugar until smooth, then add in eggs one at a time until just combined. 
  • Sift together dry ingredients and then add to the mixing bowl, beating on low until combined, then fold in the chocolate chips. 
  • Use a cookie scoop to transfer the dough to a parchment lined baking sheet, then use the back of a spatula or spoon to flatten the dough 1/4 inch thick. 
  • Repeat with remaining dough and bake at 350 degrees for 10 minutes. 
  • Allow the cookies to cool completely before sandwiching with ice cream. 
  • To make the ice cream, combine all of the ingredients in a blender or food processor until smooth. 
  • Place mixture into an ice cream maker and churn until thickened, then sandwich between two cookies and serve immediately. 
  • If not using an ice cream maker, pour the mixture into a parchment lined baking dish and freeze until firm. 
  • Once ready to serve, remove the baking dish from the freezer and allow the ice cream to thaw slightly, then use a round cookie cutter to portion out the ice cream and sandwich each round between two cookies. 

Notes – Simply use store-bought ice cream or another one of my ice cream recipes found here.

Habakkuk 3:19 “The Sovereign Lord is my strength; he makes my feet like the feet of a deer, he enables me to tread on the heights. For the director of music. On my stringed instruments.”

Filed Under: baked goods, cassava flour, coconut free, cookies, dairy free, Dessert, Fruit sweetened, gluten free, grain free, nut free, paleo, Recipes

Paleo AIP Mango Crumb Bars (Egg-free)

May 22, 2021

Just the past week my parents came to visit from Florida and brought with them mangoes from their backyard (if that sentence doesn’t make you want to move to FL, what will?!). There also just so happened to be mangoes on the clearance rack at our local Kroger, causing us to have an over abundance of mangoes in the house. So…what to do? While a coconut-mango sorbet recipe did cross my mind, I wanted to make something a little more authentic. Baking with mango is something I’ve never actually done before, which is why I chose to make mango crumb bars. Crumb bars must be a May “thing,” as back in 2019 I made these AIP Blueberry Crumb Bars that were a hit with the whole household. Though pureed green plantain really helps the durability and texture of egg-free, autoimmune-protocol baked goods, I tried to make today’s recipe a little simpler by avoiding its addition. Overall, today’s recipe is a great twist to the traditional fruit crumble bar, and can be made even more amazing with a dollop of coconut milk ice cream on top.

Paleo AIP Mango Crumb Bars

Crust

  • 1/2 cup coconut flour
  • 1/4 cup tigernut flour 
  • 1/4 tsp sea salt 
  • 1 tbsp honey
  • 1/2 cup non-hydrogenated palm shortening, cold
  • 1 tsp vanilla extract

Filling

  • 2 cups fresh diced mango
  • 1 tbsp honey
  • 1 orange, zest & juice
  • 1/4 cup water 
  • 1/8th tsp sea salt
  • 1 arrowroot slurry

Topping

  • 1/2 cup shredded coconut 
  • 1/2 cup coconut flakes
  • 1/2 cup tigernut flour
  • 1/4 tsp sea salt
  • 1/4 cup non-hydrogenated palm shortening, melted
  • 1 tbsp honey

Process

  • In a food processor, pulse together coconut flour, tigernut flour, sea salt, honey, and vanilla extract 
  • Pulse in shortening a couple tbsp at a time until a dough just forms
  • Press the dough into a parchment lined 8×8 square baking dish, poke with a few homes, and bake at 350 for 10 minutes until just beginning to brown around the edges.
  • Set aside to cool fully before adding the filling.
  • To make the filling, add all ingredients but the slurry to a pot and bring to a simmer, allowing to cook for 5 minutes, stirring often. 
  • Next, add in the slurry and allow to cook for another 5 minutes, allowing the mixture to thicken.
  • Allow the mixture to cool then spread over the baked crust.
  • To make the topping, combine all if the dry ingredients in a bowl, then mix in honey and melted shortening until a crumble has formed.
  • Next, top the filling with the prepared crumble and bake at 350 for another 10 minutes until golden brown on top. 
  • Remove the bars from the oven and allow them to cool completely before slicing and serving. 

Notes: for the arrowroot slurry, use mix 1 tbsp water with 1 tbsp arrowroot flour until combined

Romans 8:1-2 “Therefore, there is now no condemnation for those who are in Christ Jesus, because through Christ Jesus the law of the Spirit who gives life has set you free from the law of sin and death.”

Filed Under: AIP, autoimmune paleo, breakfast, coconut flour, dairy free, Dessert, egg free, grain free, Recipes, Sweets and Snacks, tigernut flour

Breastfeeding & Frenectomy – Our Experience

May 10, 2021

With August being breastfeeding awareness month, I wanted to bring light to a topic strongly related to breastfeeding and the struggles that may come with it – frenum. This word is otherwise known as the tissue membrane that connects the surfaces of the mouth (tongue to the bottom of the mouth, lips to the gums, and gums to the cheeks). While the exact cause of cheek, lip, or tongue ties is not 100% known, it is to believed to be related to genetics and the MTHFR gene mutation. It’s been confirmed that I have this mutation and therefore it didn’t come with much surprise that my first born had a significant tongue tie and my second born had all three types; buccal, labial, and lingual. I’ve mentioned the tongue tie revision that my first born received soon after birth and our struggles with nursing here.  However, I wanted to expand on this topic and our experience with multiple ties in today’s post.

~ ~ ~ ~ ~

On November 19th, just after 1 PM, our son John Miguel was brought earthside at home with the help of my great midwife and doula team.  Upon physical examination, it was determined that he had a weak suck and possible tongue tie.  While he was very interested in nursing, the midwives observations proved to be true and he could hardly stay latched. In the days to come, this caused a lot of pain and soreness when feeding and eventually caused me to bleed. With my first, her tongue tie that went unrecognized at the hospital proved to cause issues in the form of acid reflux and spitting up. I never experienced pain or bleeding with nursing and she stay latched rather well, which just goes to show how signs of a tie may vary with the baby. While she tried to adapt to her anatomy, she still swallowed air while eating, causing acid reflux. This caused us to have issues with traditional breastfeeding positions (such as across the body or “football” position), and I was forced to nurse with her and I both practically sitting straight up.  I also had to make a point to keep her in an upright position atleast 30 minutes after feeding.  This may sound simple, but to a breastfeeding mom, this is not only exhausting, but difficult for both mom and baby.  I personally did not want her to continue suffering which is why we chose to do the frenectomy at her pediatrician’s office.

~ ~ ~ ~ ~

While Miki did not have any signs of indigestion, he clearly was getting frustrated when it was time to nurse.  In turn, he wasn’t getting enough to eat, which made him fussier all around.  Much like with Allie, I wasn’t messing around, and decided to have the. a lactation consultant come to the house to do a thorough examination.  Jane determined that not only did Miki have a tongue tie, but also a strong lip tie and cheek ties. This caused him to have a very weak suck, which is why he would frequently bite my nipples when trying to get milk.  His chin was also noticeably receded and his ability to fully open his mouth was limited. Due to the multiple ties that he had (and the fact that his NP couldn’t see him for another 3 weeks), we decided to do a laser revision at a local cosmetic dentist’s office. While both laser and regular revisions have proved to be effective for our family, laser revisions are touted for having a quicker healing period and a more precise cut. Overall, the procedure took around 5 minutes with minimal bleeding and Miki calmed rather quickly afterwards. While no parent likes having to put their child through hard things, I knew doing the revision at such a young age would be best for everyone. The craziest part is that his facial expression and appearance was noticeably different immediately following the operation. Not only were his cheeks and lips much more relaxed, his cry was much louder since he could actually open his mouth to let the sound out (we always noted he was such a soft crier – not anymore!).  Healing took time and I spent almost 3 months doing the post-revision care exercises with him every 3 or so hours (including at night). He hated every minute of it but I am so thankful to say he has become a nursing pro. We no longer struggle with feeding and his suck has gotten noticeably stronger.  Not only that, but he gets compliments on his lips all the time (I guess thats an added plus for him once he’s older? haha) 

~ ~ ~ ~ ~

Overall, while some people choose to opt out of a frenectomy despite extra tissue noticeably present, it truly is up to the parents discretion on what should be done. That being said, it’s always important to make sure the baby is not experiencing low weight due to inability to feed properly. Outside of issues with nursing, one may also choose to get a revision due to the fact that the excess tissue can later cause speech issues, jaw pain/clicking, a space between the two front teeth, etc…Personally, I could tell by the look of my son’s face that there was a great deal of tension being stored in his mouth and jaw even at 3 weeks old. I myself deal with a great deal of neck and jaw pain (likely do to my lip tie) and didn’t want him to have to deal with the same if I could help it. All things aside, if you’re a mamma dealing with a painful breastfeeding experience, I highly encourage you to have your baby evaluated.  Tongue, lip, and cheek ties are more common than most of us realize and can have a big impact on a child even past nursing years. Please feel free to reach out if you have any questions about our experiences with tie revisions!

Matthew 18:15 ““If your brother or sister sins, go and point out their fault, just between the two of you. If they listen to you, you have won them over.”

Filed Under: Baby, chronic illness, chronic lyme disease, health article, homebirth, Personal Experiences

Paleo Strawberry Jam Pop-Tarts (Keto-friendly, coconut-free)

May 3, 2021

I had a thing for strawberries when I was pregnant with my first. I never knew I could crave a fruit so badly. While I’m definitely not pregnant, I still have a thing for strawberries. Growing up, my mom would take any chance she could get to take us to the local farm and fill up large flats full of PYO strawberries. Though living near the city in Nashville does not make continuing this tradition quite as easy, I’ll take any excuse to pack up the car and go strawberry picking. Just this past week, it was opening day and with studying for finals truly the last way I wanted to spend a sunny day in April, my friend and I drove 45 minutes East to go picking. Allie enjoyed grazing on strawberries like it was her job while I picked a bucket to take home. While it was only a couple pounds worth, I quickly realized that they were going to last a lot longer now that I wasn’t pregnant and devouring every strawberry in site. So what to do? Pop-tarts, duh.

Call them pop-tarts, hand-pies, or a strawberry breakfast pastry – I don’t care! These pop-tarts can truly serve as breakfast, a snack, or treat. I chose to let the strawberries shine and not use too much sweetener. For the frosting, I made things quick and simple by using Drink Everly fruit punch flavored drink powder. My toddler loves these mixes and has them daily in her “agua” (so she calls it). The drink mix is naturally colored with red radish, but you could also opt for using powdered monk fruit sweetener and a natural food dye. Overall, I tried to make the instructions to make these pop-tarts as straight forward as possible, with their shape being completely up to you. So have fun and enjoy!

Paleo Strawberry Jam Pop-Tarts (Keto-friendly, coconut-free)

Ingredients

  • 2-3 cups fresh strawberries
  • 1 clementine, juiced
  • Pinch of sea salt
  • 1/4 cup granulated monk fruit sweetener
  • 1/4 cup water 
  • 1 tsp arrowroot flour + 2 tbsp water (slurry)
  • 2 cups almond four
  • 1/4 tsp sea salt
  • 1/4 cup cold unsalted butter
  • 1/4 cup granulated monk fruit sweetener
  • 1 tsp vanilla extract
  • 1 egg
  • 4 oz softened cream cheese
  • 1/4 cup softened, unsalted butter
  • Everly fruit punch drink mix
  • 1 egg white for brushing

Process

  • Remove the stems from the strawberry and place them in a pot with water, sea salt, monk fruit sweetener, and juice of clementine, allowing to simmer over medium heat until the berries have softened. 
  • Once the liquid has reduced by half, add arrowroot slurry and whisk to combine.
  • Cook the mixture for 30-60 seconds until just thickened then remove from the heat and cool the jam for use. 
  • To make the dough, add almond flour, sea salt, vanilla, and monk fruit to a food processor and pulse to combine. 
  • Add in the cold butter and pulse to combine, then add egg and pulse just until a ball of dough forms. 
  • Place the dough on a large sheet of parchment, cover with another sheet of parchment, and roll out to 1/2 inch thick. Place the dough in the fridge to chill.
  • Once fully chilled, roll out the dough to 1/4 inch thick and cut into desired shapes. 
  • Brush the insides of the dough with egg white, then place 1 tbsp of jelly on the inside of half of the shapes. 
  • Place the equivalent of dough on top of the shape with jelly, lightly press around the edges with a fork, poke 3 holes in the top, and brush with egg white. 
  • Repeat for remaining dough and bake at 375 for 15 minutes until golden around the edges.
  • Allow the pop-tarts to cool fully before frosting and serving. 
  • To make the frosting, beat together softened cream cheese, butter, and desired amount of Drink Everly fruit punch drink mix. 

Job 19:25 “I know that my redeemer lives, and that in the end he will stand on the earth.”

Filed Under: breakfast, ketogenic, low carb, paleo, Recipes

AIP Paleo Shredded Pineapple Chicken (Keto-friendly)

April 27, 2021

I don’t have too much additional things to say about today’s recipe, so here are a few notes…For those looking to avoid coconut try using gluten-free tamari sauce. Thrive’s mushroom bone broth gives the dish a nice added savory touch but is not completely necessary. Any broth or stock will do! You can also make this recipe using a pre-cooked rotisserie chicken. Simply cut the cooking time in half and you’ve got an easy meal on your hands. I used fresh pineapple because that is what I had on hand (thank you Kroger clearance rack), however, a 16 oz can of crushed pineapple will do just fine. While I have a recommended amount of seasoning listed, feel free to bump up the ginger for a little fire-y, nightshade-free kick. That being said, while I only had half of a chicken on hand, spatchcocking and utilizing a whole one will totally work. If you do this, just don’t forget to double all of the other ingredients. That being said, if you don’t have any part of a whole chicken on hand, simply substitute 2-3 lbs of your favorite cut of chicken. I recommend skin-on, boneless thighs if you can get some. Enjoy!

Shredded Haiwian Chicken

Ingredients

  • 1/2 whole chicken
  • 16 oz diced pineapple
  • 1 cup Thrive mushroom bone broth
  • 1/2 cup coconut aminos
  • 1/2 diced yellow onion
  • 1 orange, juiced
  • 1 tsp ground ginger
  • 1 tbsp garlic powder
  • 1/2 tsp sea salt
  • Cilantro (for serving)

Process

  • Season chicken liberally with garlic powder, ground ginger, and sea salt.
  • Place ginger in a baking pan with diced pineapple, onion, juice of 1 orange, bone broth, and coconut aminos.
  • Place in a 250 dg preheated oven and cook for for 6-8 hours until easily pulling apart with a fork.
  • Remove the baking pan from the oven and shred chicken with remaining pan juices.
  • Serve in lettuce cups and garnish with cilantro

John 10:28 “I give them eternal life, and they shall never perish; no one will snatch them out of my hand. “

Filed Under: AIP, autoimmune friendly, autoimmune paleo, chicken, dairy free, egg free, gluten free, grain free, ketogenic, low carb, nut free, paleo, Protein Dishes, Recipes

Sweet Potato Waffles (AIP Paleo, Vegan, Coconut-free)

April 17, 2021

I love shopping at grocery stores like Whole Foods and the local Turnip Truck because the brands they carry excite me and I love to see what is new on the shelves. But you know what I love more? The clearance produce rack at my local Kroger. For just 99 cents a bag I am able to diversify my families diet without braking the bank. It is awesome (and half the time it is organic too!). This past week, as this recipe might suggest, I scored a bunch of sweet potatoes. While sweet potato fries are on our regular dinner rotation, I wanted to do something a little more fun for the blog. Hence…waffles.

~ ~ ~ ~ ~ ~

A few notes about today’s recipe…First off, the batter will be thick. Second, I haven’t tried the recipe with anything but green banana flour, but I have a slight feeling that almond or tigernut flour will also work. Third, you can replace the avocado oil with whatever you have on hand, such as coconut oil, ghee, or butter (the choice is yours – just don’t leave it out!). For the sweet potato, it is best to roast the them whole until able to be pierced with a fork. This ensures no extra moisture is introduced to the batter, which is key to avoid a gummy waffle.

Sweet Potato Waffles (AIP Paleo, Vegan, Coconut-free)

Ingredients

(Yields 6-8 waffle wedges)

  • 1 cup roasted & peeled sweet potato
  • 3/4 cup green banana flour
  • 1/2 yellow banana
  • 1 tbsp avocado oil
  • 1/4 tsp sea salt
  • 1/2 tsp vanilla extract
  • 1 tbsp maple syrup (optional)

Process

  • Roast whole sweet potatoes until fork tender, then peel and place in a food processor with the remaining ingredients.
  • Blend until smooth, then pour the batter into a hot waffle iron and cook until just beginning to brown.
  • Remove from the iron with a fork and allow to cool slightly before serving.
  • Repeat with remaining batter.

Romans 13:8 “Let no debt remain outstanding, except the continuing debt to love one another, for whoever loves others has fulfilled the law.”

Filed Under: AIP, autoimmune, autoimmune paleo, breakfast, coconut free, dairy free, egg free, Fruit sweetened, gluten free, grain free, nut free, paleo, plantains, Recipes, vegan

Keto Almond Butter White Chocolate Bar (Paleo-friendly, Peanut-free)

March 27, 2021

Easter is upon us once again! I love this holiday for many reasons, one being that it means spring is upon us. However, this also tends to mean that all outdoor Easter festivities are postponed due to rain (currently our situation here in Nashville). Nevertheless, I decided it was time to share my recreation of one of the favored candies in most Easter egg hunts: Reese’s White Peanut Butter Easter Egg. While I am a huge dark chocolate lover and enjoy my fair share of it on almost a regular basis, the occasional white “chocolate” still has its place. For me, it’s less about the actual taste and more about the nostalgia of my youth that comes with it. However, whatever your reason for loving white chocolate, I know today’s recipe will definitely hit the spot. While I didn’t have a fun egg-shaped chocolate mold to make these almond butter bars *look* exactly like Reese’s eggs, the texture and flavor are certainly very similar. Per usual, I like to keep my little bars cut up and stored in a deli container in the freezer for a quick snack or treat. The best part is, unlike the traditional candy, these bars are low in sugar and high in fat, sure to keep you satiated (and satisfied). My personal choice of almond butter is Barney’s bare and smooth. Unlike many brands, Barney’s almond butter is from blanched nuts (skins removed), which I find is easier for my gut to digest. Not only does this make the almond butter easier on my body, but the resulting flavor and texture is truly unbeatable (try it, and see!).

Keto Almond Butter White Chocolate Bar

Ingredients

  • 1/2 cup Barney’s bare smooth almond butter
  • 1/4 cup unsalted butter
  • 2 tbsp granulated monk fruit
  • 1/2 tsp vanilla extract
  • 1/4 tsp sea salt
  • 1/2 cup Lily’s white chocolate chips
  • 1/4 cup unsalted butter

Process

  • In a small sauce pot, heat butter until melted, then mix with monk fruit, vanilla, sea salt, and almond butter until smooth.
  • Pour mixture into a parchment lined baking dish and place in the freezer to set.
  • Once set, melt butter and white chocolate chips over a double broiler until smooth and combined.
  • Pour the chocolate over the top of the almond butter base and spread over the surface evenly.
  • Place the baking dish back in the freezer to allow the chocolate to harden.
  • Once set, remove from the freezer and cut into bars.

Note: alternatively to melting the butter, simply have all ingredients at room temperature for easy mixing.

James 1:12 “Blessed is the one who perseveres under trial because, having stood the test, that person will receive the crown of life that the Lord has promised to those who love him.”

Filed Under: candy, grain free, ketogenic, low carb, no bake, paleo, Recipes

Next Page »

Primary Sidebar

Recent Posts

My Guide to Practical Animal-based Eating

Paleo Banana Collagen Bars with Coconut Flour (Nut-free)

Paleo AIP Cinnamon Raisin Collagen Bars (Fruit-sweetened, Coconut-free)

Coconut Flour Molasses Spice Cookie Bites (AIP-friendly, Nut-free)

Crustless Keto Cheesecake (Carnivore-friendly)

Paleo Fruit Sweetened Harvest Bread (Gluten-free)

Copyright © 2025 · LBD Pro V on Genesis Framework · WordPress · Log in