• Skip to primary navigation
  • Skip to main content
  • Skip to primary sidebar
  • Home
  • About Me
    • My Videos
    • Organ Meat Makeover
  • Recipes
  • Health Articles
  • Resources
    • Young Living Essential Oils

Beyond the Bite

Get Beyond the Tick Bite and Eat Right For Your Life.

  • E-books
    • Organ Meat Makeover
    • Practical Animal-Based Eating
  • About Me
    • Videos
    • Health Articles
  • Recipes
    • Email
    • Facebook
    • Instagram
    • Pinterest
    • YouTube

Recipe Index

Review: A Simple Guide to the Paleo Autoimmune Protocol by Eileen Laird

January 13, 2016

Screen Shot 2015-12-10 at 11.09.40 AM
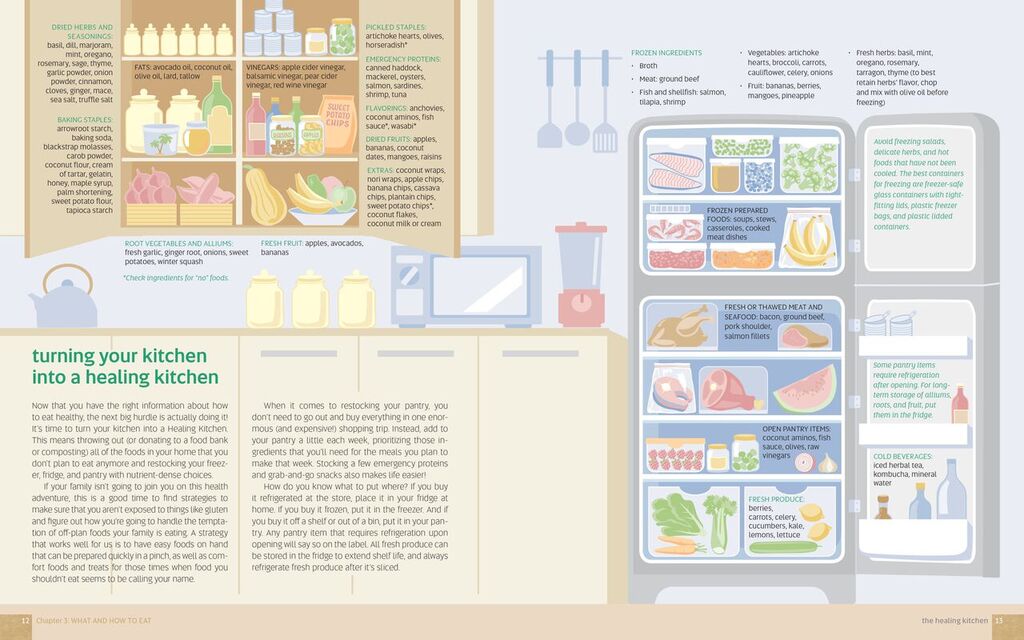
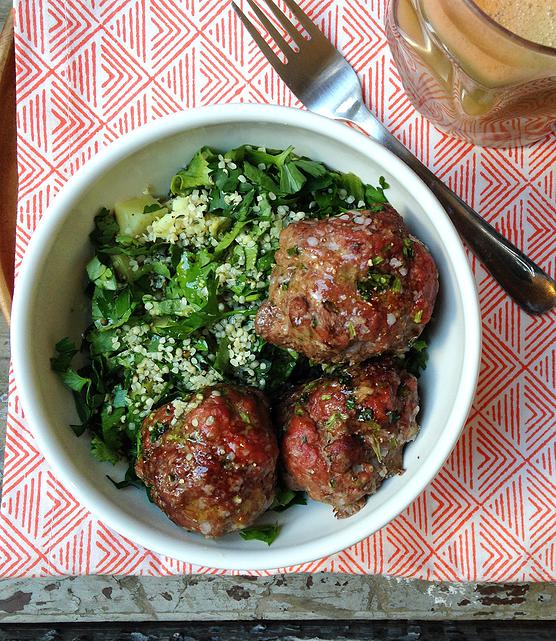
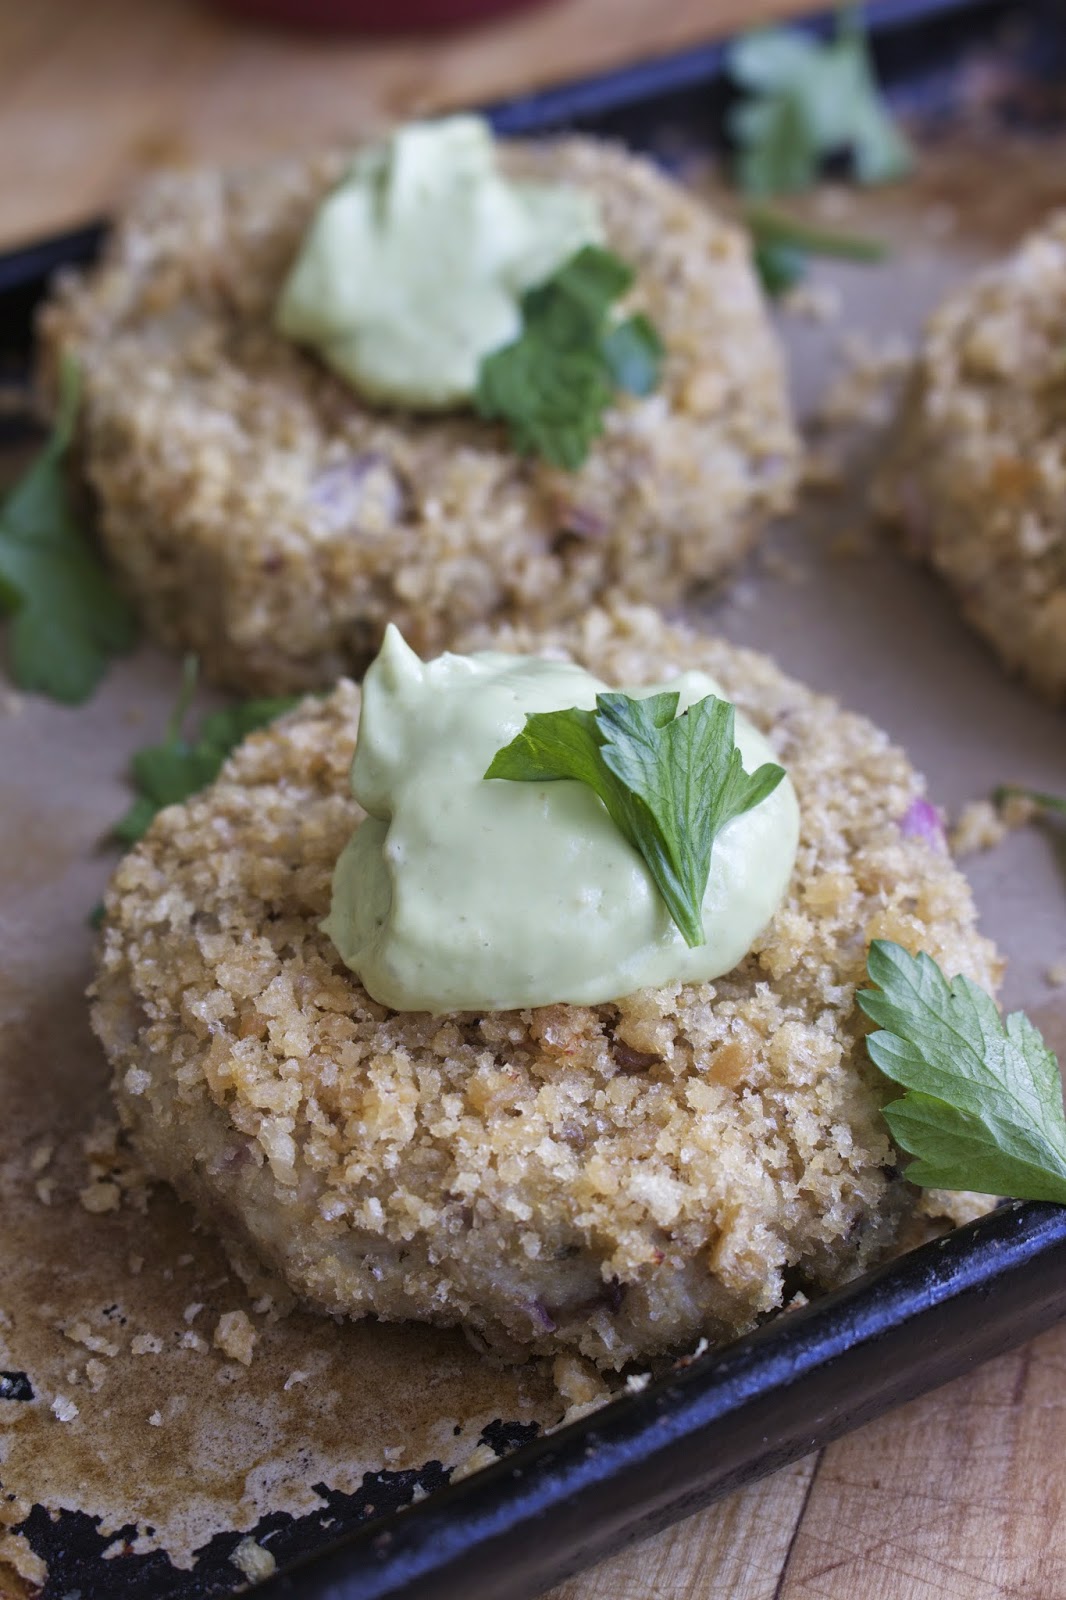
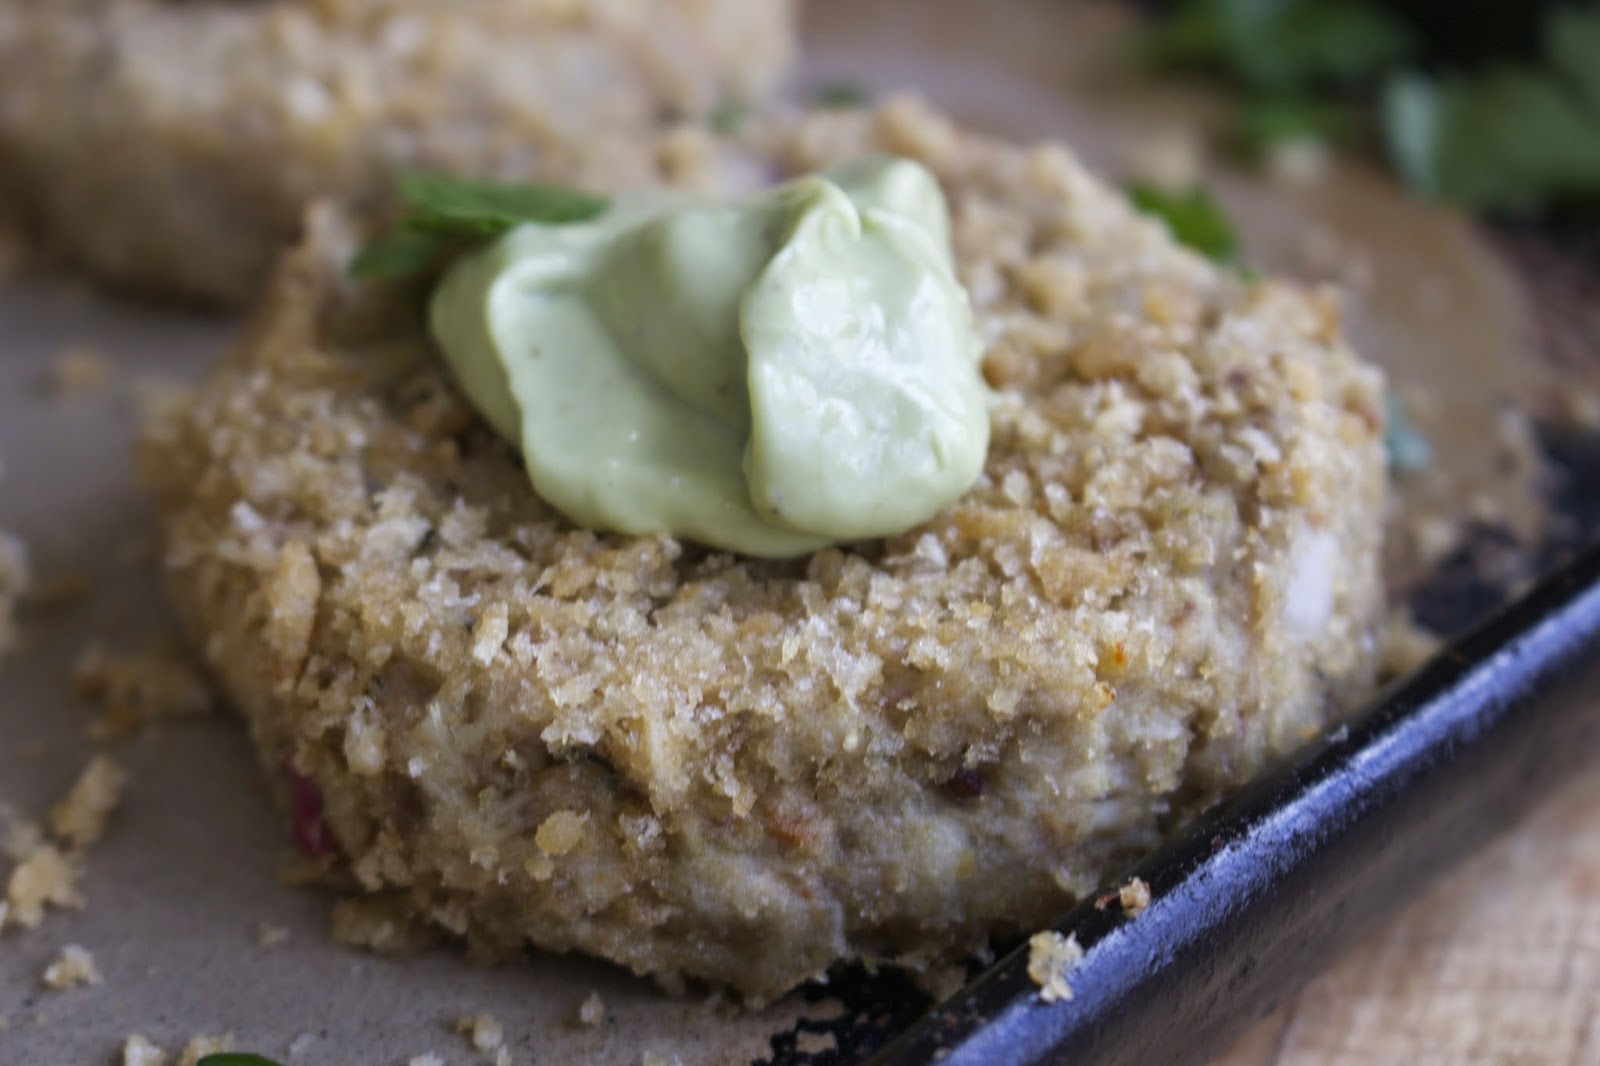
As the beginning notes of Eileen’s book say, it is a resource “dedicated to anyone whose autoimmune disease knocked them down so hard, they wondered if they would ever rise.”  That phrase alone spoke to me significantly, making me eagerly read on.  Your first thought may be that nothing about the Autoimmune Protocol is necessarily “easy,” however, I am here to tell you Eileen has set out to change your mind.  There are over two dozen sections to the book, subjects ranging from sample menus, traveling on the AIP, how to find support, how to overcome self sabotage, trouble shoot, reintroduce foods, gently detox, along with various other sections dedicated to the how, what, and why of following AIP. Overall, the book is said to be “designed to cover all of the bases” of “living the AIP life.”
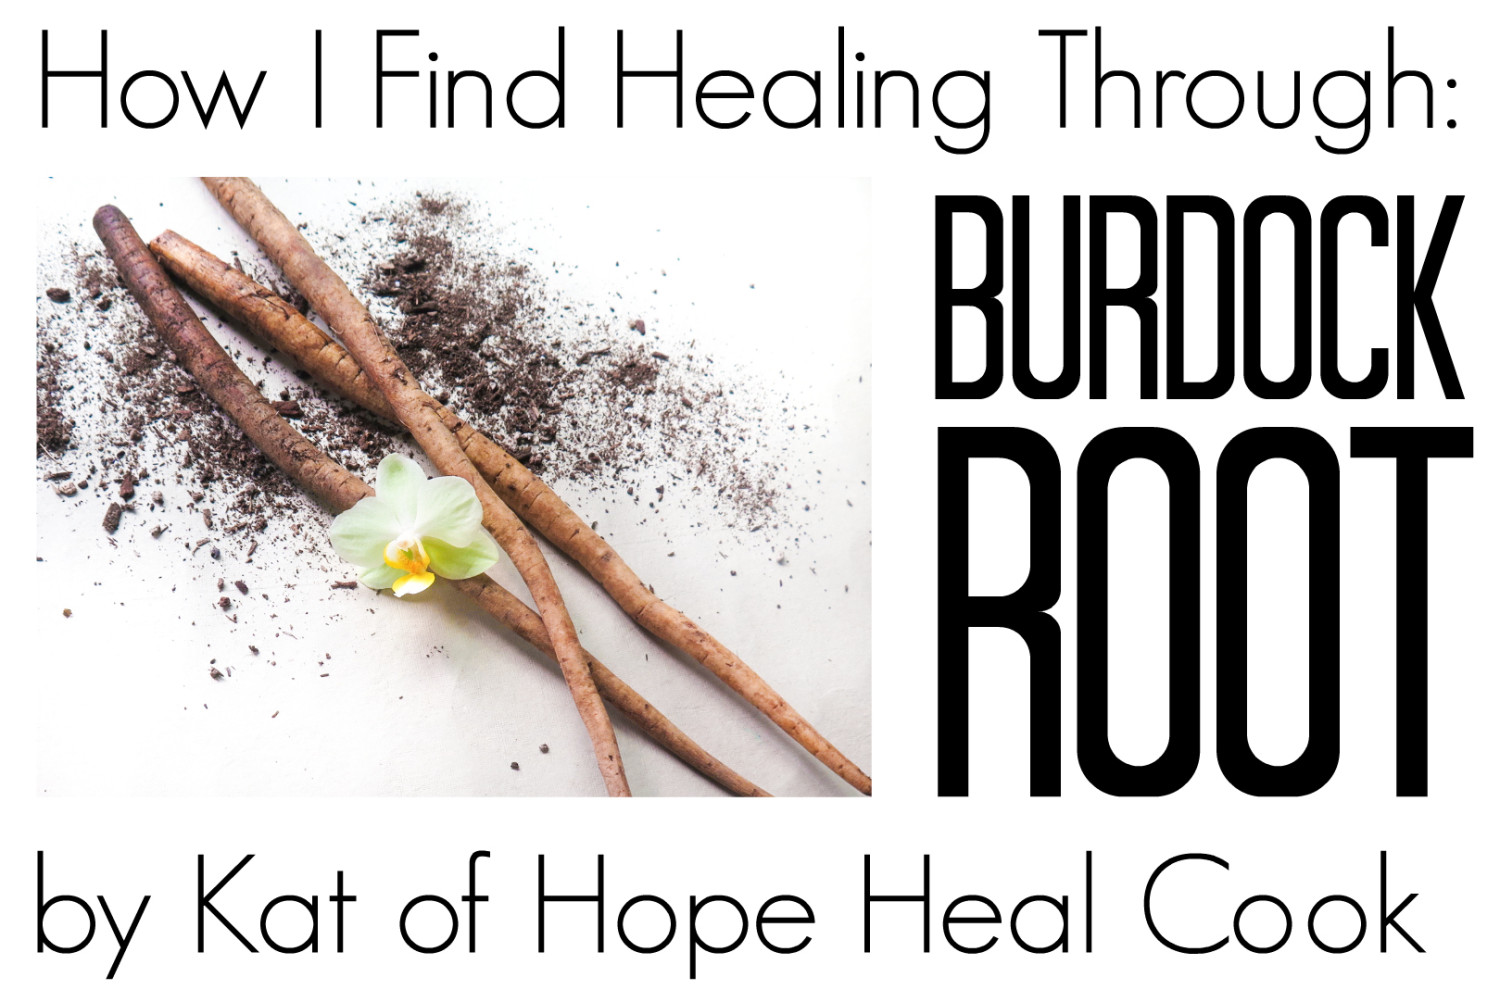
A Simple Guide

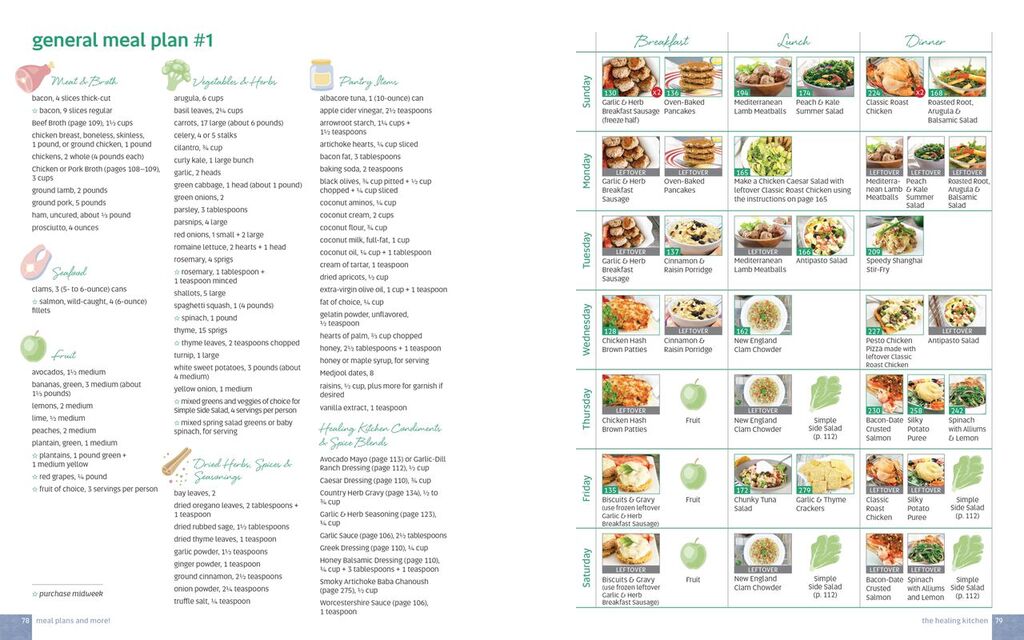
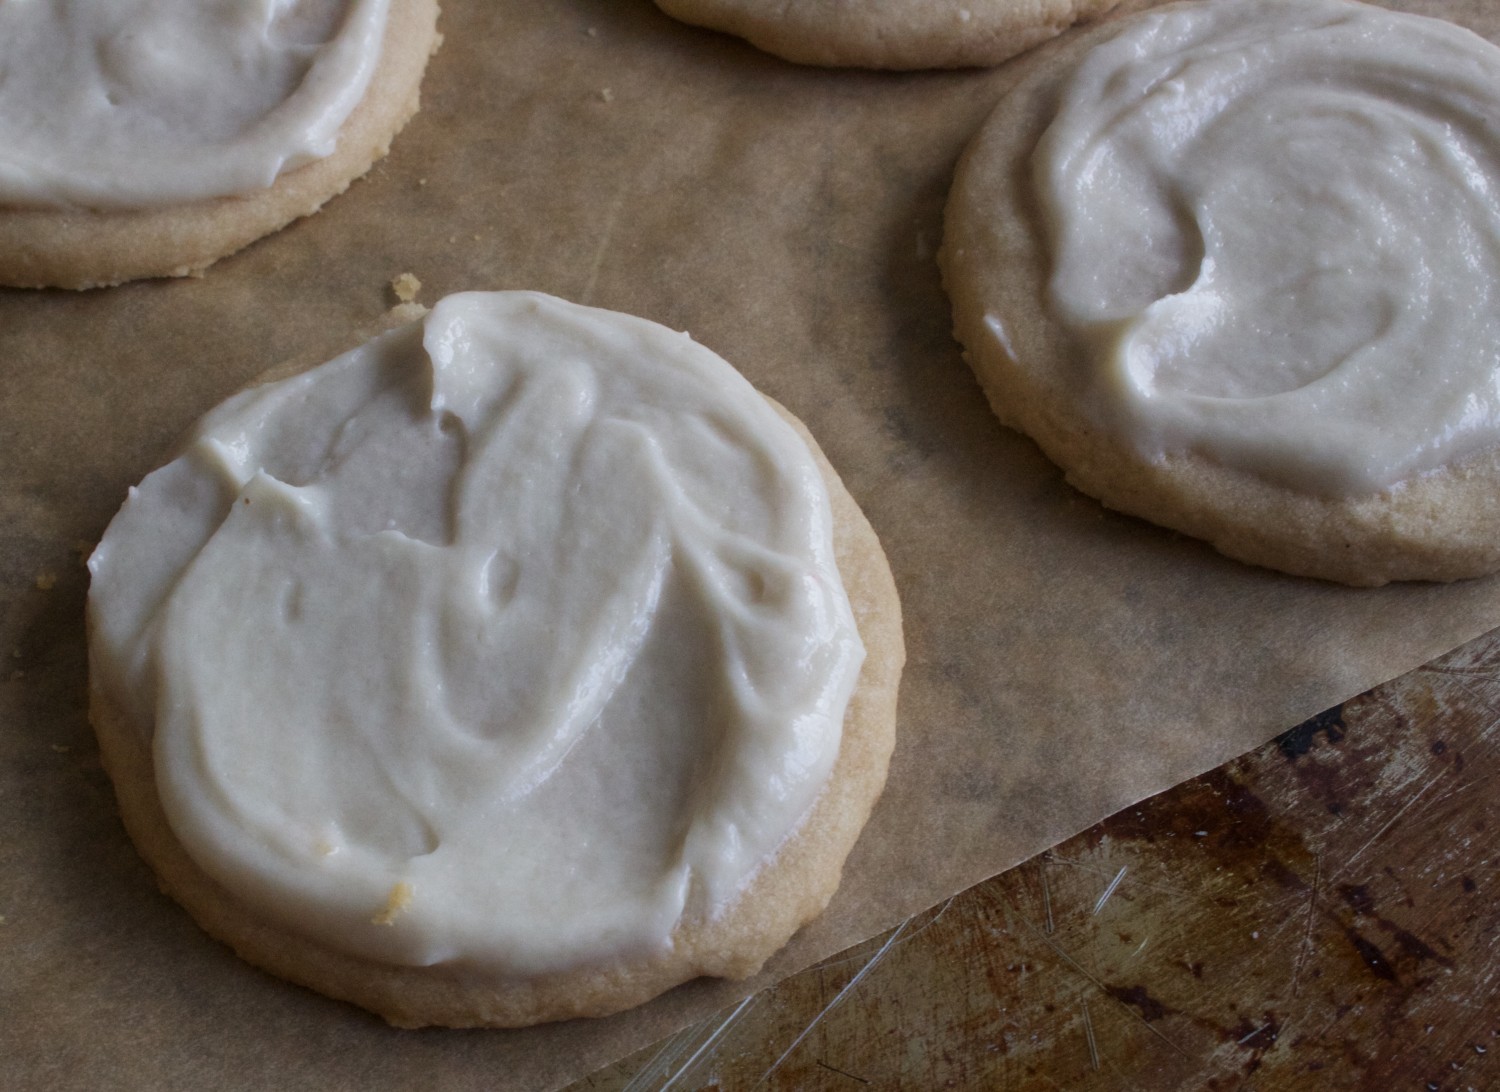
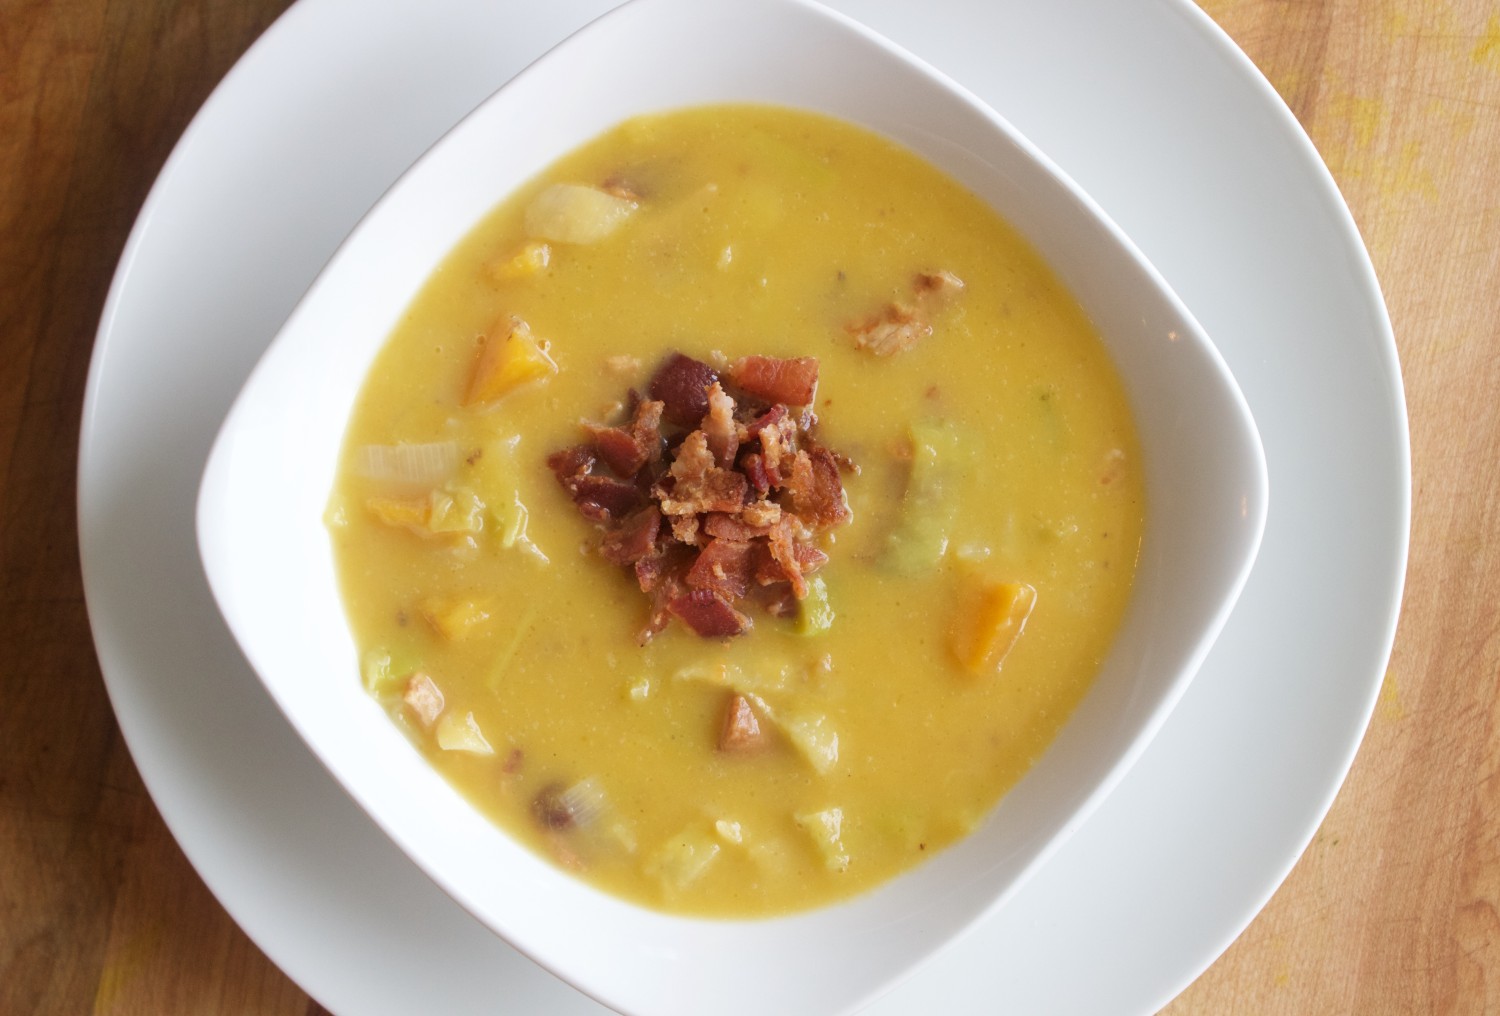
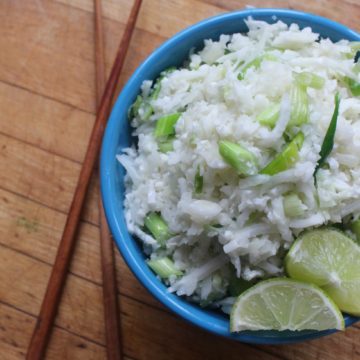
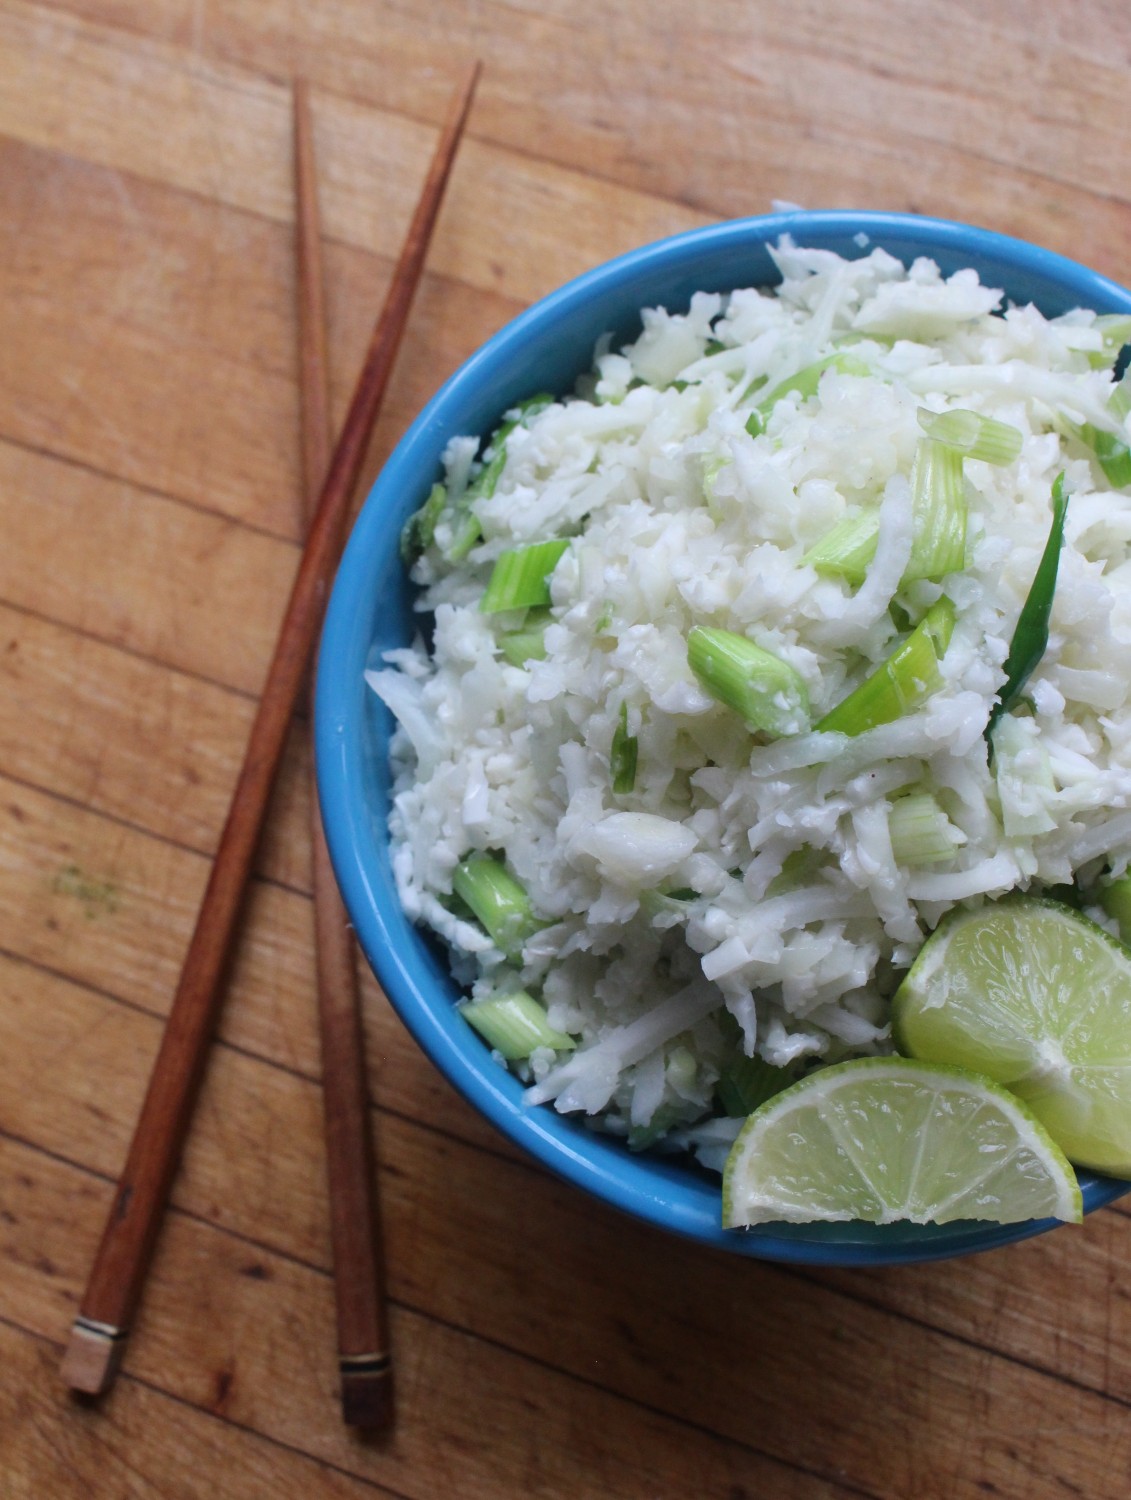
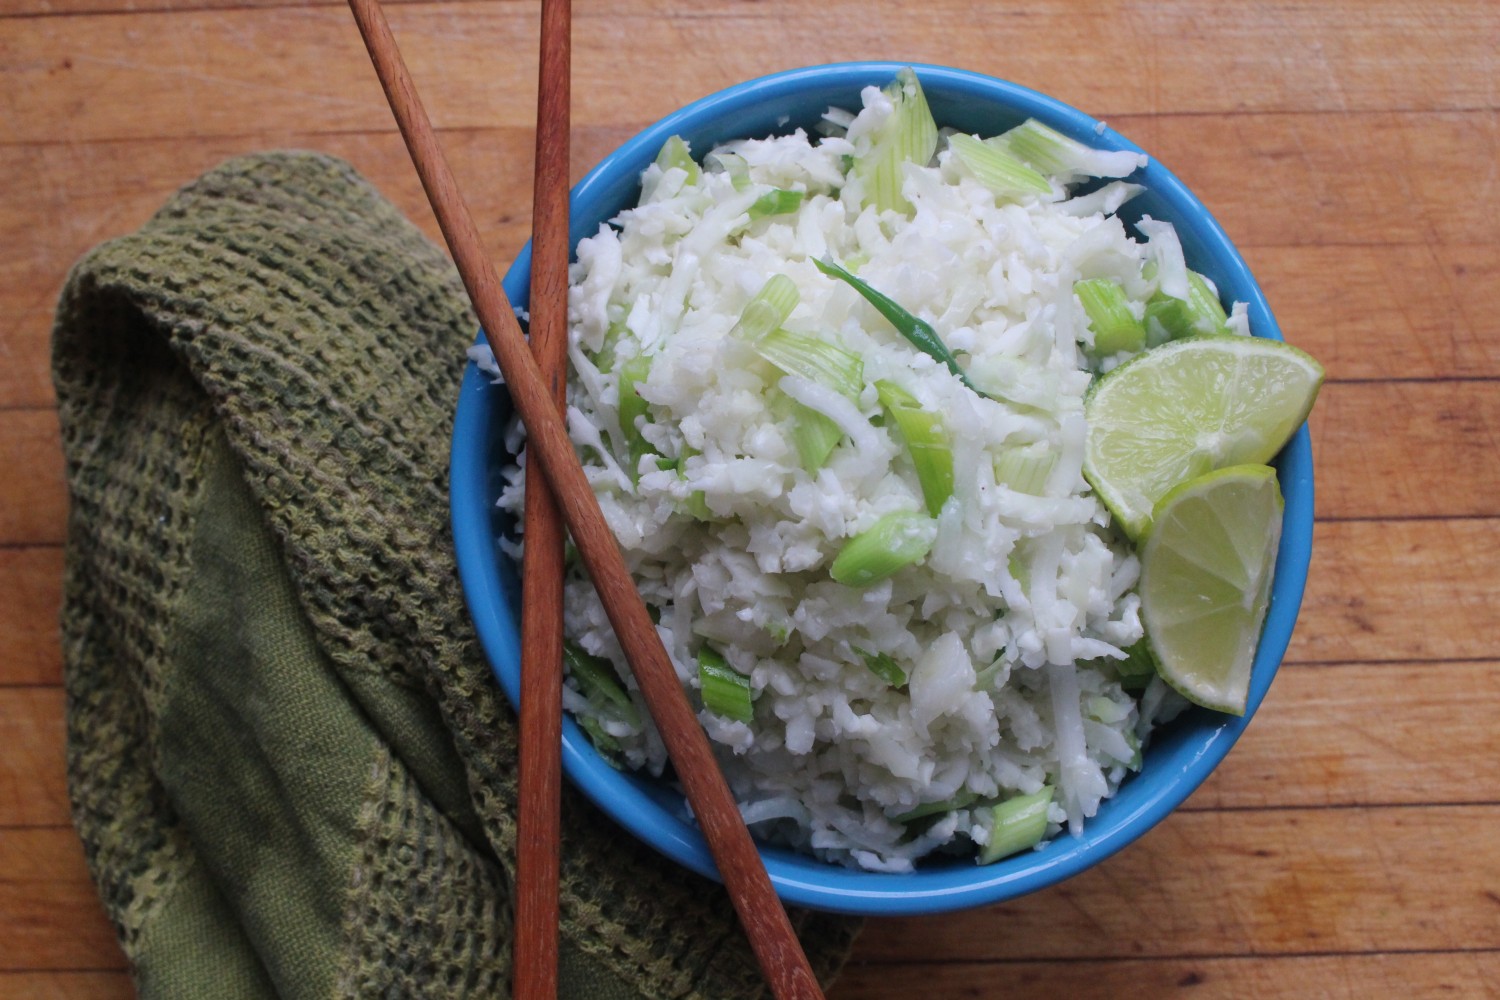
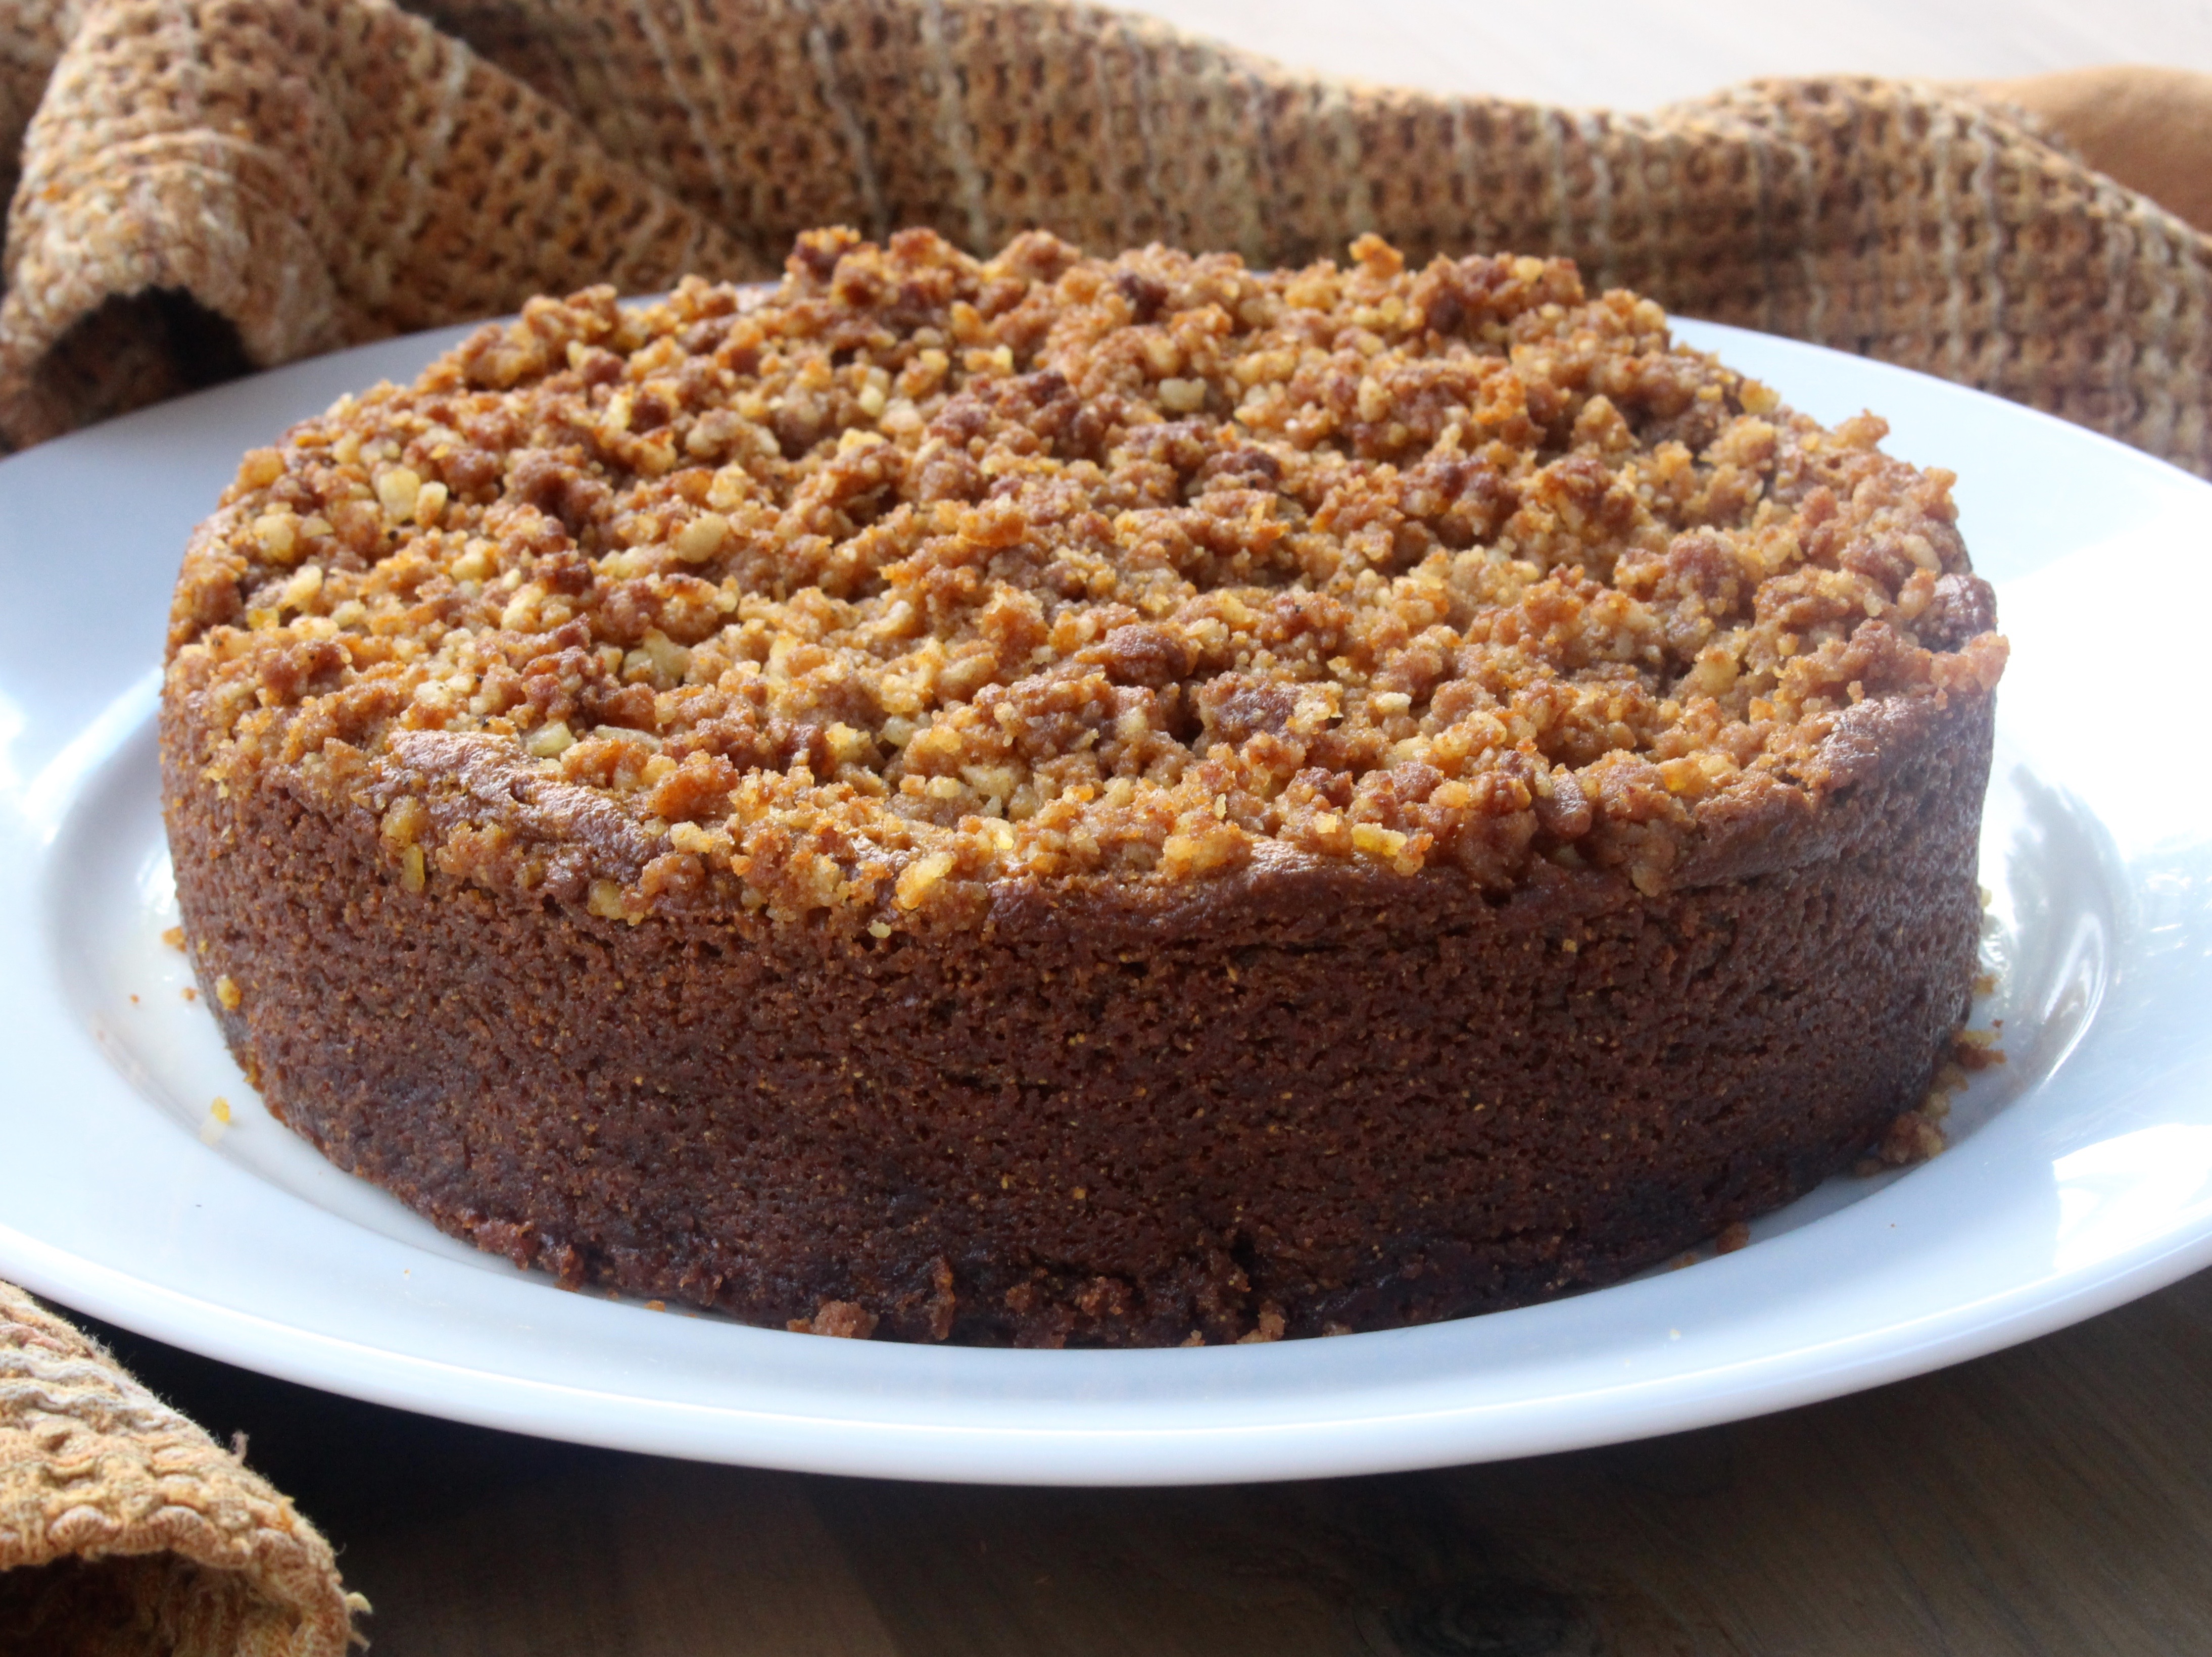
Eileen begins with sharing her personal story of dealing with rheumatoid arthritis and how AIP has helped her be able to function in life and reclaim her joy.  Overall, she explains how AIP is not a fix-all for people, as remission from an autoimmune disease does not necessarily mean completely ridding one’s body of the condition.  She includes stories from other individuals who have reversed the path of their autoimmune disease, including Mick from the Autoimmune Paleo, and Martine from Eat Heal Thrive. While there are 26 chapters in the book, the writing style is easy to understand and simple to read.  It is not a cookbook and it doesn’t contain deep, scientific information concerning the topics discussed, however, there are various helpful grocery lists, sample menus, and even an AIP food pyramid for an easy visual of what to eat.

cropped-Collages14-002

The basics of the AIP protocol are explained in four segments, foods to avoid, eat,  reintroduce, and lifestyle choices.  What food are eliminated on AIP that would otherwise be eaten on a Paleo diet? Who created the Autoimmune Protocol? Why are nightshades harmful to the body? Should stevia really be avoided? Why is meat important? What are the best resources for protein sources? All of these questions and more are answered.  There is even an entire chapter dedicated to helping you feel less overwhelmed with all of the information surrounding AIP and how to turn your kitchen into an autoimmune friendly safe haven. Chapter 12 is full of frequently asked questions, where Eileen gives thorough answers to help you understand everything from how long you will need to follow AIP, when you will see results, if organ meat is truly necessary to eat, when should I stop taking medications, all about allergy testing, and more.

Everything You Need to Know… and More

Of course, it is only human to wonder “what about eating out while following AIP?”  Is it impossible? Eileen gives a guide for just that, listing some of the best Paleo friendly restaurants around the world, as well as how to eat as Paleo as possible while out to eat. She then goes into detail about how to travel and still following the Autoimmune Protocol, with a list of travel-friendly foods. While AIP does have a large focus on eating the right foods, living a healing lifestyle is equally important. Activities to lower stress, create mindfulness, forgiving yourself when you mess-up, and overall connecting your mind and body are discussed.  After all, we are only human, and focusing on perfectionism while on AIP can actually create more harm than good.  Support is also a big part of successfully benefiting from the Autoimmune Protocol, and Eileen talks about how to deal with not being able to eat what everyone else is at social gatherings and how to accept when people on the outside aren’t as on board as you are. Sleep is another aspect of a healing lifestyle that is gone into depth that is easy to understand.  You will learn all about your circadian rhythm, what it means to be truly rested, and strategies to get the most out of your sleep. Also discussed is how to properly detox, lower stress, practical ways on how to survive when your body flares, and most importantly, self-love despite these set backs.  How to reintroduce foods, the top 5 mistakes you can make on AIP, and troubleshooting 101 if the protocol is not taking your body as far as you were hoping.

a Rafflecopter giveaway

*Giveaway is open internationally. Those out of the U.S. will receive an e-book version, while those in the U.S. will receive a paperback version (if desired).

Overall, there are many more subjects outlined in this book that are not only helpful, but also encouraging to one on the AIP. It is certainly a resource that anyone currently following the protocol (or) debating whether they should begin AIP.  Thanks to her generosity, she is allowing me to give one lucky individual to win a copy of the book for themselves!  If you are AIP (or) have a friend or family member on the protocol, be sure to share the giveaway with them, as it could be a true life-saver.

2 Corinthians 5:20 “Now then, we are ambassadors for Christ, as though God were pleading through us: we implore you on Christ’s behalf, be reconciled to God.”

Filed Under: AIP, AIP & Paleo Reviews, autoimmune paleo

Herb Bone Marrow Butter (AIP, Paleo, Keto, Low-FODMAP)

January 8, 2016


IMG_0857

Bone marrow tends to intimidate people.  I am not sure if it is because it is only found in the center of bones, or if because there isn’t anything else quite like it in the culinary world.  My personal journey with marrow began almost 2 years ago, as ordered some small veal bone from an Amish farm.  While veal bones are certainly more expensive than regular beef bones, I figured that the smaller the bones, the easier it would be for me to get accustomed to eating the rich, gelatinous goodness found in their center.  With an adventurous spirit and taste buds, marrow quickly grew on me, and it as not long until I was thoroughly enjoying a big stack on my plate once a week.  Of course, not everyone is like myself.  Sometimes it takes a bit of time and effort before they learn to embrace marrow for all that it is worth, which is what got me thinking and creating today’s recipe.  Yes, using a long, skinny spoon to scoop the marrow out of large beef bones can be intimidating and rather odd at first.  However, what if I changed the way people saw marrow by changing its appearance and form?  Well, that is exactly what I decided to do in today’s recipe.  While there is no actual dairy in my herbed bone marrow butter, the consistency and taste is equivalent to the finest of butters. That being said, if you can tolerate butter and wish for it to be in the recipe, simply use half marrow and half butter for an equally decadent condiment.  Overall, you can do anything you wish with this marrow butter.  Whether slathered over a baked spaghetti squash, used to sauté greens, mixed with roasted vegetables (before or after roasting), or stuffed into a roasted turkey or chicken thigh, there is truly no wrong way to use it.  That being said, for more clarification on how I got 1 cup of bone marrow, be sure to read the recipe notes below.  On a completely different note, for those of you looking for more nose-to-tail recipes friendly to AIP, Keto, Low-FODMAP, and low-histamine guidelines, be sure to stick around for my organ meat e-book release less than a month away!

IMG_0845

Herb Bone Marrow Butter

Print Recipe

(Makes 1 log)

  • 1 cup cooked bone marrow
  • 1/4 cup chopped fresh chive
  • 1/4 cup chopped fresh parsley
  • 1/4-1/2 tsp sea salt

Process

  • Cook bone marrow according to directions, then scoop marrow and the fat that has leaked out of the bones into a small bowl, placing in the fridge to set until hard.
  • Once hardened and cooled, scoop marrow into a food processor, pureeing until whipped and smooth.
  • Add in herbs and sea salt, pureeing again until just combined.
  • Scoop the herbed marrow onto a large sheet of wax paper.
  • Roll the marrow into a log in the wax paper and twist both ends to seal the paper, then tie string or rubber bands on each end to keep the paper sealed and twisted.
  • Place the marrow in the fridge or freezer to set, then use as desired.

Recipe Notes

How many marrow bones you use will depend on their size.
I cooked my marrow in an Instant Pot, set on the pressure cooker mode, for 9 minutes. This allowed the marrow to cook and extra fat to be released. I used both the marrow inside the bones and the fat that seeped out from the bones while cooking.


John 14:18 ““I will not leave you as orphans; I will come to you. “

Filed Under: AIP, autoimmune friendly, Condiments and Sauces, ketogenic, organ meat

An AIP Paleo Book Review: The Healing Kitchen

January 4, 2016

PkUGM8cEJkJ5alxv1L8-lIK3OocQSbb4HGCVlDLdRRc

I am thrilled to share with you all a review of yet another fantastic resource both for those specifically following the Autoimmune Protocol and for individuals simply seeking to use food as medicine.  The dream team, aka Dr. Sarah Ballantyne from the Paleo Mom and Alaena Haber from Grazed and Enthused teamed up together to make an in-depth, resourceful cookbook with over 175 recipes, 12 weekly meal plans and shopping lists, as well as 100+ pages of information concerning vitamins, nutrients, which foods contain what, what and how to eat, how food reduces inflammation, ingredient swaps, popular flavor combinations, and much more.  Overall, you do not need any previous knowledge in health or cooking to benefit from this book, as everything is mapped out in an easy to understand format.

DqknXD4oxBPFh3dMKYMWCAVOJfK4yLwENAujAf6Om7w,RAypw7oIQNnl34PXN6DJGb5BbAhwqm9kHx82FoizEkM

If you have previously bought The Paleo Approach by Dr. Sarah Ballantyne, you will know how much scientific, yet easy to understand information the book includes.  The Healing Kitchen is very similar, as it answers any question you could ever ask concerning food and the human body.  Of course, if this information is overwhelming, than of course you can just skip right to the recipes and meal planning.  All in all, it is a cookbook for the food and science lover alike.  The recipes themselves are very standard in that they do not contain any weird or hard to find ingredients.  Many of the dishes I made used ingredients that did not require me to take an extra trip to Whole Foods.  There are a slue of recipes using less than 5 ingredients, can be cooked under 20 minutes, do not contain any cooking (i.e. no kitchen cleanup time), can be made in one pot, and, the best part, leftovers that can be made into an entirely new dish. Many of the recipes can also easily be batch cooked, for those who are looking to spend less time in the kitchen during the week.

6loeuO1tpuOYMXI43j20e0FURhKccEvkpKFjA15UvZc,zR75HwAu9z4uQJqKT6YsS0sArmSmb9wlIQTm5NP_q2U

The recipes begin with what is called the “kitchen basics,” including a variety of homemade broths, dressings, condiments, and herb/spice blends.  This is then followed by a lengthy breakfast chapter, covering both sweet and savory dishes from a pumpkin spice smoothie to crispy salmon hash and biscuits and gravy.  The next chapter has 25 soup and salad recipes, ranging from hearty chowders and stews, to light and colorful veggie-full salads. While the main dish of any meal can be easily be viewed as the post time consuming and messy to make,  Sarah and Aleana pride themselves in having “easy-peasy mains,” including a variety of meat and vegetable based dishes from an Italian stromboli, to meatballs, pesto chicken pasta, and yes, even pizza.  The recipes range from all over the world, including Greek, to Hawaiian, German, and Mediterranean.  The 9th chapter of the Healing Kitchen is all about “simple sides,” all of which includes vegetables from all over the spectrum, but also an enormous amount of flavor inspired by Labanese and Caribbean cooking.  There is even an entire chapter dedicated to refreshing drinks that can easily be served at a party.   Of course, a cookbook would not be complete with a treat section, and The Healing Kitchen is sure to not disappoint.  Apple crumbled, truffle fudge pops, and no-bake lemon macaroons…Need I say more?  As someone living in a house full of boys, the dishes I make have to stand up to their picky tastebuds.  Therefore, while my brother does not follow a Paleo or AIP diet, all of the recipes in The Healing Kitchen sounded very appetizing to him.  I started off with the Anti-Inflammatory meatballs, which only had 7 ingredients and took a matter of minutes to whip up and stick in the oven.  Both my brother and our friend loved them and said they were absolutely amazing. I then chose the Fennel Mandarin Slaw, which I served with Roasted Rapsberry Salmon, which was easily rated 5 stars.  Overall, there are a great deal of tasty recipes that both myself and my housemates will enjoy.  I cannot wait to keep cooking from this book. To try and get a free copy of your own, simply enter in the giveaway below!

crispy salmon hash

a Rafflecopter giveaway

This giveaway is open to U.S. residents only and will end January the 11th. 

Titus 2:11-12 “For the grace of God has appeared, bringing salvation for all people, training us to renounce ungodliness and worldly passions, and to live self-controlled, upright, and godly lives in the present age.” 

Filed Under: AIP, AIP & Paleo Reviews, autoimmune disease, autoimmune friendly, autoimmune paleo

AIP Paleo New Years Eve Meatball Roundup

December 31, 2015

Meatball3s

Two things.  First, tomorrow is the first day of 2016, can you believe it?! Second, there is nothing better than a good meatball.  Not only are they tasty, but they are a very versatile dish that can be served as an appetizer, main dish, and even eaten as a snack.  Because of this, I thought there would be no better recipe roundup for New Year’s Eve than one filled with meatballs! Whether you have a party or get-together to attend, AIP friendly meatballs are one of the easiest dishes to pass by anyone. So go ahead, get cooking, and Happy New Year to all!!

IMG_2715-650x450

Pork

Pork Stuffing Meatballs – Eat Heal Thrive

Italian Meatballs – Gutsy by Nature

Greek Meatballs – Eat Heal Thrive

Anything Goes Meatballs – Joanna Frankham

turkeypattiesverticalcloseup

Turkey

Apple Spice Glazed Meatballs

Ginger Sage Meatballs – Whole Life Full Soul

Cavolo Nero Cabbage Meatballs – Comfort Bites

Thai Meatballs – Comfort Bites

IMG_2231

Lamb

Sweet and Sour Glazed Meatballs

Fig Meatballs – Enjoying this Journey

Greek Meatballs – Paleo Cajun Lady

Orange Tarragon Meatballs – Whole Life Full Soul

citrusbisonmeatballs-1

Bison

Citrus Bison Meatballs – Autoimmune Paleo

Paleo-Popcorn-Meatballs-FB

Beef

Ginger Spice Meatballs – Adventures in Partaking

Sweet Potato Molasses Meatballs – Heal Me in the Kitchen

Citrus Herb Meatballs – Sweet Potatoes and Social Change

Healthy Meatballs – It’s Me Charlotte

Asian Meatballs – Joy Filled Nourishment

Popcorn Meatballs – Sweet Potatoes and Social Change

Party Meatballs – Enjoying this Journey

Sweet and Sour Meatballs – Gutsy by Nature

Rustic Meatballs – A Squirrel in the Kitchen

Basic Oregano Meatballs – The Paleo Mom

Swedish Meatballs – Sweet Treats

38e3b6_22731ecf831c43a3b43328eeb70de772-1

Veal

Anti-inflammatory Meatballs – Grazed and Enthused

Hidden Liver Meatballs – Provincial Paleo

Rose Veal Bacon Bites – Comfort Bites

38e3b6_7078499115d94db983c25ae833a9bf4f-1

Chicken

Cinnamon Raisin Meatballs – Grazed and Enthused

Cranberry Relish Meatballs – Grazed and Enthused

Chicken and Ginger Mini Meatloaves – Healing Family Eats

Isaiah 46:4 “Even to your old age and gray hairs I am he, I am he who will sustain you. I have made you and I will carry you; I will sustain you and I will rescue you.”

Filed Under: AIP, autoimmune friendly, egg free, lamb, meat, paleo, pork, Protein Dishes, turkey

Daily Dose of Encouragement: The True Meaning

December 28, 2015

DailyDoseEncouragement

The past few months have been what is considered the “Holiday season.”  More specifically, my family and I have been celebrating Thanksgiving and Christmas.  Yet as anyone with a chronic illness understands, “celebrating” the holidays is a catch 22.  It can be great distraction to have all of the festivities happening all around you, but then again, it is these same festivities that make you feel even more of an outcast than ever.   Going to parties, shows, and get-togethers is just hard both emotionally and physically. It’s difficult to attend like a normal guest because, let’s face it, we’re not “normal” in any way, shape, or form.  We can’t eat, talk, laugh, and engage like everyone else does. Our bodies are worn thin simply from trying to get through the everyday life, and when holiday madness is added to the mix, it’s easy to get discouraged, depressed, and more hopeless than ever before.  That being said, as I spend my 5th Thanksgiving and Christmas being sick with the effects of chronic Lyme Disease, the reality of what this time of year truly means has become more apparent to me than ever.

Untitled

No, we may not necessarily be able to enjoy all the cookies and egg nog like friends and family around us.  Christmas morning you may wake up with unexplainable and extreme GI distress, joint pain and a blaring headache.  It’s hard to be joyous and happy with everyone around when we feel so awful inside.  However, there is something else that is far deeper and important to our being that we can experience even while battling life’s trials.  Christmas isn’t about presents, sweet treats, and holiday parties. While this all may be associated with the holiday season, what Christmas is truly about is the coming of Christ Jesus in the form of a baby boy.  He came with the purpose of serving and ultimately dying on the cross as a covering for our sins (Matthew e20:28).  It was this act of love that gives us, and all human beings, the choice of spending eternity with Him in heaven (1 John 15:13).  Though we typically choose to dwell on this event only on Easter, this act of saving grace would have never occurred unless God sent his son to the world (i.e. Christmas).  So, what does Christmas really mean for those like myself battling a chronic illness (or anyone and everyone for that matter)? For starters, it means we have the promise of eternal salvation (John 10:28).  It means that no matter what we go through here on earth, we will be transformed and given a new, unblemished, perfect, disease and pain-free body (Philippians 3:21).  Christmas also means that even while we are here on earth, we can have inexpressible peace, hope, and comfort (Psalm 29:11, Romans 5:3-5, Romans 15:13).  Ultimately, it means that we have a purpose (Proverbs 19:21), He has a plan (Isaiah 55:9), and at the end of it all, we will get to spend eternity with Him in Heaven.  This world is not our home (Hebrews 13:14).  The cookies, eggnog, presents, and holiday parties  were simply created by man as a way to find surface enjoyment and excitement.  Yet we have all been created for something far greater, and through Christ’s birth, death, and resurrection, we can find these things.  Even when our lives do not look like those around us, Christmas can serve as the perfect reminder of one of the greatest results of Jesus’ birth, and that is that we have life beyond this life because He gave His life.   All in all, the only thing that can truly take away the pain and suffering we experience in this world is the gift of God’s son, and it all began with Christmas.


1 Peter 1:8-9  “Though you have not seen him, you love him. Though you do not now see him, you believe in him and rejoice with joy that is inexpressible and filled with glory, obtaining the outcome of your faith, the salvation of your souls.”

Filed Under: chronic lyme, chronic lyme disease, daily dose of encouragement, Personal Experiences

Squash and Sweet Potato Flour Molasses Spice Cookies (AIP/Paleo)

December 22, 2015

IMG_0023

Though I don’t typically post two sweet treat recipes in a row, however, it’s Christmas, enough said. On that note, I have been going back through the archives and picking recipes that I have wanted to revise, my molasses cookies being one of them.  It is crazy how many new and different products now readily available on the market from the time I made many of my first baked goods.  While I still stand behind them, as I do not post anything that doesn’t get the thumbs up from family and friends, I simply wanted to make some of my recipes using different ingredients.  Overall, versatility is a great thing when it comes to AIP and Paleo baked goods, as it is hard to have literally every ingredient that may possible be used in a given recipe.  Today I chose to stick with two of Anti Grain’s drum dried vegetable flours.  Yes, these molasses spice cookies feature butternut squash and sweet potato, yet you would never in a million years be able to guess so.  They truly come together in a matter of minutes, as no fancy equipment is needed.  With just a spatula and mixing bowl, you can whip up these cookies in no time, the longest period being the actual baking time.  All in all, I was seriously so thrilled with how these cookies came out.  They flattened perfectly on their own while cooking, had the signature crinkle look of a typical molasses cookie, while also containing the perfect chew.  The slightly crisp outside coupled with the soft inside makes for a cookie remarkably similar to any other molasses cookie.  Overall, my parents and a couple practitioners of mine (the official taste testers for this recipe) loved them.

IMG_2493

Squash and Sweet Potato Flour Molasses Spice Cookies

Print Recipe

(Makes 14-16 Cookies)
Ingredients

  • 3/4 cup Anti-Grain butternut squash flour
  • 3/4 cup Anti-Grain sweet potato flour
  • 1/4 cup molasses
  • 1/4 cup maple syrup
  • 1 tsp baking soda
  • 3/4 tsp cinnamon
  • 1/2 tsp ginger
  • 1/4th tsp sea salt
  • 1 tbsp grass-fed gelatin
  • 1/2 cup non-hydrogenated palm shortening

Process

  • Preheat oven to 350 degrees.
  • In a bowl, whisk together baking soda, sea salt, cinnamon, ginger, gelatin, squash flour, and sweet potato flour.
  • In a small sauce pan, melt shortening and mix with maple syrup and molasses
  • Pour wet ingredients into the dry and fold in using a spatula until a cookie dough has formed.
  • Form dough into like size balls by rolling them in-between your palms, then place them on a parchment lined baking sheet, 3-4 inches apart.
  • Place the baking sheet in the oven and allow the cookies to bake for 15 minutes.
  • Remove the sheet from the oven and allow the cookies to cool for 5 minutes, then transfer them to a wire rack for further cooling.

Recipe Notes

Coconut oil can be used in place of the palm shortening, simply flatten the cookies with the back of a spoon before baking.


Luke 2:8-11 “But the angel said to them, “Do not be afraid. I bring you good news that will cause great joy for all the people. Today in the town of David a Savior has been born to you; he is the Messiah, the Lord.”

Filed Under: AIP, autoimmune friendly, butternut squash flour, coconut free, cookies, dairy free, egg free, grain free, nut free, sweet potato flour, Sweets and Snacks

Cassava Flour Sugar Cookies (AIP/Paleo, Vegan)

December 16, 2015

sugarcookies

 It has been over a year since I posted a sugar cookie recipe, and my, have the times of Paleo flours changed.  Last year I had great fun experimenting with different ratios, and came up with the perfect chewy yet crisp sugar cookie that even had an icing free of refined sugar.   Since then, tiger nut flour and cassava flour have come to dominate the world of Paleo flours, which is why I decided to make a new recipe utilizing a more readily available flour.  Of course, if you do not have mint extract, or you do not care for a minty sugar cookie, I encourage you to simply omit this ingredient and make them a regular, vanilla sugar cookie.  Overall, this recipe could not be easier. They have the perfect crumb and because they do not flatten on their own, rolling them out and using cookie cutters to make fun, festive shapes works fantastic.  Of course, you cannot have a sugar cookie without something to top it with.  I have made various buttercream that do not use refined sugar, however, I wanted to create one more a long the lines of icing that is lighter in texture and easy to spread.  All in all, I am thrilled to say I did just that by adding a bit of cassava flour to the mixture, which made for a spreadable icing that freezers great once on the cookies.  While it may sound odd to add flour to an icing, the cassava flour acts as what would otherwise be the starch component in a regular powdered sugar.  Because maple sugar is typically ground finer than other Paleo friendly, granulated sugars, it works best to make a smooth icing.  Overall, the cookies came out fantastic, however, I must admit, my favorite part is the icing. On that note, there are 8 days till Christmas…can you believe it?!

IMG_0407

Cassava Flour Iced Sugar Cookies

Print Recipe

(Yields 1 1/2-2 dozen)
Sugar Cookie Ingredients

  • 1 1/2 cup Otto’s Cassava flour
  • 1/2 tsp sea salt
  • 1/2 tsp baking soda
  • 2/3 cup non-hydrogenated palm shortening
  • 1/2 cup maple syrup
  • 1 tbsp vanilla extract

Vanilla Icing 

  • 1/2 cup full fat coconut milk
  • 1/2 cup non-hydrogenated palm shortening
  • 1 tbsp vanilla powder
  • 1/4 cup maple sugar
  • 1/4 cup Otto’s cassava flour

Process

  • Preheat oven to 350 degrees.
  • Beat shortening, maple syrup, and vanilla in a standard mixer or food processor.
  • In a separate bowl, whisk together dry ingredients.
  • Add the dry to the went and beat until just combined.
  • Transfer the dough to a large sheet of parchment paper, use your hands to pat the dough down into a round circle, sprinkle it with flour, and then place another piece of parchment on top of it.
  • Use a roller to roll out the dough to 1/4 inch thick, then cut into desired shapes, continuing until all of the dough is used.
  • Put the sheet in the oven and allow the cookies to bake for 10-12 minutes until golden brown on the bottom.
  • Remove from the oven and allow to cool completely before frosting.
  • To make the frosting, puree coconut milk, maple sugar, vanilla, and shortening in a food processor.
  • Add in ottos cassava flour 1 tbsp at a time, then allow the mixture to puree for another 5 minutes until smooth.
  • Once the cookies have cooled, frost them with the icing and enjoy.

Recipe Notes

Add 1/3 cup maple sugar for more sweetness to the cookies if desired.
Replace vanilla powder with vanilla extract in the frosting if not on AIP.

For strict AIP coconut milk, make your own or use Natural Value brand.

In order to get the proper constancy of icing, do not stir the coconut cream into the coconut milk before using. Simply scoop out 1/4 cup of both cream and water to make the 1/2 cup measurement.

Alternatively you can use 1/2 cup of pure coconut cream.

I’ve made these into bars in a 8 inch pan, baking for 15 minutes at 350 degrees.

Luke 1:46-47,49 “And Mary said: “My soul glorifies the Lord and my spirit rejoices in God my Savior, for the Mighty One has done great things for me— holy is his name.”

Filed Under: AIP, autoimmune friendly, cassava flour, coconut free, cookies, dairy free, egg free, nut free, Sweets and Snacks, vegan

Roasted Butternut Leek Soup with Bacon (AIP, Paleo)

December 12, 2015

IMG_0212

It feels slightly odd posting a soup recipe when yesterday’s high was 73 degrees.  However, there have certainly been some colder days popping up leaving frost on my window pains and a light, white coating on the grass each morning.  While my body may not necessarily appreciate the chill in the air, my mind tells me that there is no better way to make use of the winter months than to get busy in the kitchen.  Therefore, with marrow bones from a local farmer slowly building up in a bag in my freezer, I decided it was time to make some bone broth.  There are also a million leeks in the fridge, all without their tops, as the leek greens are the only part of the leek I can eat.  Since my brother is out of town for a couple weeks and no one around the house is going to eat them on a salad like he does, I thought there would be no better way to use a large portion of them up then by incorporating them into a soup.  There is also a ginormous butternut squash that I received from my local CSA farm share, and just in case I received another one this week, I decided it too was required to be incorporated into the soup.  While I do love coming up with recipes in my head with any and every ingredient in mind, sometimes trying to figure out what to make with a set list of ingredients is just as, if not more fun.   It makes you become more creative, seeing ingredients in a whole new light than when prepared in their typical manner.  Overall, the combination of homemade bone broth, leeks, and butternut squash came out fabulous.  Of course, we cannot forget about the bacon, as it infuses the soup with a slight smokey flavor that is offset perfectly with the subtle sweetness of leeks and squash.  I was also told by my housemate that there was just the perfect amount of bacon found throughout the soup.

IMG_0216


Roasted Butternut Leek Soup with Bacon

Print Recipe

(Serves 4-6)
Ingredients

  • 5 cups cubed butternut squash
  • 1/4 cup avocado oil
  • 6 1/2 cups homemade bone broth
  • 5 cups chopped leeks
  • 1 tbsp ground ginger
  • 1 tsp sea salt
  • 8 pieces of bacon
  • Green onion for garnish (optional)

Process

  • Place bacon slices in a large baking dish and place in the oven in the oven.
  • Turn oven on to 400 degrees, and allow the bacon to cook until just beginning to get crispy, then remove and allow to cool before chopping into bite size pieces.
  • Peel, cut, and cube butternut squash into 1/2 inch, like size chunks, place on a large baking dish, toss with 2 tbsp of avocado oil, and once preheated, place the dish in the oven and allow the squash to roast for 30-40 minutes until soft and just beginning to brown.
  • In a large stock pot, heat remaining 2 tbsp of avocado oil on medium heat, and once hot, add leeks, sprinkle them with 1 tsp sea salt and ground ginger, and allow them soften and fragrant, about 10-15 minutes.
  • Once the leeks have softened and are fragrant, transfer half of them to a large blender with 1/2 of the roasted squash and 1 1/2 cups of the bone broth, pureeing until smooth.
  • Scoop the puree back into the stock pot, then mix in with the remaining 6 cups of bone broth, roasted squash, cooked leeks, and chopped bacon pieces.
  • Stir to fully incorporate, season with salt if needed, and allow the mixture to come to a gentle simmer, then turn the heat off of the soup and serve.


Psalm 27:5 “For in the day of trouble He will keep me safe in His dwelling;  He will hide me in the shelter of His sacred tent and set me high upon a rock.”

Filed Under: AIP, autoimmune friendly, pork, soup, vegetables, Vegetables and Sides

Coconut Cauliflower Rice (AIP/Paleo, Keto)

December 9, 2015

IMG_0134

If you have been following Beyond the Bite for sometime now, you will know that I have a deep love for Asian cuisine.  When I first hit my brick wall with chronic Lyme, was half dead, running to and fro to NYC for surgery and various other appointments, the one food that I always wanted was Pad Thai.  I craved this dish so much so, that I sought out the best Asian restaurants in NYC that were friendly to gluten and dairy allergies, and ordered their Pad Thai.  I’ve talked about it a bit before, but there was a time were my body couldn’t tolerate me consuming any form of food do to my celiac artery being compressed, thus cutting off blood flow to digestive and surrounding organs.  Anyways, my point of me hitting on this
time in my past was to express how much I love Asian inspired food.  Despite the indescribable pain from eating with a compressed celiac artery, Pad Thai in the city was worth it, totally, all-the-way worth it.  Anyways, with this strong love for Asian food still burning strongly inside me, I decided to make a fun spin on cauliflower rice to serve at my families dinner a long side the slow-cooker pulled pork my mom was making.  Inspiration for this recipe also came from my uncle, who was visiting at the time.  He loves to eat oatmeal and rice in the morning, and one morning, he decided to cook it in coconut oil.  This reminded me how delicious rice and coconut were together, which is what led me to immediately get in the kitchen to create this recipe.  Overall, this rice is addicting.  You truly don’t need anything else on your plate (or bowl) aside from this rice.  It is simply that delicious.

IMG_0127


Coconut Cauliflower Rice

Print Recipe

(Serves 4-6)
Ingredients

  • 1 head of cauliflower
  • 2  tbsp of coconut oil
  • 1/2 cup coconut cream
  • 1 tsp sea salt
  • 1 cup chopped green onion
  • 2 limes (optional)

Process

  • In a food processor fitted with the shredder attachment, shred one head of cauliflower.
  • Heat coconut oil in a large frying pan on medium heat until hot, then add in cauliflower and stir around.
  • Add in coconut cream and sprinkle with sea salt, stirring the mixture around until the coconut cream is fully incorporated.
  • Cover the frying pan, turn the heat to low, and allow it to steam for 9 minutes.
  • Remove the top, turn the heat to medium, and stir in the chopped green onion, allowing the rice to cook for another 1-2 minutes, then serve, garnishing with lime wedges if desired.

Recipe Notes

I get my coconut cream from putting a can of coconut in the fridge overnight and scooping out the cream that is on the top.  You can also purchase pure coconut cream.

You can also “rice” your cauliflower using the “S” blade, depending on how fine you like it.


John 15:5,8 ““I am the vine; you are the branches. If you remain in me and I in you, you will bear much fruit; apart from me you can do nothing. This is to my Father’s glory, that you bear much fruit, showing yourselves to be my disciples.”

Filed Under: AIP, autoimmune friendly, autoimmune paleo, grain free, ketogenic, vegan, vegetables, Vegetables and Sides

Anti-Grain Sweet Potato Flour Cinnamon Coffee Cake (AIP/Paleo)

December 5, 2015

IMG_9891

IMG_9883

Awhile back, as I walked in the door when returning from a trip down to the tennis courts, I was hit with with a waft of cinnamon.  Yet not just any cinnamon, but sweet, maple cinnamon, as my mother was baking off her favorite Paleo granola recipe found in Paleo in 28, a cookbook by Kenzie of Cave Girl in the City.  This got my taste buds watering and therefore my mind thinking, and obviously, I simply couldn’t resist making a recipe that made one’s kitchen smell like a sweet, cinnamon wonderland much like my mother’s granola.  As the winter months come around, Anti-Grain’s vegetable based flours come into great use, as sweet potato, pumpkin, and butternut squash inevitably go with the flavors of pumpkin pie spice.   Simply by the smell, I knew that this coffee cake would easily win over the hearts and mouths of my “official taste testers.”  That being said, whenever I bake with vegetables like plantain or sweet potato, in order for the recipe to pass the taste test, the flavor of these ingredients must be undetectable.  While I personally  don’t mind this, my family and friends are a bit more picky in that they don’t like tasting “dinner in their dessert.”  Yet much to my surprise and delight, there was no hint of sweet potato or plantain in this coffee cake, causing it to be scarfed down quickly by those eagerly watching me take photos and waiting to dig in.  As for the crumble topping, I believe I may have just stumbled upon the beginnings of a new AIP friendly granola recipe that doesn’t use tiger nuts like my previously posted recipes.  All in all, this coffee cake has the perfect, ready texture on the outside, with a moist, decadent center that you cannot help but completely love.  Not only that, but it is a recipe sure to make your house smell absolutely amazing!

IMG_9928

Sweet Potato Flour Cinnamon Coffee Cake

Print Recipe

(Serves 8)
Cake Ingredients

  • 1 cup Anti-Grain sweet potato flour
  • 1 tbsp cinnamon
  • 1 1/2 tsp grain free baking powder
  • 1/4 tsp sea salt
  • 1/2 cup pureed green plantain
  • 1/2 cup pure maple syrup
  • 1/2 cup non-hydrogenated palm shortening
  • 1 tsp vanilla extract

Topping Ingredients

  • 1 cup unsweetened banana chips
  • 1/4 cup Anti-Grain sweet potato flour
  • 1 tsp cinnamon
  • 1 tbsp maple syrup
  • 1/4 cup non-hydrogenated palm shortening
  • Dash of sea salt

Process

  • Preheat oven to 350 degrees.
  • In a food processor, puree plantain, maple syrup, palm shortening, and vanilla extract until smooth.
  • Whisk together grain free baking powder, sea salt, and sweet potato flour in a separate bowl, then add to the food processor and puree until just combined.
  • Grease a 6×2 inch round cake pan and cut out a piece of parchment paper to fit into the bottom of the pan.
  • Evenly scoop the cake batter into the prepared pan.
  • To create the topping, pulse the banana chips, cinnamon, sea salt, and sweet potato flour until crumbly, then add in palm shortening and maple syrup, pulsing until a sticky crumble forms.
  • Transfer the crumble to the top of the cake batter and lightly press it down.
  • Place the cake in the oven to bake for 40-45 minutes, until the cake has pulled away from the sides and the middle is no longer wet when a toothpick is inserted.

Recipe Notes

Coconut oil can be used in place of the non-hydrogenated palm shortening.


John 10:7, 9-10 “Therefore Jesus said again, “Very truly I tell you, I am the gate for the sheep. I am the gate; whoever enters through me will be saved. They will come in and go out, and find pasture. The thief comes only to steal and kill and destroy; I have come that they may have life, and have it to the full.”

Filed Under: AIP, autoimmune friendly, breakfast, coconut free, dairy free, Dessert, egg free, grain free, nut free, paleo, plantains, sweet potato flour, Sweets and Snacks, vegan

Daily Dose of Encouragement: Bold

December 2, 2015

DailyDoseEncouragement

There are some decisions that we have to make in life that we as individuals simply don’t know how the end will turn out.  Currently, I am in a big state of transition and change in my life.  I am going out on a huge leap of faith, believing that God will carry me all the way and direct me, and striving to not like worry or fear creep into my mind.  It is certainly not easy, comfortable, or painless, however, I know it is what God is calling me to do, and therefore I must.  It is through this time filled with uncertainty and the unknown, that I am reminded what it truly means to be bold.  According to the Merriam Dictionary, being “bold” is defined as being “fearless before danger” and “showing or requiring a fearless daring spirit.”  In a way, the term “bold” can be likened to the term “brave,” as the latter is defined as “having or showing courage.”  Inevitably, to be bold, one must be brave, and in order to be brave, one must be bold.  Yet this is not always easy, and in the case for myself, dealing with chronic Lyme Disease can easily wear at both my mental and physical well being until boldness is the last thing I feel.

Brave

When there is not an ounce of strength left in our bones, with weariness and exhaustion flooding our bodies, the last thing that we feel is fearless.  Instead, we feel incredibly vulnerable, unable to handle the difficulties that continue to surround us, and it is during this time that fear can easily creep into our minds.  However, in order to continue on and be bold, we must not let an ounce of this uncertainty creep into our thoughts.  It is not to say that we should shut off our minds from all sensibility, however, we must give all the nitty gritty to the Lord and not think of all the “what ifs” that could weaken or harm us on the path that lies ahead.  When we look at the given circumstance or event through human eyes, doubt and failure will inevitably arise.  All of the worst possible outcomes flood our minds, and suddenly we find ourselves anxious, questioning whether we are truly ready to be as bold as we once planned.  By ourselves, we very well may be inadequate and ill equipped for the journey ahead of us.  However, this is where the power of God comes into play.  Instead of fear, Christ gives us peace that is unlike and better than anything in the world.  While words of encouragement and support from all of our friend and family members may help for a short period, the only way that our spirit and mind can contain and unwavering sense of boldness is when they are in close communion with God.  In His word, we are reminded never to “be troubled or afraid,” (John 14:27, NLV) and to never “worry about your life” (including the little ins and outs), like what we will eat or drink (Matthew 6:25-34).  For we are His children, He loves us more than we could ever know, and because of this, has mapped out our entire life according to His will.  We need not worry about the what would otherwise by the scary unknown, as He promises to “make [our] paths straight” (Proverbs 3:5-6).  Only the devil will fill our hearts with fear, but the Lord will establish our steps (Proverbs 16:9), renew our strength (Isaiah 40:31), and instruct and teach us throughout all of the unknown (Psalm 32:8).  The same God that helped young David kill the giant Goliath with just a few pebbles and a slingshot (1 Samuel 17), is the same God that is with His children until the end of the day.  So, whatever it is you may be facing in the present or future, go, in the name of the Lord Almighty, and be bold.

2 Corinthians 3:12  “Therefore, since we have such a hope, we are very bold. “

Filed Under: chronic lyme disease, daily dose of encouragement, Personal Experiences

Paleo Autoimmune Protocol Crispy Meat Patties

November 28, 2015

   Today’s recipe is one that I created after having the leftover bits and pieces of chicken that were from a batch of my low-FODMAP bone broth that I made using a chicken carcass.    Overall, mom was absolutely hooked on the patties, as well as the avocado cream that I served them with.  However, I waited to share the recipe with you all until a timing I saw fit, and with it being two days after Thanksgiving, I thought it would be perfect.  Last year, my family and I fried our turkey in coconut oil. Sadly, it got a bit overdone, though no one was complaining, as it was still might tasty.  This year, I decided to tackle the turkey myself.  I brined it in a sea salt and sugar brine, and once ready to cook, rubbed it down with oil and fresh chopped herbs.  Much to everyone’s hope, the bird came out fantastic, and my father noted that even the white meat was rich in flavor.  However, while we had more than a dozen people for our Thanksgiving dinner, there were inevitable leftovers from the 18 lb turkey.  So, what to do with all of the extras?  Make crispy meat patties! Or as in the case of today’s recipe, crispy chicken patties.  Truly, you cannot go wrong regardless of what meat you choose to use, though I have not ever tried making these patties with leftover ham.  They key is to have you meat shredded and easy to mix with the pureed sweet potato.  To make the recipe even better, replace the avocado cream with leftover gravy or cranberry sauce for a delicious, post-Thanksgiving meal!

Crispy Meat Patties

Print Recipe

(Serves 2-4)
Ingredients

  • 2 1/2 cup shredded chicken (or) turkey
  • 3/4 cup pureed Japanese sweet potato (from 1 small sweet potato)
  • 1 1/2 tsp sea salt
  • 1 tbsp ground onion powder
  • 1/2 cup Pork Dust pork rinds

Process

  • Preheat oven to 425 degrees.
  • In a food processor, pulse shredded chicken until further broken up, then add previously pureed sweet potato, sea salt, and onion powder.
  • Spread pork rinds in a shallow dish, form the chicken mixture into 5 like size patties, and place in the pork rinds, covering on both sides by gently patting on like breading.
  • Place each chicken patty on a greased baking sheet and bake in for 10 minutes until warm through.
  • Remove from the oven and serve with sweet avocado cream, leftover gravy, or cranberry sauce!

Recipe Notes

To make the pureed sweet potato, peel and boil chunks of sweet potato until soft, then either puree in a food processor, or mash with a potato masher until smooth.
To make low-FODMAP, replace chopped onion powder with 2 tbsp of fresh chopped green onion or chive.

Colossians 3:16 “Let the message of Christ dwell among you richly as you teach and admonish one another with all wisdom through psalms, hymns, and songs from the Spirit, singing to God with gratitude in your hearts.”

Filed Under: AIP, autoimmune friendly, autoimmune paleo, egg free, gluten free, Protein Dishes Tagged With: chicken patties, egg free, grain free, Paleo, pork rinds, primal, sweet potaot

Food That Heals: Gingered-Apple Pear Sauce by Martine of Eat Heal Thrive (AIP/Paleo)

November 24, 2015

Untitled

A Note from Gabriella: I am excited to share with you all the 4th post for a series I am hosting on Beyond the Bite for the month of November called “Food That Heals.” In a nut shell, this series highlights individuals who are actively living out Hippocrate’s famous quote “let food be thy medicine, and medicine be thy food.” You can view other posts here.

unnamed-2

Martine Partridge is an eater of real, whole, nourishing food. She is also a combatter of Crohn’s Disease. Martine is an enthusiastic advocate for using food as medicine since food has become her strongest ally in living a full and happy life in spite of autoimmunity. When Martine isn’t ogling food photos or creating scrumptious grain-free, dairy-free, legume-free, and refined-free dishes to share with friends and family, she is practicing yoga, reading a novel, or hanging with family, friends and her sweet pup, Henry. She is forever grateful to her parents for their unconditional love and incredible support, especially through the darkest days of dealing with Crohn’s Disease. Martine also admires and applauds the strength and inspiration of her fellow autoimmune warriors who refuse to let disease define them and who continue to fight against the symptoms chronic illness. For more food and lifestyle ideas, follow Martine’s blog, eathealthrive.ca. Martine welcomes and looks forward to engaging with her readers on social media as well. Find her on Instagram @eat_heal_thrive, Twitter @Eat_Heal_Thrive, Pinterest Eat Heal Thrive, and Facebook Eat Heal Thrive.

About Martine

When Gabriella approached me about contributing to her blog for a series that focuses on food as medicine, I was happy and excited to participate! The food as medicine movement is close to my heart…and my colon. I’ve used food as medicine to some degree in the 20+ years I’ve been battling Crohn’s Disease. In fact, when the doctors were advising the complete removal of my large intestine, using food as medicine saved me from undergoing that life-altering surgery, and I’m happy to report that I live a full and happy life today with my digestive tract intact. At the time I, fortunately, had life insurance from an insurance company similar to Special Risk Managers (see here – https://www.specialriskmanagers.com.au/crohns-disease-life-insurance/) and my rather expensive medications and potential surgeries would have been covered. I attribute my wellbeing to a continued focus on food as the fulcrum for good health. This is not to say that I am cured. I still have days in which I struggle a bit, but they are few and far between. Eating whole, nourishing food gives me back the control. I no longer live in fear of Crohn’s and its horrid symptoms. Focusing on the consumption of nutrient density and anti-inflammatory foods allows me to carry on with life relatively unimpeded by what can be a viciously serious and chronic illness. So let’s chat more specifically about some of the food that has aided me in my healing journey.

About Fresh Ginger

Keeping inflammation at bay is the name of the game when gaining the upper hand on Crohn’s. As such, I’ve come to love ginger, not just for its flavourful zip, but also for its anti-inflammatory properties. Ginger is also known to protect and heal the gut, reducing digestive woes like bloating and cramps. And, fortunately, ginger is relatively easy to source in that it is available all year round. Here’s a great kitchen hack for you: ginger keeps in the freezer for six months if it’s tightly wrapped and unpeeled. I have several 1-inch knobs of ginger frozen and on-hand, ready to be microplaned.

About Soluble Fiber

My colon appreciates the soothing qualities of cooked soluble fiber (I’ve learned this from weathering the storm of Crohn’s). Soluble fiber absorbs water and becomes gel-like when moving through the digestive tract. This gelling quality is precisely what makes soluble fiber perfect for a digestive system that needs some extra TLC because soluble fiber can help the colon reach a balance, maintaining healthy bowel movements and guarding against either extreme of constipation or diarrhea. Two foods that are particularly high in soluble fiber are apples and pears, both of which I adore!

Putting the Pieces Together

So given my love of fresh ginger as well as my adoration for apples and pears, I’m sharing this Gingered Apple-Pear Sauce because it maximizes the yumminess of all three. This recipe is a healthy treat option and one that contains a good dose of that valuable, soothing soluble fiber.

unnamed

Gingered Apple-Pear Sauce

Print Recipe

Prep Time: 10 minutes
Cooking Time: 10 minutes
(Yields 2.5 cups)
Ingredients

  • 5 medium apples – peeled, cored, and sliced (about 5 cups)
  • 4 small pears – peeled, cored, and sliced (about 2 cups)
  • 1/3 cup apple juice (or water)
  • 2 tsp fresh ginger, minced
  • ½ tsp vanilla extract
  • ½ tsp ground cinnamon
  • 1 tbsp maple syrup or honey (optional)
  • 3-4 dried apricots, chopped fine (optional but a very nice addition)

Process

  • In a large skillet or Dutch oven, heat the apple and pear slices over medium heat. Pour in the apple juice (or water). Add the fresh ginger, vanilla, cinnamon, and optional maple syrup (or honey) and dried apricots. Bring to a simmer.
  • Reduce heat and allow to gently simmer for 15-20 minutes until all fruit is tender and slightly caramelized.
  • Remove from heat and mash by hand for a chunkier, more rustic sauce or use an immersion blender to purée to desired consistency.
  • Serve warm or cool. Store in the refrigerator for 3-5 days.

Filed Under: AIP, autoimmune disease, autoimmune friendly, coconut free, condiments, Condiments and Sauces, dairy free, Food and The Human Body, food that heals, fruit, Fruit sweetened, no bake, nut free, Sweets and Snacks

Savory Rutabaga Gravy (AIP/Paleo, Keto, Low-FODMAP)

November 20, 2015

IMG_9861

 Can you believe it?  Thanksgiving is less than a week away! It seems like just yesterday I was posting my AIP Thanksgiving Roundup while on my way out to TN for my families Thanksgiving.  Speaking of passing time, just as it heals pain and teaches us lessons,  it also changes our tastebuds.  Much like my parents informed me as a 5 year old when I said I didn’t like the texture of the vegetables on my plate, my tastebuds have definitely “grown up.” over time.  This process of changing my tastebuds has certainly been challenged throughout the 4+ years of battling chronic Lyme Disease and having to alter my diet dramatically in order to heal.  If I don’t like a food, I have learned how to remove that saying from my mindset, instead telling myself I will enjoy it, and therefore end up doing so.  This tactic may sound a bit odd, and some may even declare that it doesn’t work.  However, I can promise, as stated above, all it takes is time, and lots of it.  Truly, you can adapt your body (and tastebuds) to anything you set your mind too.  While organ meat is an example that is on the more extreme end of the spectrum, gravy just so happens to be another one of these foods.  Growing up, I never got the gist of smothering the roasted Thanksgiving turkey with gravy.  Gravy? What’s gravy?  It just never made sense, until the past year, when I had to transition to a high-fat, ketogenic diet as part of my PK Protocol.  All of the sudden, the thought of smothering my turkey in delicious, rich, and naturally fatty au jus became absolutely amazing, so much so that  I was actually dreaming of gravy in the middle of the summer.  After much deliberation,  I was able to put together a recipe low in FODMAPs, friendly to the reintroductions I have made with the Autoimmune Protocol, while also being lower in carbs than a standard gravy recipe. Whether you use previously made bone broth, or the juices straight from the pan of your roasted turkey, this recipe is wonderfully satisfying for any gravy cravings you may have.  What is even better is that all of the ingredients used are sourced from whole foods, meaning no mindlessly whisking flour.  Even my family and friends loved it, stating that I must make it for everyone around the Thanksgiving table. 

IMG_9858

Savory Rutabaga Gravy

Print Recipe

(Yields 1 1/2 cups)
Ingredients

  • 2 cups rutabaga chunks (10 oz)
  • 1 1/2 cup homemade bone broth
  • 1/4 cup Tinstar Foods brown butter ghee (or) coconut oil for AIP
  • 2 tsp dried rosemary
  • 1 1/2 tsp sea salt
  • 1 tsp dried thyme
  • 1/4 tsp ground sage

Process

  • Peel, chunk, and boil rutabaga until fork tender
  • Drain rutabaga and place in a food processor a long with the ghee.
  • Puree until smooth, then add in rosemary, sea salt, thyme, and sage.
  • Put the cover on and with the processor running, slowly pour in the bone broth until gravy consistency is reached.

Recipe Notes

If you are not low-FODMAP, add 1 tbsp garlic powder and 1 tsp onion powder.
If you are reheating the gravy, you may have to add 1/2 cup or more more bone broth to keep the gravy from thickening.
If the gravy is too thick for your liking, simply add more broth and ghee.
If you follow AIP, use coconut oil, as ghee is a stage one AIP reintroduction food.
For more information about ghee and AIP, please visit Phoenix Helix post, “To Ghee or Not to Ghee?”


1 Kings 8:28 “Yet give attention to your servant’s prayer and his plea for mercy, Lord my God. Hear the cry and the prayer that your servant is praying in your presence this day.”

Filed Under: AIP, autoimmune friendly, coconut free, condiments, Condiments and Sauces, dairy free, egg free, gluten free, grain free, ketogenic, low carb, nut free, vegetables, Vegetables and Sides

Food That Heals: Favorite Sardine Salad by Tara of Paleo Cajun Lady (AIP/Paleo)

November 17, 2015

Sardines

A Note from Gabriella: I am excited to share with you all the first post for a new series I am hosting on Beyond the Bite for the month of November called “Food That Heals.” In a nut shell, this series highlights individuals who are actively living out Hippocrate’s famous quote “let food be thy medicine, and medicine be thy food.” You can also view previous contributors, here.

photo-3_fotor

Tara Perillo is the founder and blogger behind Paleo Cajun Lady and the author of AIP Paleo Cajun Cookbook. She is a displaced Cajun from Louisiana, who now resides in Illinois with her hubby and little dog, Giddy. In 2013, Tara was diagnosed with Systemic Lupus Erythematosus (SLE) and Psoriasis. She had been diagnosed with Vitiligo, at a young age. As a certified herbalist and homeopath, she chose to heal herself with the nutritional and lifestyle changes outlined in Sarah Ballantyne’s The Paleo Approach. After almost two years following the autoimmune protocol (AIP), she is now in full remission, and has healed a majority of the damage done by Lupus. She is currently enjoying her new status as an AIP athlete. You can connect with Tara on Facebook, Twitter, Instagram, and Pinterest.

About Me

Before I get into why I consider sardines to be such a powerful food as medicine, let me tell you a bit about myself. In 2013, I was diagnosed with Systemic Lupus Erythematosus (SLE), with a secondary Psoriasis diagnosis. This was my second and third autoimmune disease diagnoses. I had been diagnosed with Vitiligo years before. Having been a certified herbalist and homeopath for many years, I knew I was not willing to follow conventional medicine’s approach to my healing. After much research, I came upon the paleo diet, and eventually the autoimmune protocol (AIP), as outlined in The Paleo Approach. Thankfully, sardines were allowed on the AIP. Happily, I can report that my lupus is now in full remission! I received the news only a couple of weeks before the two year anniversary of receiving my diagnosis. And, most of the damage caused by my psoriasis has completely healed.

Sardine 101

When Gabriella first asked me to contribute a post on the food that most contributed to my healing, I immediately thought of the tiny, but mighty sardine. These little guys pack so many nutrients in each morsel. Each tin of sardines is full of healing properties. Now, on to why I believe sardines are one of the healthiest foods you can eat. Of course, we know that sardines supply us with omega-3 fatty acids. But, in addition to EPA and DHA, they also are an excellent source of Vitamin D, B12, selenium, and protein. They are also a good source of calcium, Vitamin B3, iodine, copper, Vitamin B2, choline, and phosphorus. If you’re finding that you do have a calcium deficiency, along with sardines, you might want to introduce dicalcium phosphate into your diet. You’ll need calcium to keep your bones and teeth strong so it’s important your body gets the right amount. Consult with your doctor if you think you’re seriously lacking calcium. Some of these vitamins and nutrients can only be found in the fish itself, not in a fish oil supplement. Most fish oil supplements contain only EPA and DHA. There is also the problem with the body’s absorption of the omega-3 fatty acids, with supplementation. Studies have shown that our absorption of these nutrients is better when we consume the fish, rather than the supplement. This absorption can also be increased even further by eating sardines canned in olive oil. You might be interested to learn that you can also take olive oil in a supplement form on its own. For more information about using olive oil as part of your health supplement check out c60purplepower.com. Although it was recommended that I consume the sardines, and take an additional supplement, I chose to only eat the fish. I found it difficult to find affordable fish oil without additives. Tins of sardines are very inexpensive.

Benefits of the nutrients found in sardines:

Vitamin D – Increases the absorption of calcium, helps regulate cell activity, may help in the prevention of cancer

Vitamin B12 – Promotes cardiovascular health, supports bone health

Protein – Forms the basis of muscles and connective tissues, provides us with amino acids

Selenium – Neutralizes free radicals, protects organs from damage, protects against mercury toxicity

Sardines are extremely beneficial for those of us with autoimmune disease affecting the skin. Many of the nutrients in sardines help to rejuvenate the skin and decrease skin inflammation. I personally attribute eating sardines to the reduction and repair of my psoriatic scarring. Another symptom alleviated by consuming sardines was the prevention of blood clots. I had a pretty bad situation going on with bleeding, due to lupus complications. Because I have secondary antiphospholipid syndrome (APS), a blood clotting disorder characterized by excessive clotting of the blood in veins and arteries, I needed nutrients to help keep clots from forming. Sardines provided all the blood thinning I needed, in a naturally sourced way. There is no doubt in my mind that eating sardines has contributed to putting my autoimmune disease into remission. I am living proof that you can use food as medicine effectively. So, the next time you’re searching for an inexpensive, healthy treat, give those little fish a try. How something so small could supply you with so many benefits is amazing.

unnamed-4

My Favorite Sardine Salad

Print Recipe

Prep Time: 15 minutes
(Serves 1)
Ingredients

  • 1 tablespoon balsamic vinegar
  • 3 cups lettuce, shredded
  • 1/2 cup chopped cucumber
  • 1/4 cup chopped red onion
  • 1 avocado; peeled, pitted and cut into chunks
  • 10 olives, any variety
  • 1 can sardines, in olive oil
  • Salt, to taste

Process

  • Pour balsamic vinegar into bottom of large bowl.
  • Add lettuce, cucumber, red onion, avocado and olives to bowl.
  • Open can of sardines.
  • Pour entire contents of sardine can into bowl, over other ingredients.
  • Add salt, to taste.
  • Toss all ingredients together, plate, and serve.

Psalm 119:105 “Your word is a lamp for my feet, a light on my path.”

Filed Under: AIP, autoimmune disease, autoimmune friendly, chronic illness, coconut free, Food and The Human Body, food that heals, ketogenic, low carb, paleo, Protein Dishes, seafood

AIP Paleo Anti-Grain Flour Double Pumpkin Spice Cookies (Coconut Free)

November 13, 2015

DoublePumpkinSpice

I have three posts that I aim to share with you all before Thanksgiving officially rolls around.  The first are these pumpkin spice cookies that feature the one and only pumpkin flour from Anti-Grain Foods.  Yes, you heard me right, pumpkin flour. It is made from exactly what the name implies (i.e. pumpkin), is minimally processed, and drum dried precisely like the rest of Anti Grain’s fruit and vegetable flours.  For those of you on the elimination phase of the Autoimmune Protocol, the flour does contain some of the seeds for structural and texture reasons, so take precautions if you have not yet re-introduced seeds.  While I personally do not do well with nuts or seeds, I knew that my family would be happy candidates to evaluate and taste test the use of pumpkin flour.  Therefore, since we are neck deep in all things pumpkin spice, I decided to go ahead and make a recipe that literally combined pumpkin and spice, to make a festive cookie that everyone would enjoy.  Overall, I am thrilled with the results, as the combination of pumpkin puree and pumpkin flour gave the cookie a nice crusty outside with a light, chewy inside.  For mix-ins, I used dried currants, though if you are a fan of chocolate and pumpkin, using mini Enjoy Life chocolate chips or homemade carob chips, would be equally tasty.  Now, if you are wondering what the two other posts are that I am wanting to have up before Thanksgiving,  know that a new rendition on my famous AIP Spiced Pumpkin Pie and a low-FODMAP, keto friendly Thanksgiving gravy are coming your way! In the meantime, I urge you to bake off a batch of these cookies to enjoy with family and friends.

PumpkinCookings

Pumpkin Spice Cookies

Print Recipe

(Makes 1 1/2 dozen)
Cookie Ingredients

  • 1 cup pumpkin flour
  • 1/4 tsp sea salt
  • 1/2 tsp baking soda
  • 1 tbsp AIP pumpkin spice
  • 1/2 cup non-hydrogenated palm shortening
  • 1/4 cup granulated maple sugar
  • 1/4 cup maple syrup
  • 1/4 cup canned pureed pumpkin
  • 1 tsp vanilla
  • 1 tbsp Great Lakes gelatin
  • 1/2 cup raisins (or) currants

AIP Pumpkin Pie Spice 

  • 1 tbsp ground ginger
  • 2 tbsp ground cinnamon
  • 1 1/2 tsp clove

Process

  • In a standard mixer, beat together vanilla, shortening, maple syrup, canned pumpkin, and maple sugar.
  • In a separate mixing bowl, whisk together pumpkin pie spice, salt, baking soda, pumpkin flour, and gelatin.
  • With the mixer running on low, slowly spoon in the dry ingredients into the mixing bowl until all of the dry ingredients have been added.
  • Allow the mixer to beat until a cookie dough has formed, then add in raisins or currents, allowing it to beat until fully incorporated.
  • Form 1 inch balls, flatten with palm, place on a lined baking sheet, and cook at 350 degrees for 15 minutes until golden brown around the edges.
  • Allow the cookies to cool on their sheets for atleast 15 minutes, then transfer to a plate to serve.

Recipes Notes

If you do not have, or cannot eat pumpkin flour, simply substitute Anti-Grain sweet potato flour or butternut squash flour.


Colossians 1:9 “For this reason, since the day we heard about you, we have not stopped praying for you. We continually ask God to fill you with the knowledge of his will through all the wisdom and understanding that the Spirit gives”

Filed Under: AIP, autoimmune, autoimmune friendly, coconut free, cookies, egg free, grain free, nut free, paleo, pumpkin flour, Sweets and Snacks

Food That Heals: Apple Cider Vinegar Tonic by Grace of Gracefully Primal (AIP/Paleo)

November 10, 2015

Untitled

A Note from Gabriella:  Welcome everyone! I am excited to share with you all the second post for a a series I am hosting on Beyond the Bite for the month of November called “Food That Heals.”  In a nut shell, this series highlights individuals who are actively living out Hippocrate’s famous quote “let food be thy medicine, and medicine be thy food.” Be sure to check out previous posts here. 

awning3-crop

Hey, guys! I’m Grace and I blog about primal eating and mindful living at Gracefully Primal.  As I’m sure was the case for many of you, I lived with digestive and skin problems for many years and failed to find relief from conventional medicine treatments. It wasn’t until a naturopath taught me how to naturally support my body that I finally saw improvement.

My Experience

One of the greatest remedies she brought into my life was apple cider vinegar and I’ve since become a total ACV evangelist! I’m super excited to share a bit about this liquid gold on Gabriella’s beautiful blog today. (Thanks, Gabriella!)  There are LOTS of articles online touting the benefits of ACV. (A few good ones are here and here.) While I can’t personally speak to all of its purported benefits, I can tell you that ACV has brought health and vitality to my life in multiple ways.  Applied topically, ACV has toned my skin and healed stubborn and infected blemishes and cuts all over my body. In the kitchen, I use ACV to release the minerals from bones in my homemade bone broth. I even mix it with water to clean my countertops, sink, shower and toilet.  But most important of all are the effects it’s had on my digestion. Drinking ACV has significantly improved my sluggish digestive system and reduced my chronic bloating symptoms. How? Well, it’s a bit like our fermented friends kombucha and sauerkraut. The chemical process that forms vinegar is actually a form of fermentation known as acid fermentation.

ACV tonic 017

About Apple Cider Vinegar

But what make ACV different from plain old white vinegar? Well, the bacteria that catalyzes the fermentation process in ACV is a special kind of bacteria known as the “mother” – a cloudy substance similar to a kombucha SCOBY. The “mother” infuses ACV with probiotic bacteria that’s good for our guts, as opposed to generic old bacteria from the air. Yay!  There is a bit of fine print here though. Not every brand of ACV is created equal. In fact, there’s only one I’ve found on the mass market that’s truly legit: Bragg’s.  Bragg’s is made from organic apples and it’s unfiltered, meaning it contains enzymes from apple peels which are rich in antioxidants. It’s also 100% raw, unpasteurized, and recognized as a “live food.” It costs a dollar or two more than generic brands, but nothing else (apart from small-batch ACV you might find at your farmer’s market) can match its quality.  When I first started experimenting with it, I’d drink a teaspoon of ACV diluted in 8 oz. of water before meals. I’m sure you can imagine, it was a bit intense going down the shoot. Ever since then, I’ve been on a mission to find delicious ways of incorporating it into my diet and my Ginger Berry Tonic is pretty legit (if I do say so myself)! It looks and feels like a fancy virgin cocktail, and when enjoyed before meals, primes your stomach by supporting your natural digestive enzymes.

ACV tonic 020

Ginger Berry Tonic

Print Recipe

Ingredients

  • 1 tbsp Bragg’s apple cider vinegar
  • 12 oz water
  • Handful frozen berries
  • Juice of ½ lemon
  • 2-3 quarter-sized medallions of fresh ginger
  • ¼ tsp honey (optional)

Instructions Served cold

  • Combine all ingredients in a sealed container (I use a screw-top Mason jar) and place in refrigerator overnight.
  • Shake/mix well and serve cold.

Instructions Served hot

  • Combine all ingredients in a small saucepan and bring to a simmer on the stove.
  • Stir until honey dissolves, if using.
  • Pour into a big, cozy mug and sip happily.
  • Now sit back, sip and enjoy that happy stomach feeling.

Recipe Notes 

This recipe is great for experimentation! Try it with different frozen fruits, citrus juices or even herb infusions. Post a photo of your concoction on Instagram and tag me in it (@gracefullyprimal)!


Psalm 18:6 “In my distress I called to the Lord; I cried to my God for help.  From his temple he heard my voice; my cry came before him, into his ears.”

Filed Under: AIP, autoimmune friendly, chronic illness, drinks, Food and The Human Body, food that heals, fruit, Sweets and Snacks

Fresh Chive and Bacon Fat Roasted Black Radishes (AIP/Paleo, Keto)

November 7, 2015

IMG_9847

Another roasted vegetable recipe? Why yes! Every week in the month of November, I will be featuring a new “Food That Heals” post, while also sharing a recipe of my own.  As for today’s, in the past couple of months, my family and I got slammed with bundles and bundles of black radishes from our local CSA.  While we thoroughly enjoy them shredded or chopped in salads, I wanted to come up with a different way to enjoy the tasty root vegetable.  Apparently, radishes are one of the easiest vegetable to grow, as they flourish in most all types of climates.  This would make sense of why they are so abundant here in New England.  There are a wide variety of radishes that you may see in stores, including the Easter egg radish, daikon radish, early scarlet globe, and many others.  Yet don’t be too confused, as the taste of a quite similar across the entire spectrum of options.  Much like turnips, I find that individuals either love or hate radishes.  Unlike their winter counterparts of squash and sweet potatoes,  radishes are not sweet, nor are they anywhere near full of the same carb content.  Therefore, I find one must have the right mindset and tastebuds when eating radishes.  You cannot expect a sweet roasted vegetable, as the slight bite will completely turn you off from the idea of ever eating a radish again.  Yet if you can appreciate them for what they are, you are sure to enjoy radishes.  While my tastebuds are quite accustomed to eating no form of sugar, my family is not quite to this extreme.  Therefore, I chose to roast the radishes until crispy and brown around the edges.  This is our favorite way to enjoy vegetables, as the slight char makes anything taste better.  By coating them in bacon fat before cooking, the radishes obtain a slightly smokey taste, which add to their depth of flavor, making them even more appetizing.  I would also suggest that they would be fantastic roasted in Tinstar Food’s ghee.  Overall, this recipe is perfect for those who have to limit their carb intake, yet love enjoying roasted vegetables.

IMG_9848

Fresh Chive and Bacon Fat Roasted Black Radishes

Print Recipe

(Serves 2-4)
Ingredients

  • 1 lb black radishes
  • 1/4 cup bacon fat
  • 1/2 tsp sea salt
  • 1/4 cup chopped chives (packed)

Process

  • Preheat oven to 425 degrees.
  • Rinse, dry, and cut radishes into 1/8ths to get like-size chunks, placing them in a roasting dish.
  • In a small sauce pan, melt the bacon fat, and once melted, stir in chopped chives and sea salt.
  • Pour the bacon fat mixture over the prepared radishes and mix together until they are evenly coated.
  • Place the roasting dish in the oven and allow the radishes to roast until tender and crispy around the edges, 35-45 minutes.


1 Timothy 2:1-2 “I urge, then, first of all, that petitions, prayers, intercession and thanksgiving be made for all people— for kings and all those in authority, that we may live peaceful and quiet lives in all godliness and holiness”

Filed Under: AIP, autoimmune friendly, coconut free, dairy free, egg free, grain free, ketogenic, low carb, nut free, paleo, vegetables, Vegetables and Sides

Food That Heals: Burdock Root With Toasted Coconut Sauce by Kat of Hope Heal Cook (AIP/Paleo)

November 3, 2015

Burdock

A Note from Gabriella:  Welcome everyone! I am excited to share with you all the first post for a new series I am hosting on Beyond the Bite for the month of November called “Food That Heals.”  In a nut shell, this series highlights individuals who are actively living out Hippocrate’s famous quote “let food be thy medicine, and medicine be thy food.”  

unnamed

Hello everyone, I’m Kat, the blogger behind HopeHealCook.com. I’m actively healing from Chronic Autoimmune Lyme Disease using holistic medicine, diet, and lifestyle. I’ve always loved cooking and have been interested in the connection between diet and health since I was a teenager. Two years ago, after trying all different diets and food philosophies, I finally found a way of eating that best suits my beloved body and continues to produce
healing results.  My current diet is based on the ketogenic diet outlined in the P.K. Protocol
for Lyme, Dr. Sarah Ballantyne’s Autoimmune Protocol, and the results of my food intolerance testing. I’ve found that eating this way has greatly reduced my inflammation, improved my energy and sleep, and decreased feelings of agitation, depression, and anxiety. Overall my diet, which I’ve tailored specifically for my body and it’s unique healing, has radically improved my quality of life.  The main focus of my diet is nutrient density. That means I prioritize foods that have the most nutritional bang for their buck. I believe that all whole foods contain healing properties, but some have greater medicinal benefit than others. One food that has been highly regarded in Asian cultures for it’s power to stimulate healing is burdock root.

unnamed-1

About Burdock

Burdock root has been used in traditional medicines as a blood purifier, a diuretic and to soothe conditions affecting the skin and joints. In combination with other herbs, traditional Chinese healers use burdock root as a remedy for colds and throat infections. Because it assists with detoxification, it’s also used for disorders of the liver, gallbladder, and kidneys. Burdock root also contains phytonutrients called polyacetylenes which are known to be effective antibacterials and antifungals, making it a beneficial medicinal food for those of us battling infections.  In Asia burdock root is eaten as a vegetable. It has a slightly sweet earthy flavor and is a good source of Vitamin B6, Magnesium, Phosphorus, Potassium and Manganese. Burdock root also contains inulin, a prebiotic that supports healthy intestinal bio-flora. This starchy root vegetable has twice the carbohydrates of carrots, and based on my experience it is not a low-FODMAP food. However its nutritional and medicinal benefits make burdock root worth incorporating into my low carb diet. Many health food stores now carry burdock root in the produce section, and I’ve found it at the farmer’s market too. When selecting burdock look for firm roots and avoid ones that seem shriveled or excessively limp.

Cooking With Burdock

The following recipe is one of my favorite ways to prepare burdock root. Tender cooked slices are dressed in a nutty coconut sauce that highlights the root’s natural sweetness. In Japanese cuisine burdock is often paired with creamy sauces made from toasted sesame seeds or miso. Using toasted Coconut Manna imparts a similar flavor and texture for a dish that’s reminiscent of traditional favorites and yet excitingly new. Serve Burdock Root with Toasted Coconut Sauce as a vegetable side or as a tasty snack. Because it’s good both hot and cold it also makes a great addition to packed lunches.

unnamed-2

Burdock Root With Toasted Coconut Sauce

Print Recipe

(Serves 2)
Ingredients

  • 1/2 lb of fresh burdock root
  • 1 tbsp coconut oil
  • 1 tbsp coconut manna
  • 1 tbsp Coconut Aminos
  • 1-2 pinches of sea salt

Process

  • Scrub the burdock root with a vegetable brush under running water to remove any dirt or small root fibers. Alternatively you can use a vegetable peeler and peel the root, but after a good scrubbing I find it’s not necessary.
  • Cut the root into 3 inch pieces, and then slice each piece lengthwise into “sticks” of relatively equal size like you’d do if preparing carrot sticks. Burdock root oxidizes quickly when exposed to air so to prevent it from browning you can soak it water with a couple teaspoons of vinegar.
  • Bring a pot of water to a boil on the stove over hight heat.
  • Lower the heat to medium high and add the sliced burdock.
  • Simmer the burdock for 10 minutes then drain well.
  •  Heat a pan over medium high heat and add the coconut oil and coconut manna. Use a spoon or whisk to mix the two together until blended while cooking for 2-3 minutes or until the coconut manna turn a golden color and develops a nutty aroma.
  • As soon as the coconut manna begins to color, turn off the heat.
  • Add the burdock root slices, Coconut Aminos, and a pinch of salt to the pan. Stir to coat the burdock with the sauce, adding another pinch of salt if you fancy.
  • Serve while warm and fragrant, give thanks for this healing food, and enjoy!

Recipe Notes

Coconut Manna is also known as coconut butter and is made from the whole flesh of the coconut.

Resources

Burdock Root. (2014). Nutrition facts. Retrieved from http://nutritiondata.self.com/facts/vegetables-and-vegetable-products/2823/2

Natural Herbs Guide. (2010). Burdock root uses, benefits, and side effects. Retrieved from http://naturalherbsguide.com/burdock.html

Psalm 37:4 “Take delight in the Lord, and he will give you the desires of your heart.”

Filed Under: AIP, autoimmune disease, autoimmune friendly, beyond the bite community, chronic illness, chronic lyme, chronic lyme disease, Food and The Human Body, food that heals, Sweets and Snacks Tagged With: food that heals

A Family Review of Paleo Treats + “Tigernut Joy” Cookie Dough Bites (AIP/Paleo)

October 30, 2015

PaleoTreats

Today’s post is a double whammy. With Halloween being tomorrow, I figured it would be the perfect time to publish my review of Paleo Treats AND share with a killer treat recipe that I have been teasing my Instagram followers with for some time now. To be honest, I should probably stop doing this, as I’ll probably end up losing some followers if I do it for much longer. And that definitely won’t be good. I’ve heard that some people decide to use this free instagram followers app to help them gain more followers on their account. I think it’s a great idea, especially if you have a lot of posts that you want people to see, as well as regaining more followers in case you lose any. I would love for more Instagram users to see my recipes and posts!

My friend did recommend me to check out this blog where Earthweb have reviewed Follow Fox. That might be something I should check out soon. Unfortunately, I can’t now as I’ve been far too busy making some delicious treats. First off, the lowdown on Paleo Treats. I call this as “family review,” because I used my aunt, uncle, cousin, and parents to taste test the paleo desserts by Paleo Treats for me. While my parents eat Paleo on a regular basis, my extended family does not, thus putting these products to the ultimate test. (Disclaimer: the views shared in this review are honest opinions, not payed or endorsed by Paleo Treats).

Background Info

What I love more than the products of the various Paleo certified companies out there, is that they start from humble beginnings of are either family or friends. They are always real people, with real stories, and a huge heart for their company, and Paleo Treats is no exception. The company originally began back 6 years ago, in 2009, with three good friends; Dave, Lee, and Nik. It is a company based out of San Diego California, where their treats are made in a local facility, mixed, packaged, and labeled all by hand (the best way – in my opinion). They also strive to use organic ingredients whenever possible. Overall, Paleo Treats prizes themselves for “[focusing] on excellence,” and truly, it does show. Whether you live in the U.S., or half way across the world, Paleo Treats sends their desserts all over, from Australia to Afghanistan. Each dessert is made with the average of five different ingredients, usually some type of nut and seed, coconut or coconut oil, dried fruit, cocoa butter or powder, and honey.

The Test

There are dozens of certified Paleo treats out there, and like yourself, I am always a bit skeptical of those that claim they are the “best available.” My family rarely purchases the from the store, as, after all, they have me to make them anything and everything their hearts could ever desire. Yet there comes a time that I am sure all of you can relate to, and that is the day when you simply want the luxury of having a Paleo compliant treat already made for you. No turning on the oven, no kitchen mess, and no waiting for the dessert to cool until digging in. Is this too much to ask? Well, the folks at Paleo Treats would have to say no, it certainly is not! Therefore, with a house full of both direct and extended family members, I knew I had the perfect opportunity to truly test the paleo desserts by Paleo Treats.

Paleo Desserts

The treats are certified Paleo, gluten free, and all lightly sweetened with honey. They are made with minimal, whole-food ingredients, and as mentioned previously, strive to be organic and local when possible. Paleo Treats sent me five different treats of theirs to try, all of which I have pictured above. After placing the desserts in the freezer to chill (it is instructed that the treats are best served cold), I cut each one of them into 6th for the family to try. The first to go was the “Cocoa Now!” cookie, which got rave reviews from the start. Everyone loved the combination of sweet and tangy flavor from the raisins and goji berries that was mixed with the crunch of almonds and pistashios. Overall, the mix of salty and sweet was just right, as no flavor overpowered the other, rather highlighted each other just right to make the perfect, chocolate-y treat. From my observance the Cocoa Now is the equivalent of your favorite trail mix formed into a handy snack or dessert. Next up was the “Brownie Bomb.” My mother, the lover of all things brownies, thought these were literally “the bomb,” while my father, who isn’t necessarily a huge fan of brownies, happily scarfed his down with a look of satisfaction. While my parents were the ones who gave me the longest descriptions of why they liked the paleo desserts, I must make note that my cousin, aunt, and uncle, were nodding in agreement the entire time. I also think my uncle may have said “these are really good” about a dozen times. The “Mac Attack” is just what the name implies, as it is a fun twist on the typical macaroon. Aside from the Bandito, the Mac Attack is the lowest in sugar out of all of Paleo Treats products. Yet who are we kidding…Who is looking at the grams of sugar when indulging in a treat handmade with quality ingredients and a whole bunch of love? Um, no one. That being said, no matter how healthy you think your diet or snacks are, we should all be doing more to reduce our sugar intake. Eating too many sugary treats can lead to oral health issues such as cavities, gum disease and even tooth decay so therefore it is vital that you take steps to eat less sugar. We should all aim to see a Cosmetic dentist in Hampton or a dentist closer to home once every six months too if we want to look after our teeth. Overall, if you love coconut, you will absolutely love this treat. On the other hand, those that were not huge fans of coconut still found it enjoyable. While the main flavor is coconut, this fancy macaroon has a hint of chocolate that adds to the overall depth of flavor. Next, the Mustang Bar was put to the test. As stated on Paleo Treat’s website, this treat is “a cross between paleo granola and a sweet snack bar,” that has a “a whisper of vanilla” paired with “creamy buttery nutty opulence.” I would try and summarize what my family loved about this bar, however, the description by Paleo Treats is so exact that it would simply be verbatim. That being said, my family especially loved that the cookie was held together by almond butter, which created a creamy texture that offset the nutty chew of the walnuts, almonds, pumpkin seeds, and coconut. To my mother, it felt “healthier” than the other paleo desserts by Paleo Treats, yet with the same amount of decadence. Lastly, everyone tried the Bandito. Though it appears to be a typical nut butter cup, the use of roasted almonds makes for an extra special taste. The chocolate top is nice and soft, so you don’t have to worry about breaking your front teeth on a frozen cookie. My mother especially liked the hint of salt, as this highlighted the chocolate quite well.

Nosh

Overall, my family was seriously thrilled with the paleo desserts by Paleo Treats. Personally, they brought back memories of eating frozen cookie dough at youth group, only this time it’s 10 x better because they’re Paleo. Each treat is in a perfectly portioned circle that can either be cut into individual servings, or thrown into your purse or backpack for later down the road. Because they are best served frozen, I couldn’t help but realize that they would be great treats to stash in my families ski jackets when we visit our family in Colorado. It has always been a tradition to keep our pockets full of “goodies,” and the desserts by Paleo Treats couldn’t fit the occasion better. While you may take one glance at Paleo Treats and write them off due to the price, I must say, you get what you pay for. Obviously, paleo desserts aren’t something those living a Primal lifestyle consume all the time, rather, should be just what the name implies (a “treat”). With all that behind us, Paleo Treats is certainly a company worth supporting. Pure, Paleo ingredients hand mixed, baked, and carefully shipped in boxes with hilarious wrapping tape straight to your doorstep, folks, I am not sure it gets much better than that!

IMG_9729_2

Tigernut joy? What does that mean? Well, the flavors in today’s cookies resemble that of an “Almond Joy,” however, instead of using almonds as the name implies, I chose to use tigernuts. While whole tigernuts would be a great addition to this no-bake treate, I am currently out of them, and am trying to save money and not buy any extra ingredients until I have used up all that I currently have. As notes, you can use chocolate chips or homemade carob chips, a recipe from Flame to Fork. I have seen many individuals make my Tigernut Flour Chocolate Chip Cookies using these same carob chips, and the results turn out fantastic. However, because my family is biased towards chocolate and doesn’t have any reason not to eat it, I chose to use mini Enjoy Life chocolate chips for mine. In reality, the choice is up to you, but either way, you will get a quick, easy, no-bake cookie dough bites. I also incorporated Vital Protein’s collagen peptides. This product is truly revolutionary for both those looking for a clean protein powder, as well as those seeking an extra gut-healing boost in their diet. You can literally dissolve the powder into anything, or, as I have done in today’s recipe, add it to a sweet treat to make it more satisfying. All in all, this recipe can be whipped together in a matter of minutes. Truly, the hardest part is waiting for them to set up in the freezer, but I promise you, it is worth it.

CookieDoughBites

Tigernut Joy No-Bake Cookie Dough Bites

Print Recipe

(Makes 1 dozen)
Ingredients

  • 1/2 cup Organic Gemini Tigernut flour
  • 1/2 cup Vital Protein Collagen Peptides
  • 2/3 cup shredded coconut
  • 1/4 cup coconut oil
  • 1/4 cup maple syrup
  • 1/4 tsp sea salt
  • 2-4 tbsp chocolate (or) carob chips
  • 1 tsp vanilla extract

Process

  • In a medium sized mixing bowl, sift together tigernut flour, collagen powder, shredded coconut, and sea salt.
  • In a separate bowl, whisk together vanilla, maple syrup, and coconut oil, then pour it over the dry ingredients, mixing with a spatula until just combined, then fold in the chocolate chips.
  • Use your hands (or) a cookie scoop to form 12 like-size cookie dough bites, placing each one on a parchment lined plate.
  • Once through with making all 12 bites, place the plate in the freezer and allow to chill for atleast 30-40 minutes until the coconut oil has solidified.
  • Store the treats in the freezer or fridge and remove when ready to eat.

Recipe Notes

If you can have nuts, Honeyville almond flour will work great in place of the tigernut flour.
Raisins, currants, or homemade carob chips make great AIP substitutions for chocolate chips.

Psalm 91:14 “Because he has set his love upon Me, therefore I will deliver him;
I will set him on high, because he has known My name.”

Filed Under: AIP, AIP & Paleo Reviews, autoimmune friendly, cookies, dairy free, Dessert, no bake, paleo, Sweets and Snacks

Maple Sugar Brined Chicken (AIP/Paleo, Low-FODMAP)

October 27, 2015

IMG_9804

I absolutely love brining meat.  Whether it be a slow bring, such as with my dry rubbed steak recipe, or  a simple, 30 minutes dry brine, the end result is always a juicy, tender cut of meat.  Brining takes meat to a whole new level, whether it be a prized cut of steak, or an otherwise chewy pork chop, you cannot go wrong with brining.  While it may be a bit foreign to you at first, once you get the basic rules and ratios down, brining is a breeze.  So, where do you start?  Well, thanks to various articles online that have served as education for me on the topic of brining, I am going to summarize them for you in today’s post.  The most basic form of bringing is a sea salt and sugar brine, as adding other flavoring agents requires a method called “boil brining,” which adds a few more steps, so we won’t be expanding upon that.  For every 4 cups of water that you use in the brine, you will add 1/4 cup of sea salt and 1/8th cup of sugar (in this case, I am using granulated maple sugar).  Ultimately, you want enough water in the brine to cover the entire chicken (or other cut of meat) when submerged.  So, while brining a ginormous turkey at thanksgiving may seem like it contains tons of sugar, you do not have to worry because you are not actually consuming it.  Instead, the salt and sugar simply serve as tools that allows the meat to absorb moisture that otherwise is not present, while also breaking down the structure in the protein molecules, resulting in tender meat.  The sugar also makes a super crisp skin, especially if you take the extra effort to remove the chicken from the brine one hour prior to cooking and allowing it to air dry in the fridge before roasting.   As far as cooking goes, my mother always uses the rule of thumb to cook your roaster 20 minutes per pound at 325 degrees.

Remember, the recipe below is based off of the weight of my chicken an how much water I needed to cover the chicken in the given stock pot that I was using.  If your chicken or stock pot is bigger or smaller, simply adjust the recipe with the pointers noted below. 

  • Use 1/8th cup of maple sugar for every 4 cups of water in your brine.
  • Use 1/4th cup of sea salt for every 4 cups of water in your brine.
  • Boil 1-2 cups of the brining water to make the dissolving easier without changing the overall cool temperature of the brine. 
  • Allow your chicken to brine at least 1 hour per lb, but never over 12 hours. 
  • Roast our chicken for 20 minutes per pound, in an oven set to 325 degrees. 

IMG_9797-1500x1199

Maple Sugar Brined Chicken

Print Recipe

(Serves 4-6)
Ingredients

  • 4 lb roaster chicken
  • 12 cups of cold water
  • 3/4 cup sea salt
  • 1/2 cup maple sugar

Process

  • In a large stock pot, dissolve salt and maple sugar in the water *If you heat the water to dissolve the ingredients, allow it to cool before submerging the chicken.
  • Once dissolved, submerge the chicken into the brine . *If the chicken floats to the top, place something heavy on it to keep it fully covered with water.
  • Place the stock pot in a fridge, or wherever the temperature is kept cool.
  • Allow the chicken to brine at least 3-4 hours.
  • An hour before cooking, remove the chicken from the brine, rinse it in cool water, pat it dry with paper towels, and allow it to air dry in the fridge for a hour.
  • Preheat oven to 325.
  • Place roasted chicken on a wired baking sheet lined with foil.
  • Once preheated, allow the chicken to bake 1 hour and 20 minutes.
  • Remove the chicken from the oven and allow to cool 5-10 minutes until carving and serving.

Recipe Notes

Of course, if you do not have tons of maple sugar on hand, simply use regular cane sugar or brown sugar.
Adjust the cooking time according to how many lbs your chicken is (20 minute per extra lb).


Hebrews 4:12 “For the word of God is alive and active. Sharper than any double-edged sword, it penetrates even to dividing soul and spirit, joints and marrow; it judges the thoughts and attitudes of the heart.”

Filed Under: AIP, autoimmune friendly, chicken, ketogenic, low carb, meat, paleo, Protein Dishes

« Previous Page
Next Page »

Primary Sidebar

Recent Posts

My Guide to Practical Animal-based Eating

Paleo Banana Collagen Bars with Coconut Flour (Nut-free)

Paleo AIP Cinnamon Raisin Collagen Bars (Fruit-sweetened, Coconut-free)

Coconut Flour Molasses Spice Cookie Bites (AIP-friendly, Nut-free)

Crustless Keto Cheesecake (Carnivore-friendly)

Paleo Fruit Sweetened Harvest Bread (Gluten-free)

Copyright © 2025 · LBD Pro V on Genesis Framework · WordPress · Log in